Functional Test Procedures
F1. Web User Interface (UI) Accessibility
-
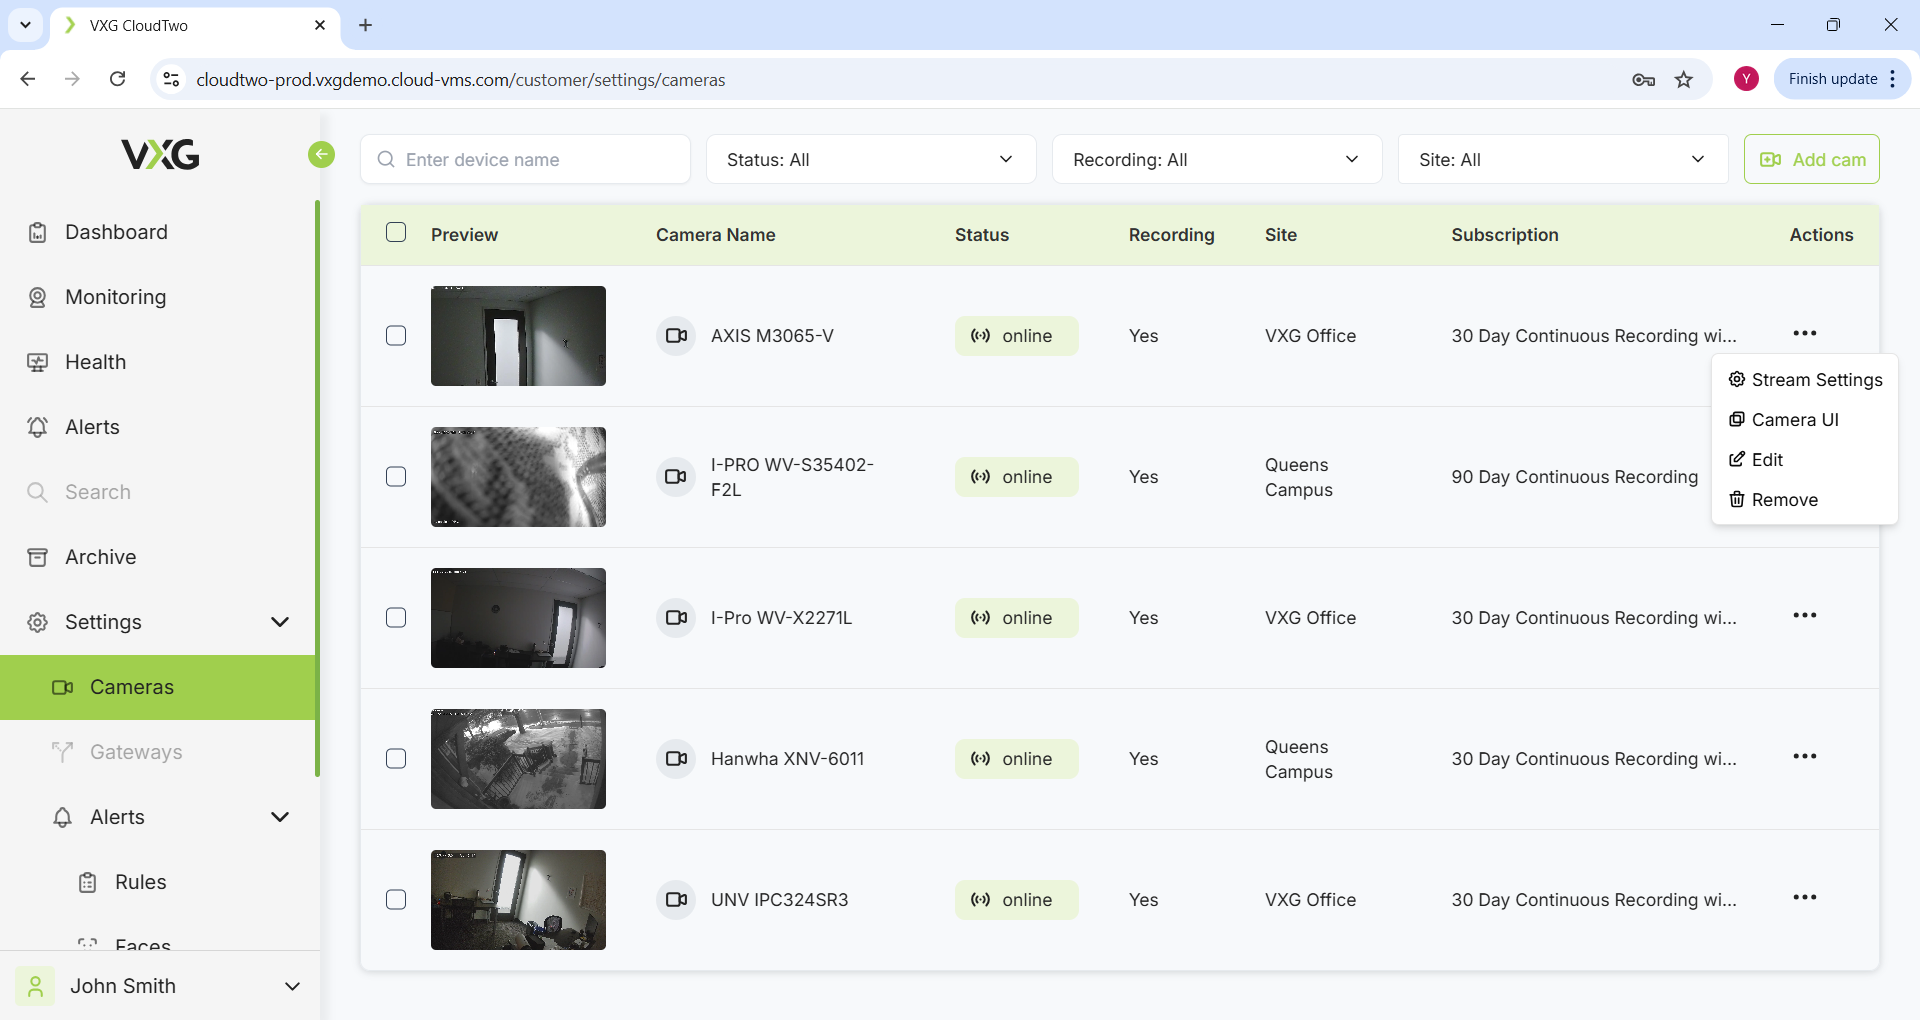
Navigate to Settings → Cameras, select the desired camera, and access the Camera UI.
-
Verify that the camera’s Web UI is accessible and responsive.
F2. Stream Configuration Validation
-
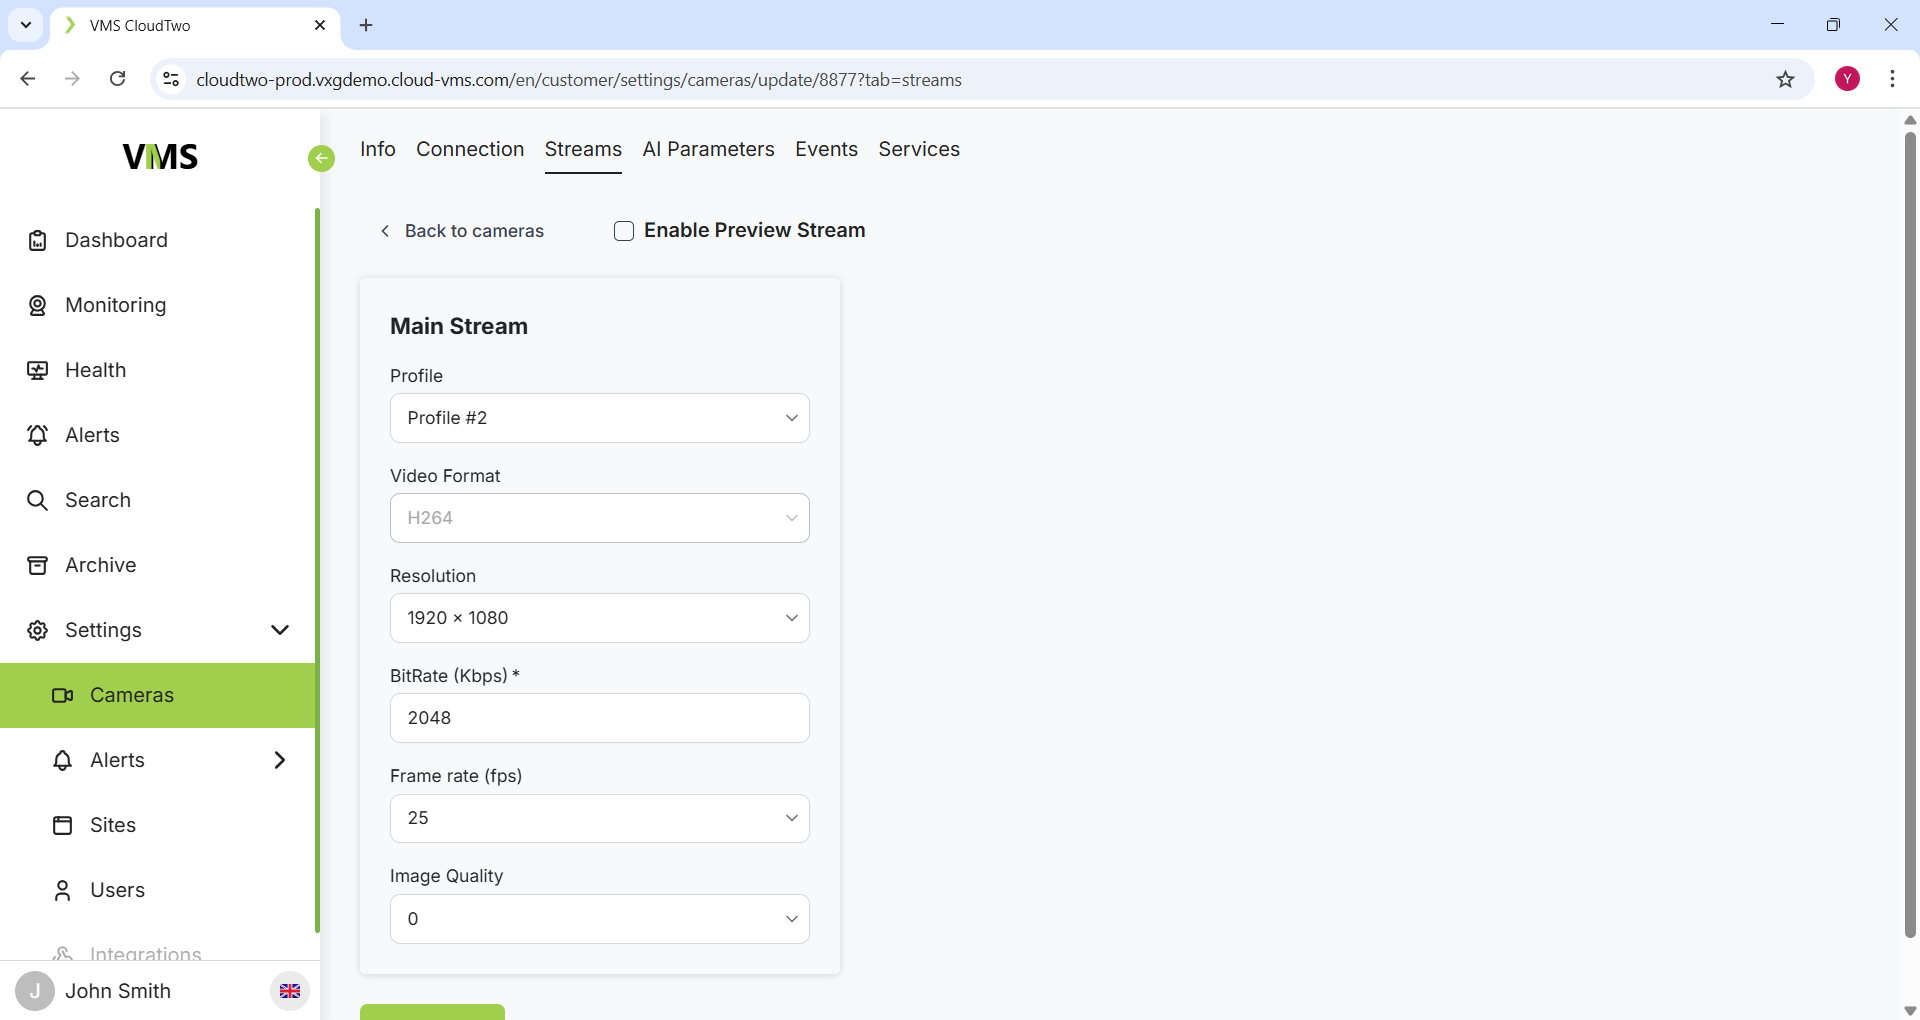
In Settings → Cameras, select the target camera and open the Streams section.
-
Modify the stream profile and/or adjust stream parameters as required.
-
Confirm via the camera Web UI that the updated stream parameters have been correctly applied.
F3. PTZ (Pan-Tilt-Zoom) Control Verification (if supported)
-
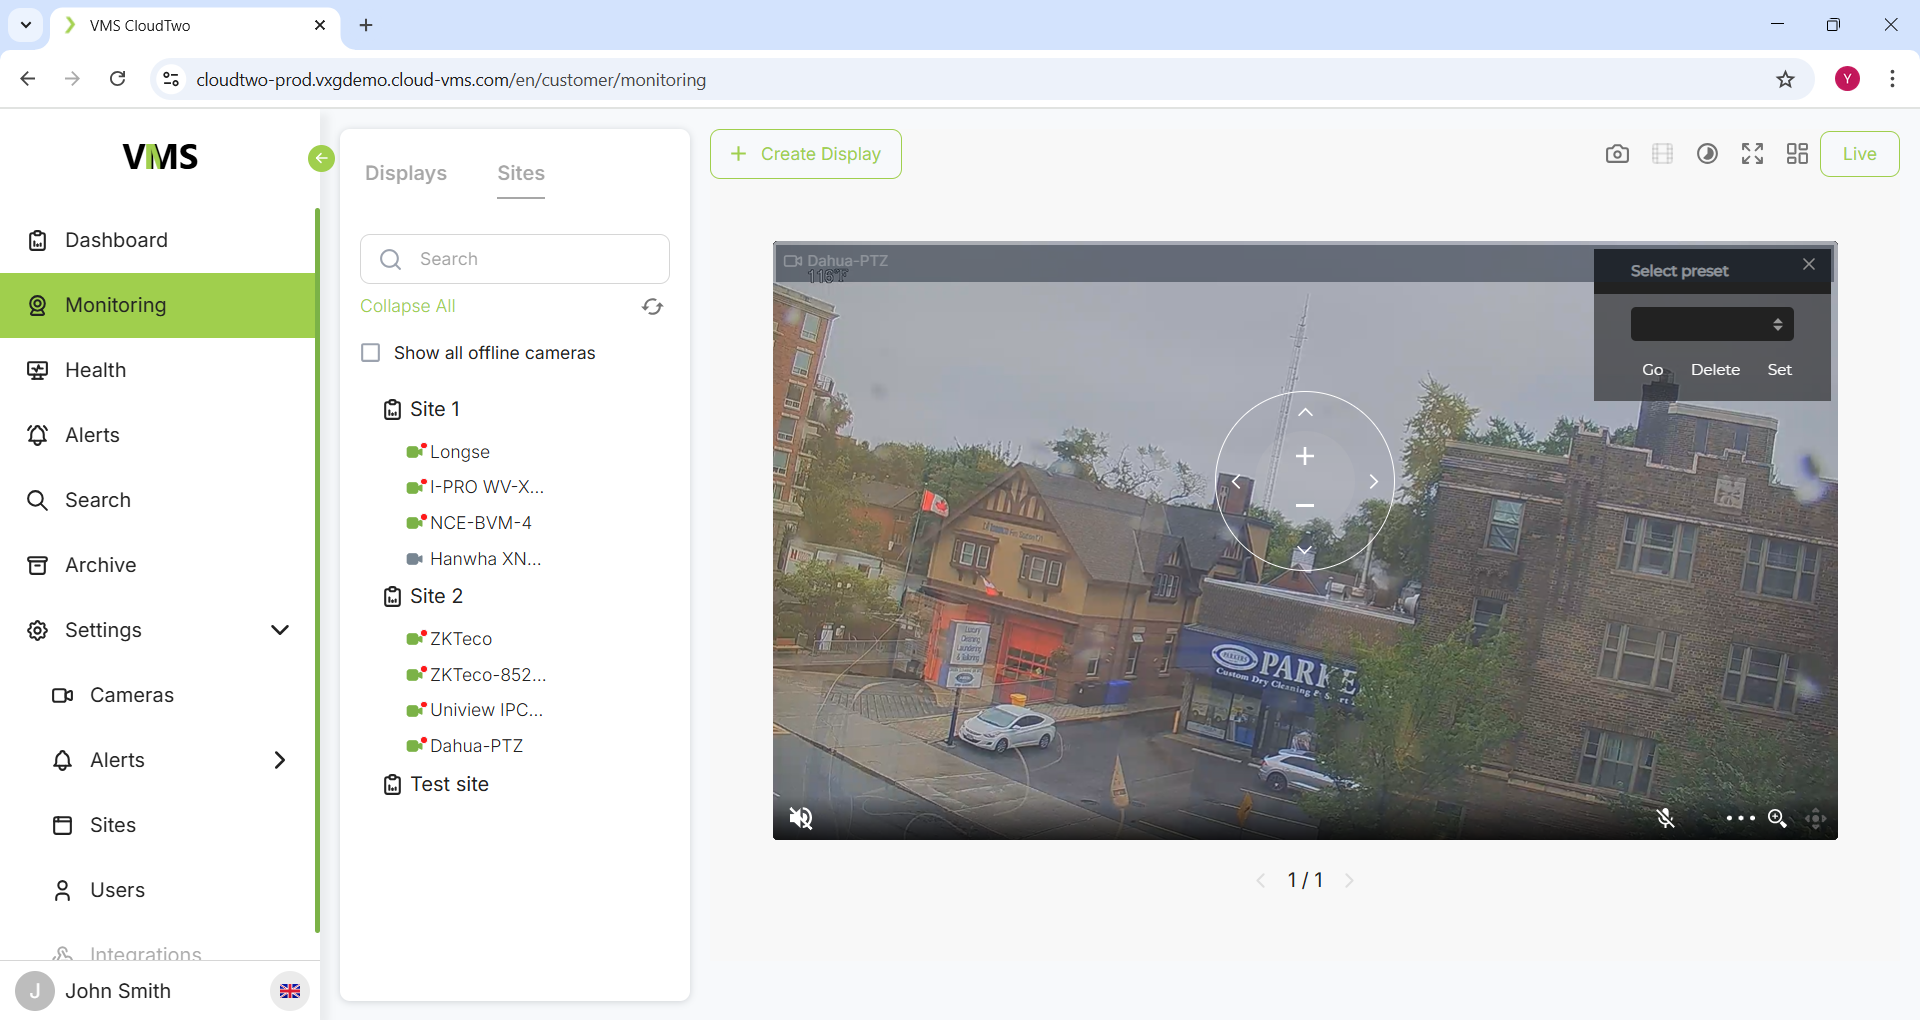
Ensure the “PTZ” icon is enabled in single camera Live View mode.
-
Switch to WebRTC (low latency) mode.
-
Operate PTZ controls and verify correct functionality.
F4. Two-Way Audio (Backward Audio) Functionality (if supported)
-
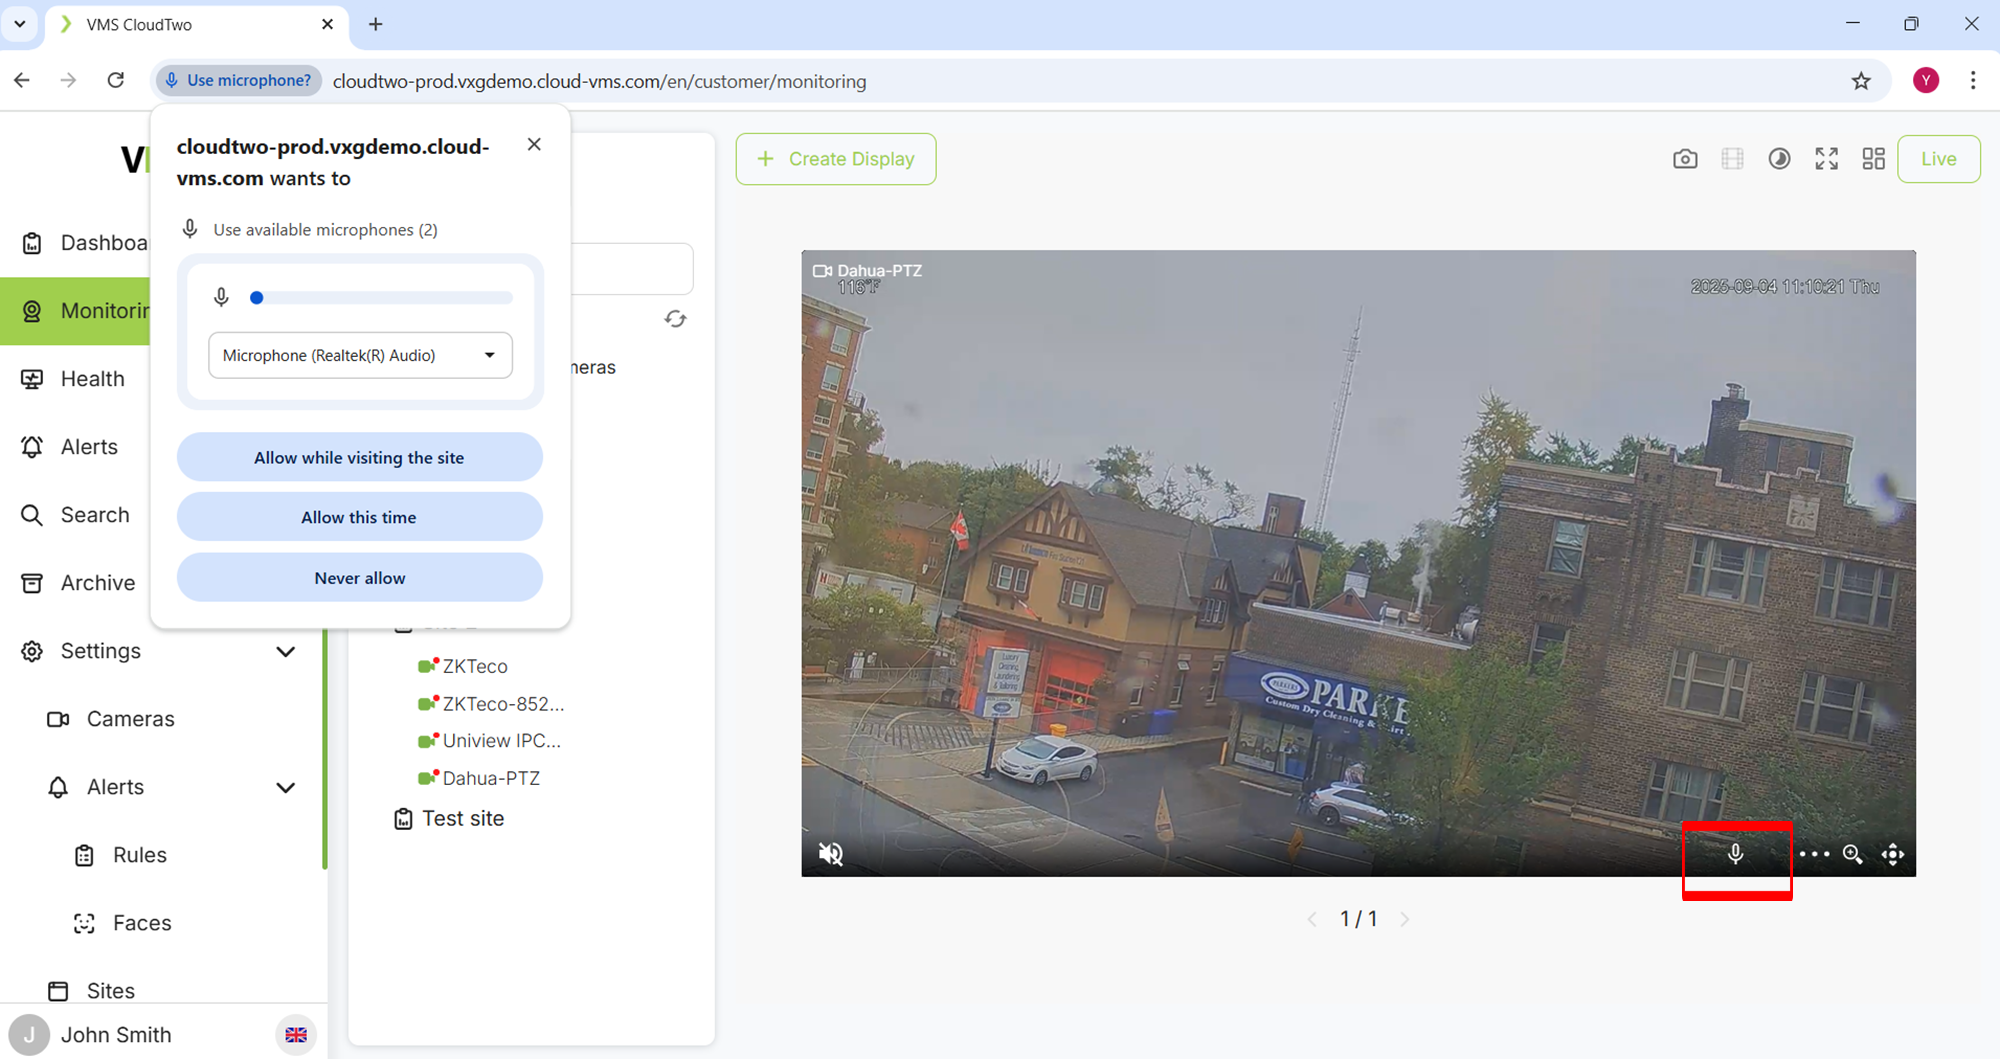
Confirm the “microphone” icon is enabled in single camera Live View mode.
-
Switch to WebRTC (low latency) mode.
-
Test backward audio transmission and verify operational integrity.
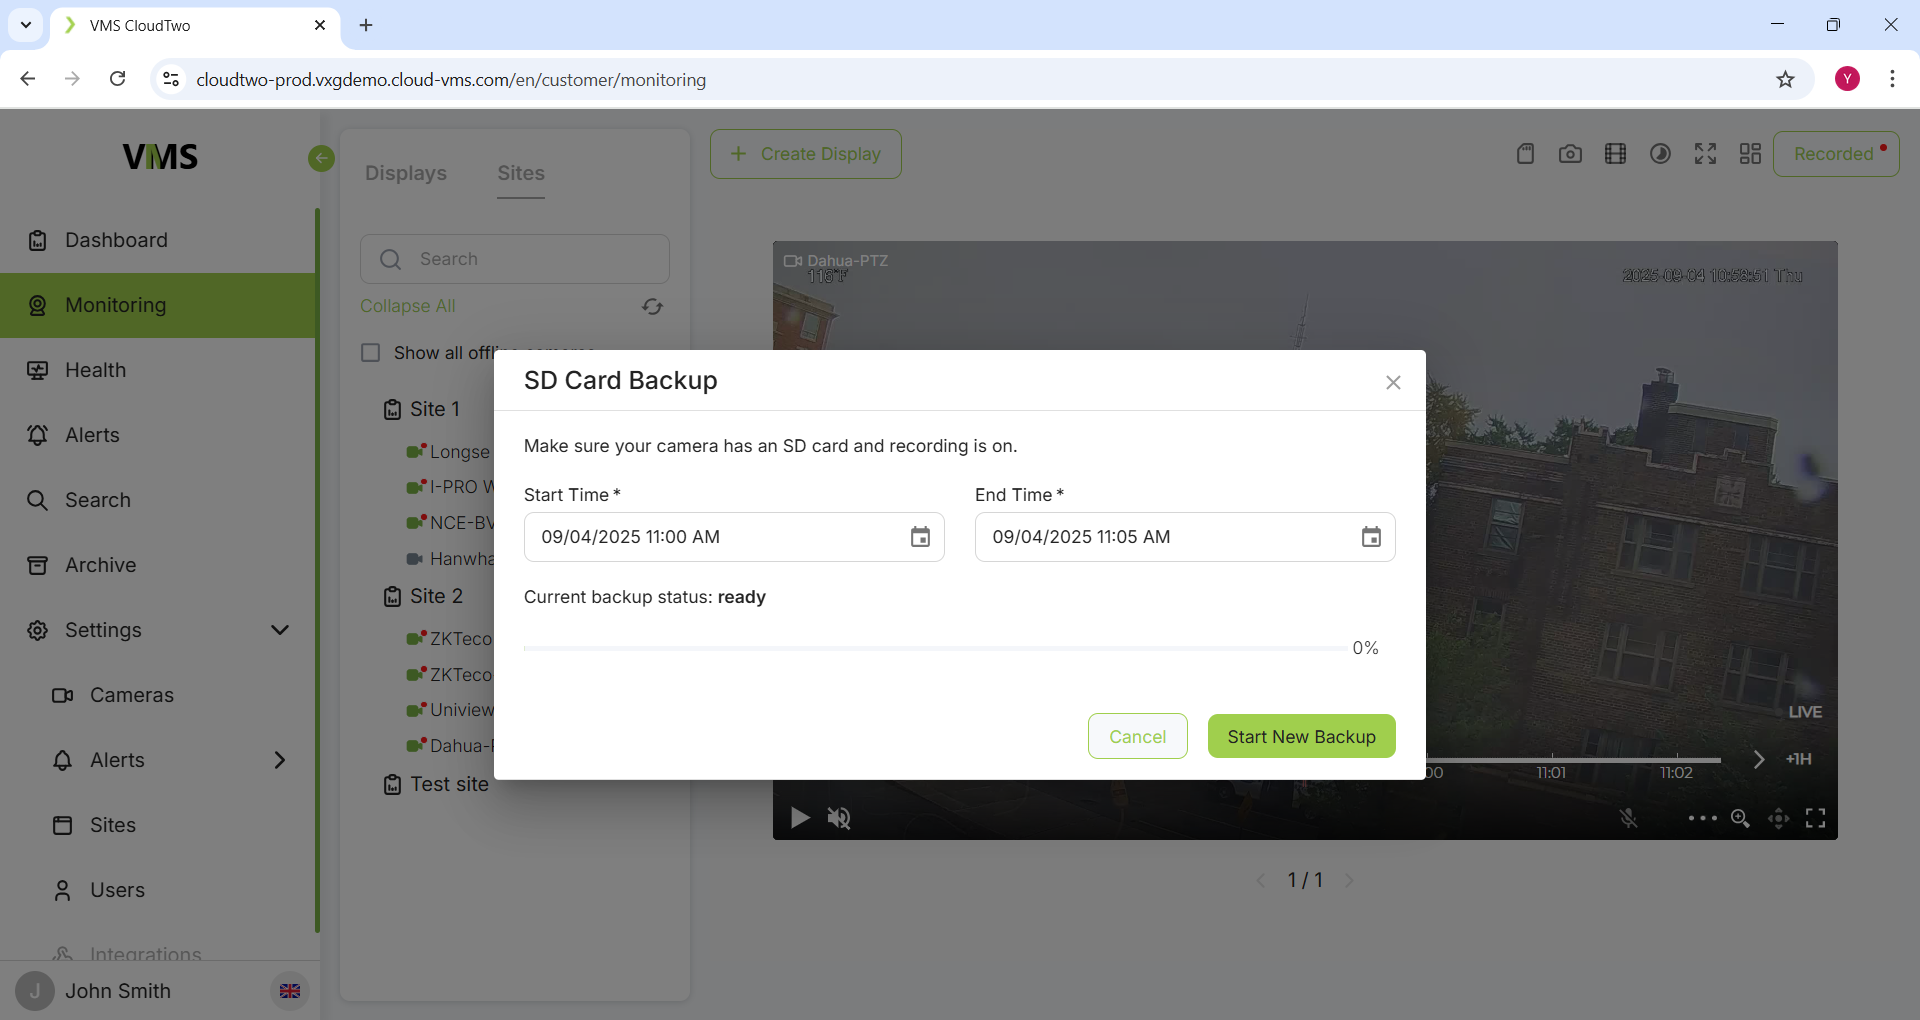
F5. SD Card Backup and Cloud Synchronization
-
Access the camera UI and verify that recording to the SD card is active.
-
Modify the recording plan to motion-based or disable recording for the test camera as needed.
-
In single camera Live View mode, click the SD card icon.
-
Select a time interval containing SD card recordings.
-
Confirm that video data is successfully copied to cloud storage (the timeline indicator should turn white).
-
Playback the video from cloud storage to ensure data integrity.
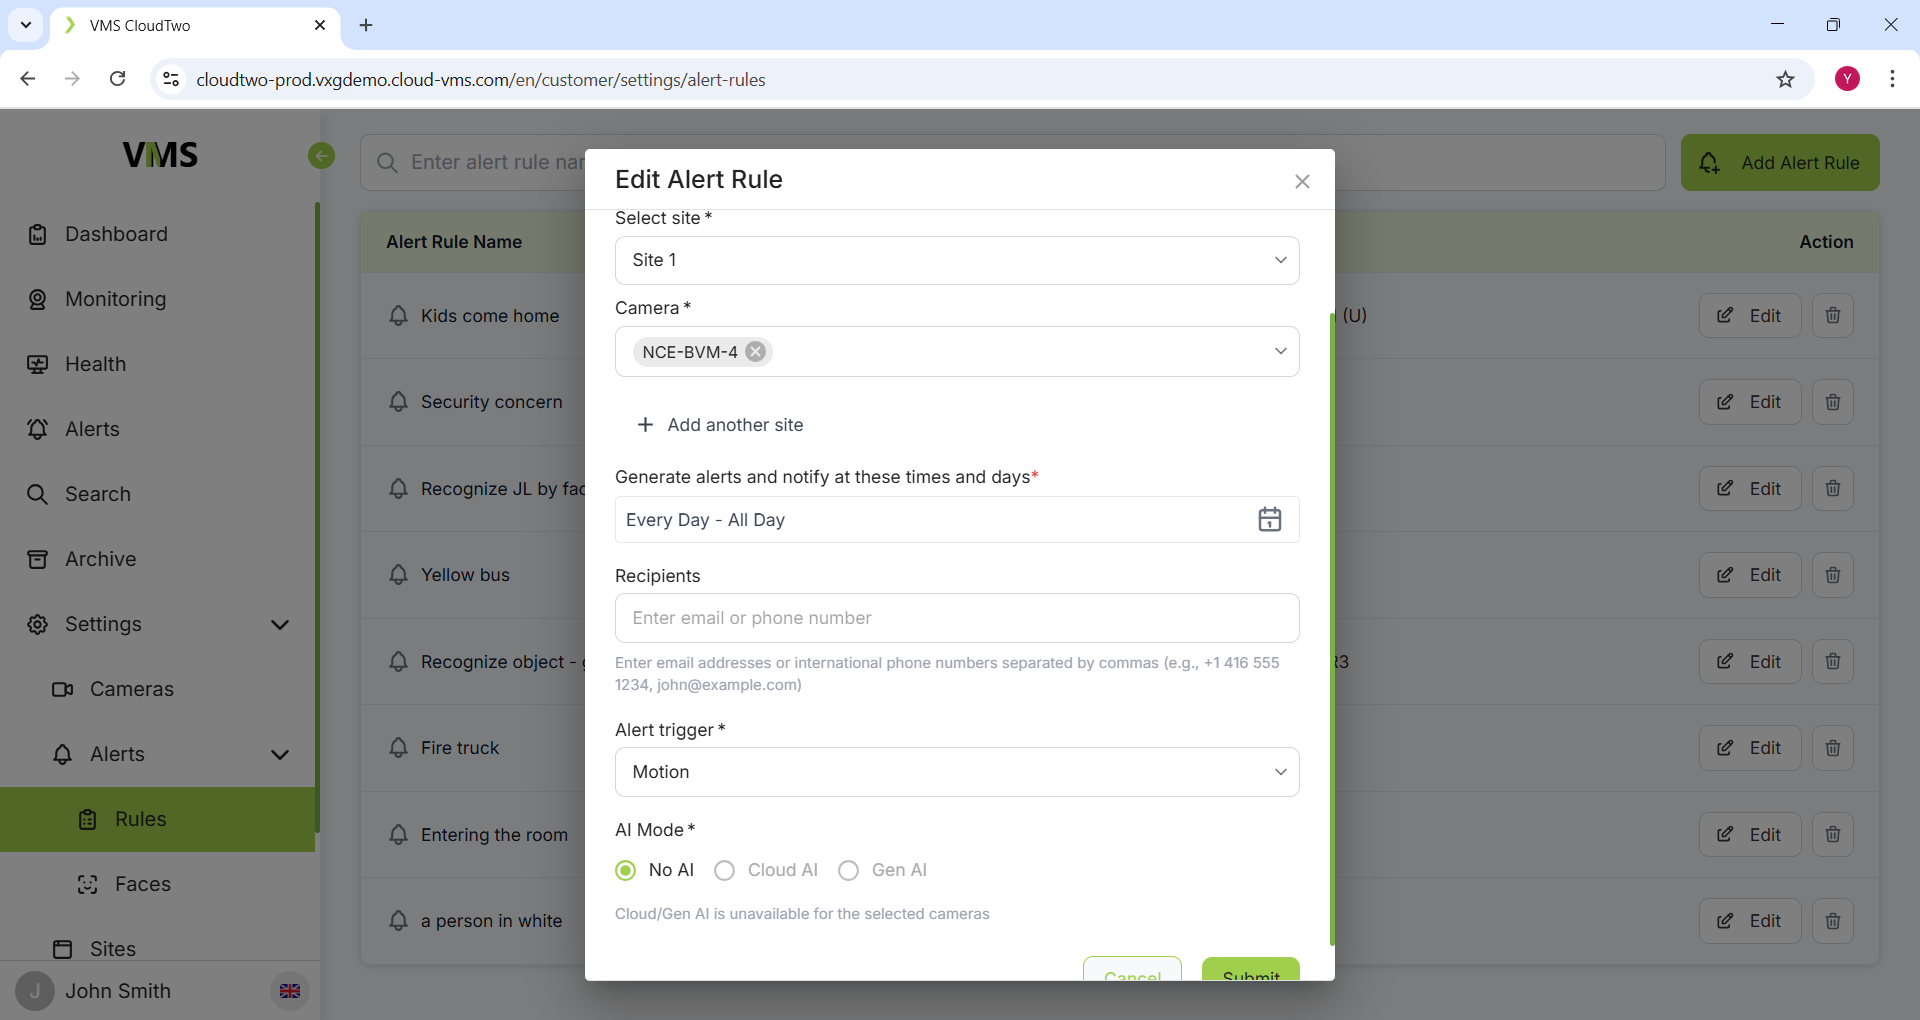
F6. ONVIF Event Handling
-
Configure an event (e.g., motion detection) on the camera.
-
Trigger the configured event.
-
Validate event occurrence using ODM (ONVIF Device Manager).
-
Verify the event is logged in the camera’s timeline on the monitoring page. Ensure recording is enabled for the camera.
Stress Test Procedures
S1. Power Cycling Robustness
-
Power cycle the camera by disconnecting and reconnecting the power supply.
-
Verify that the camera successfully reconnects and video streaming resumes.
-
Repeat the power cycle process 10 times consecutively.
S2. Network Disconnection Recovery
-
Disconnect the Ethernet cable from the PoE switch (simulating Internet loss) and reconnect after 1 minute.
-
Confirm that the camera re-establishes connection and resumes video streaming.
-
Repeat this procedure 10 times.
S3. Add/Remove Camera Stability
-
Add a camera via the UI.
-
Wait for the camera to come online.
-
Remove the camera from the system.
-
Restart the application or reboot the camera.
-
Repeat the add/remove cycle 10 times.