Creating a Layout
-
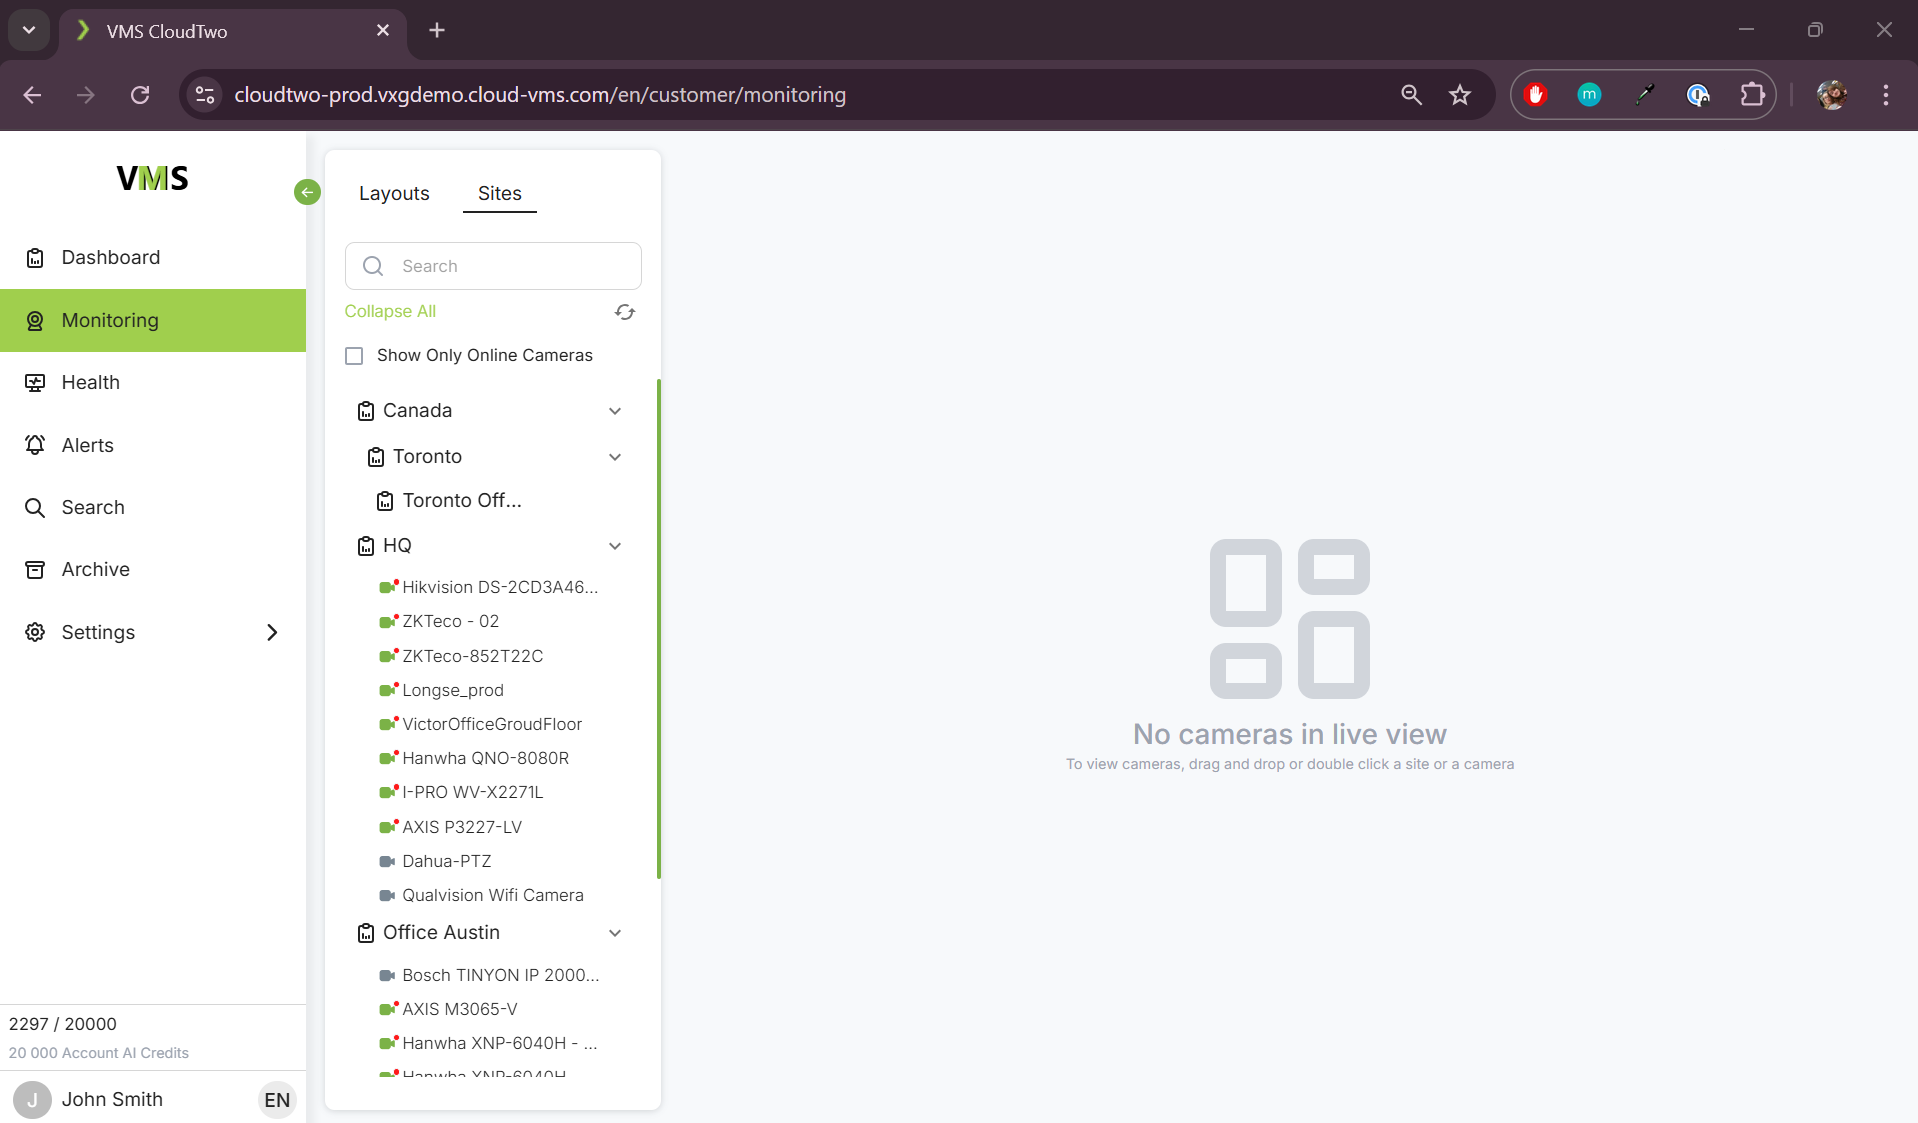
Go to Sites.
-
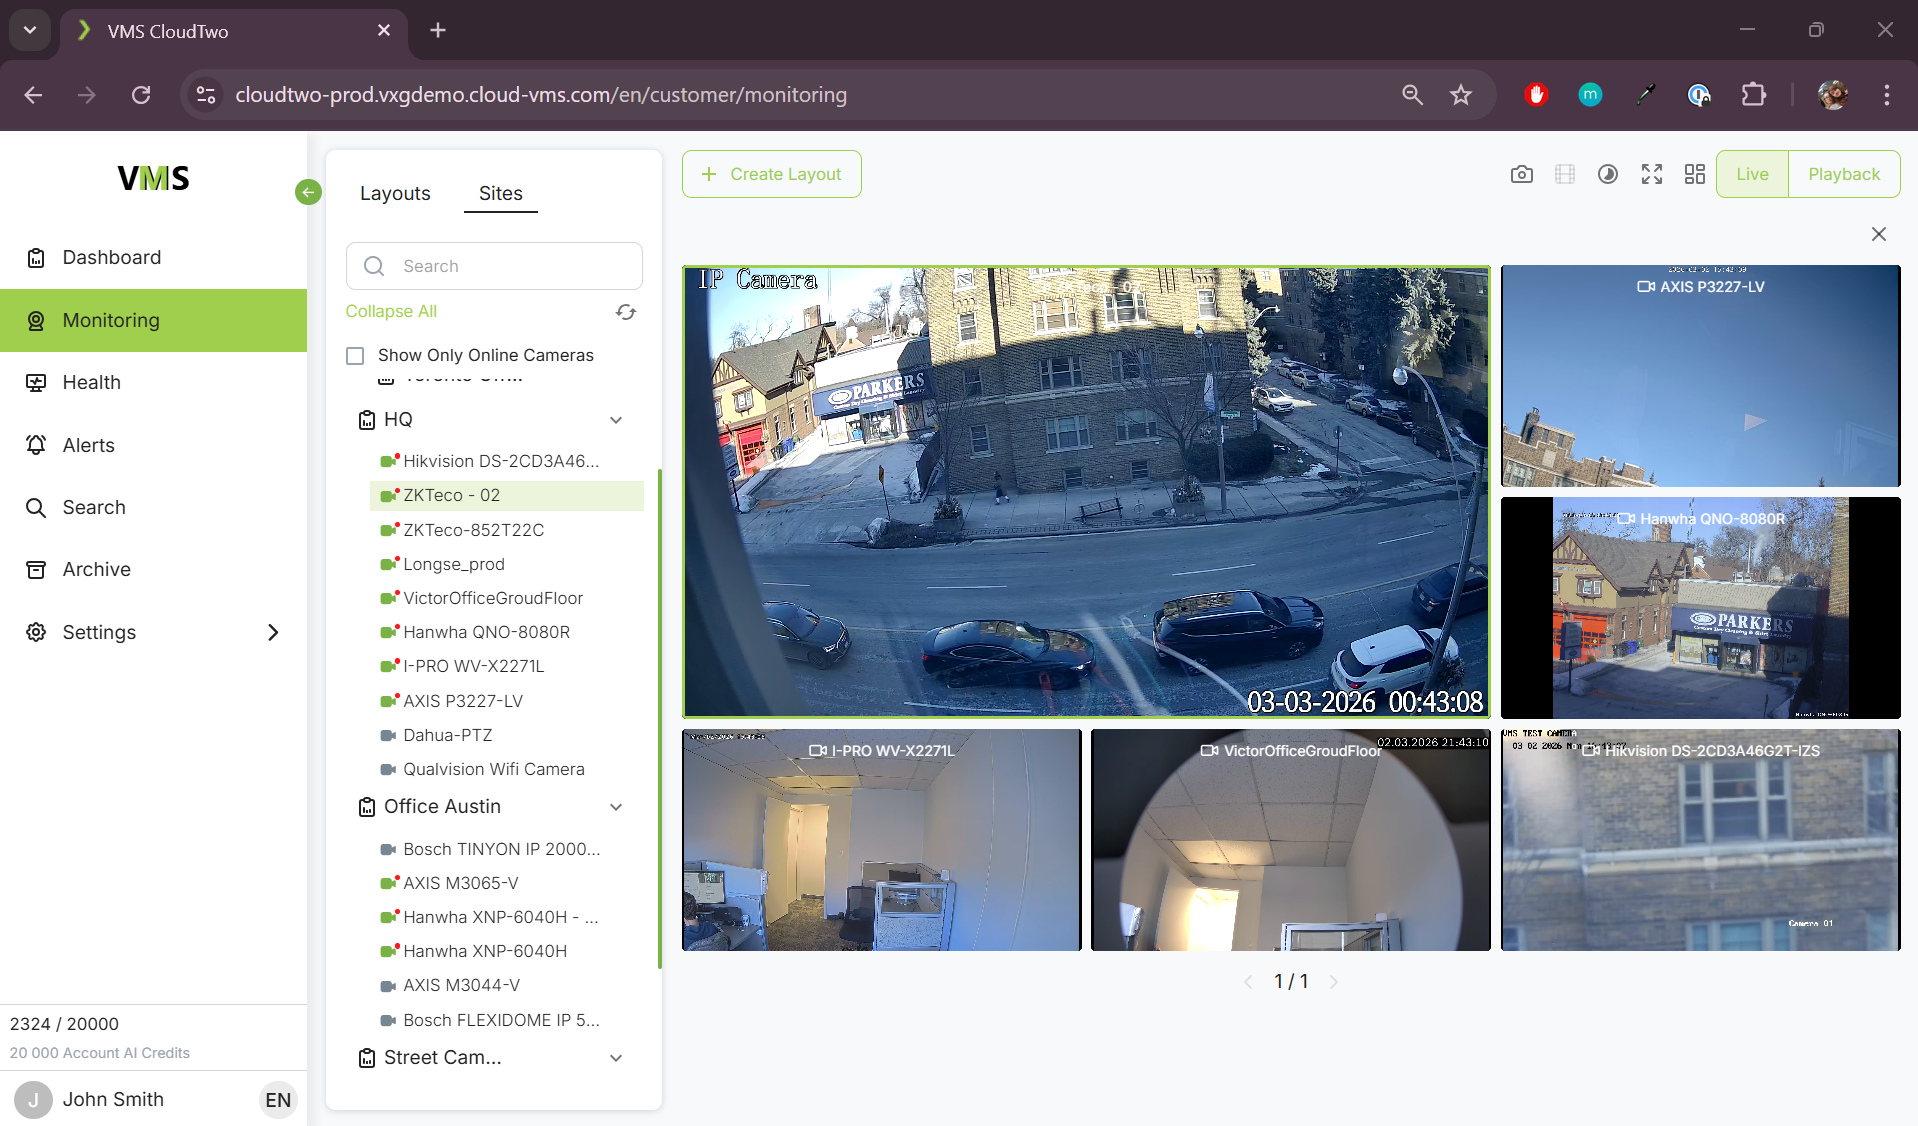
Drag and drop sites or individual cameras into the right panel.
-
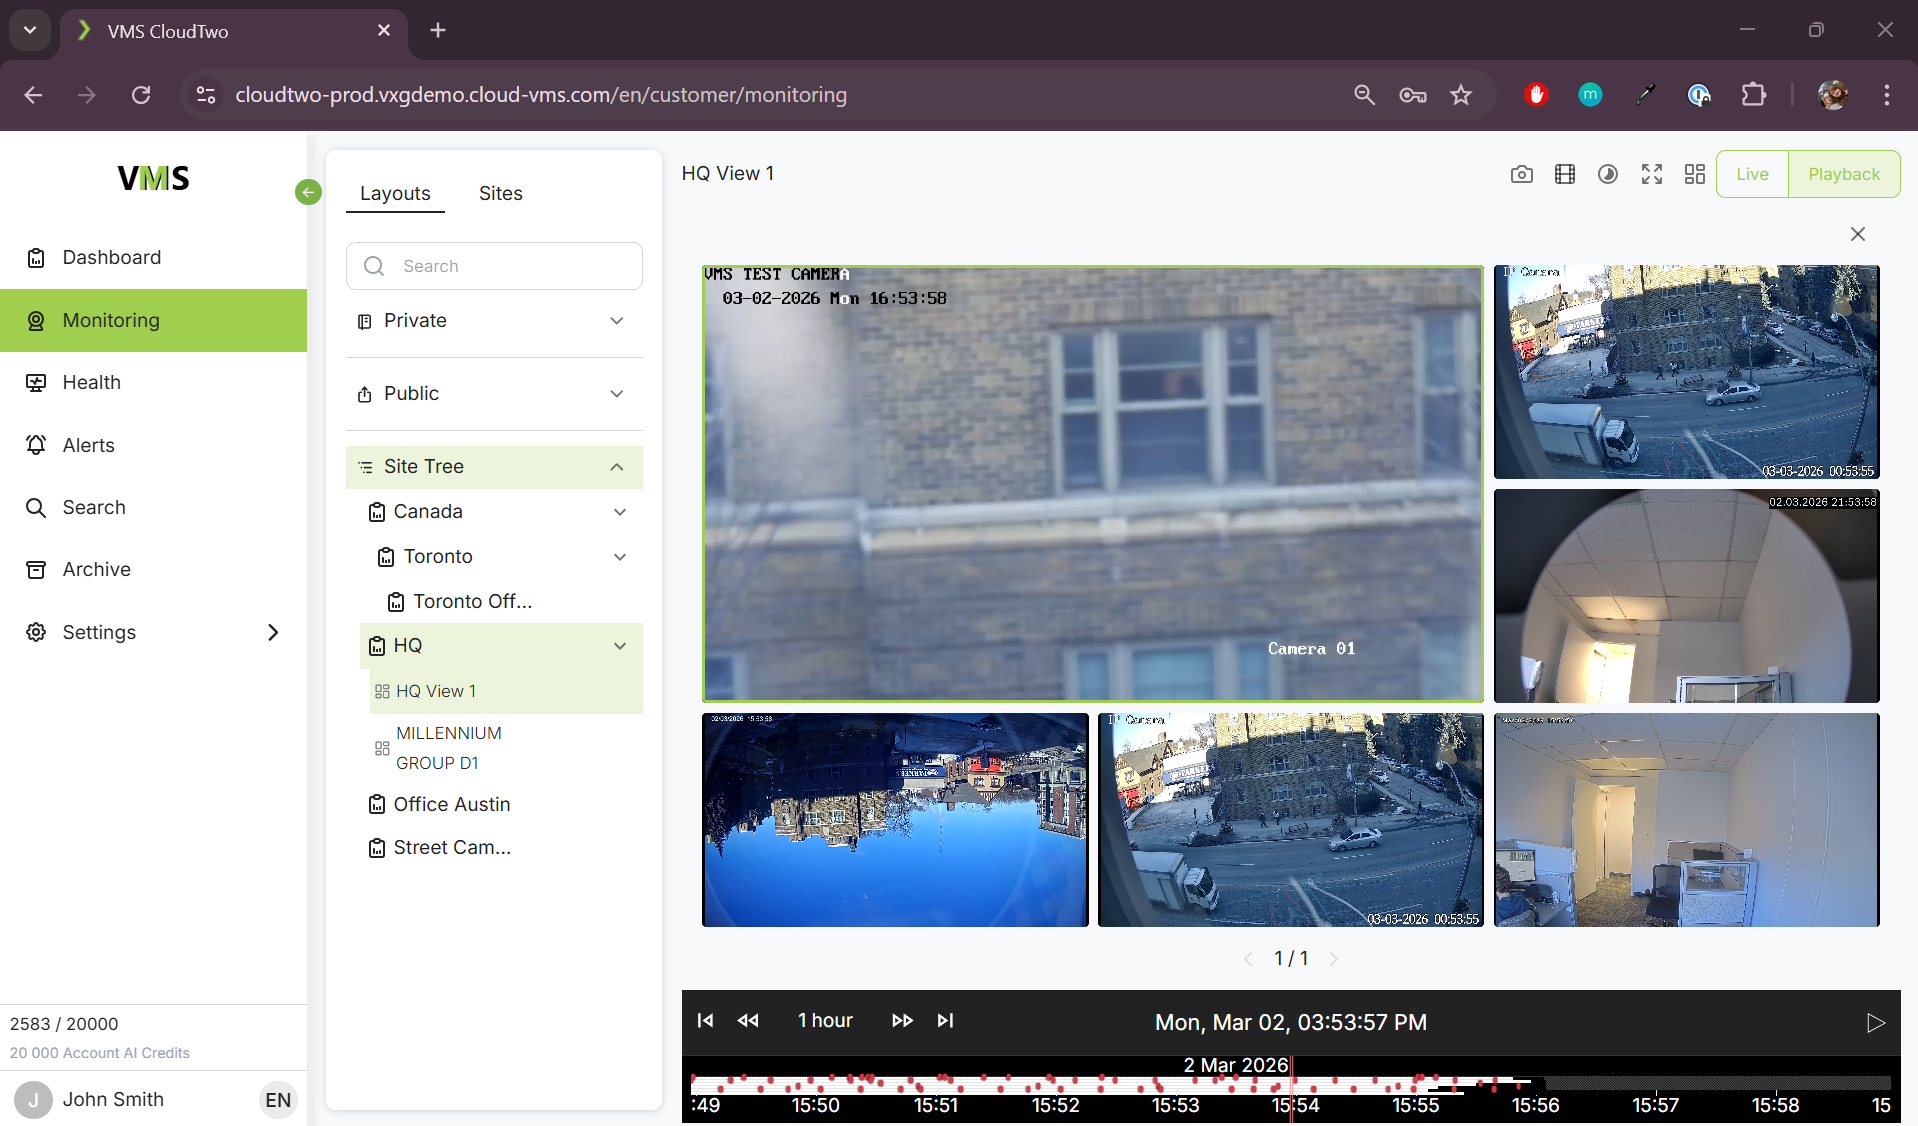
Choose a layout using the Layout button.
-
Adjust camera positions by dragging each camera window.
-
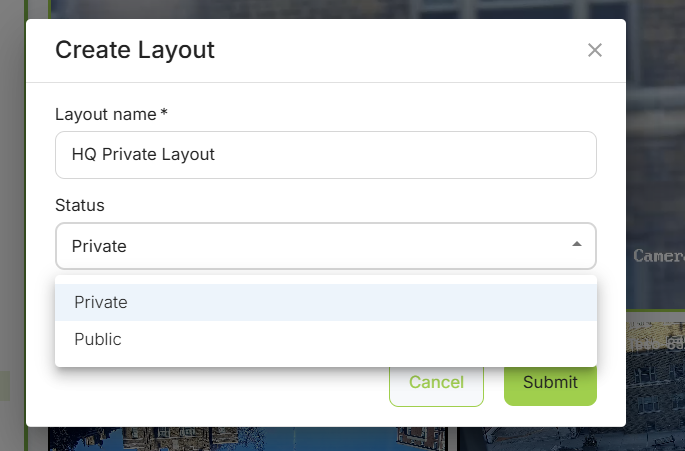
Save the layout by clicking "Create Layout".
-
If all the cameras you selected are from a single site, the checkbox “Auditor Shareable Layout” will be enabled. If you leave this enabled, any Auditor type user that has access to the site where these cameras came from will be able to see this layout. This layout will appear in the “Sites Tree” tab of the Layout section.
-
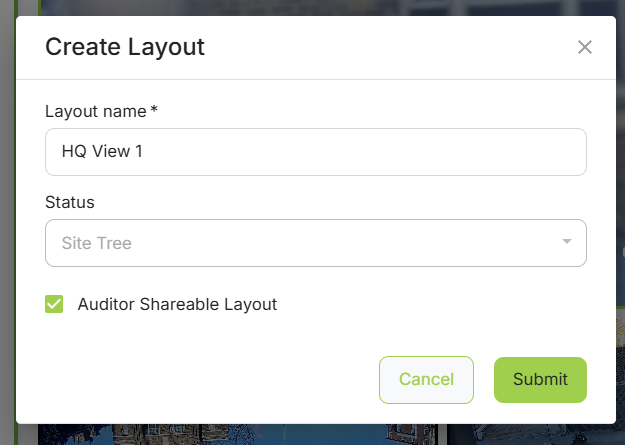
If you create a layout using cameras from multiple sites, or you don’t want to share this layout with auditors, you can uncheck “Auditor Shareable Layout”. Then you will be presented with the option “Private” or “Public”.
-
Private layouts can only be viewed by you.
-
Public layouts can be viewed by any other Operator user in your company (users with the same permission level as you)
-
-
-
The display will be stored in the "Layouts" section for future use.
Single Camera Mode
Live Preview
-
Double-click on a selected camera to switch to single camera mode.
-
This will grant access to the camera control UI.
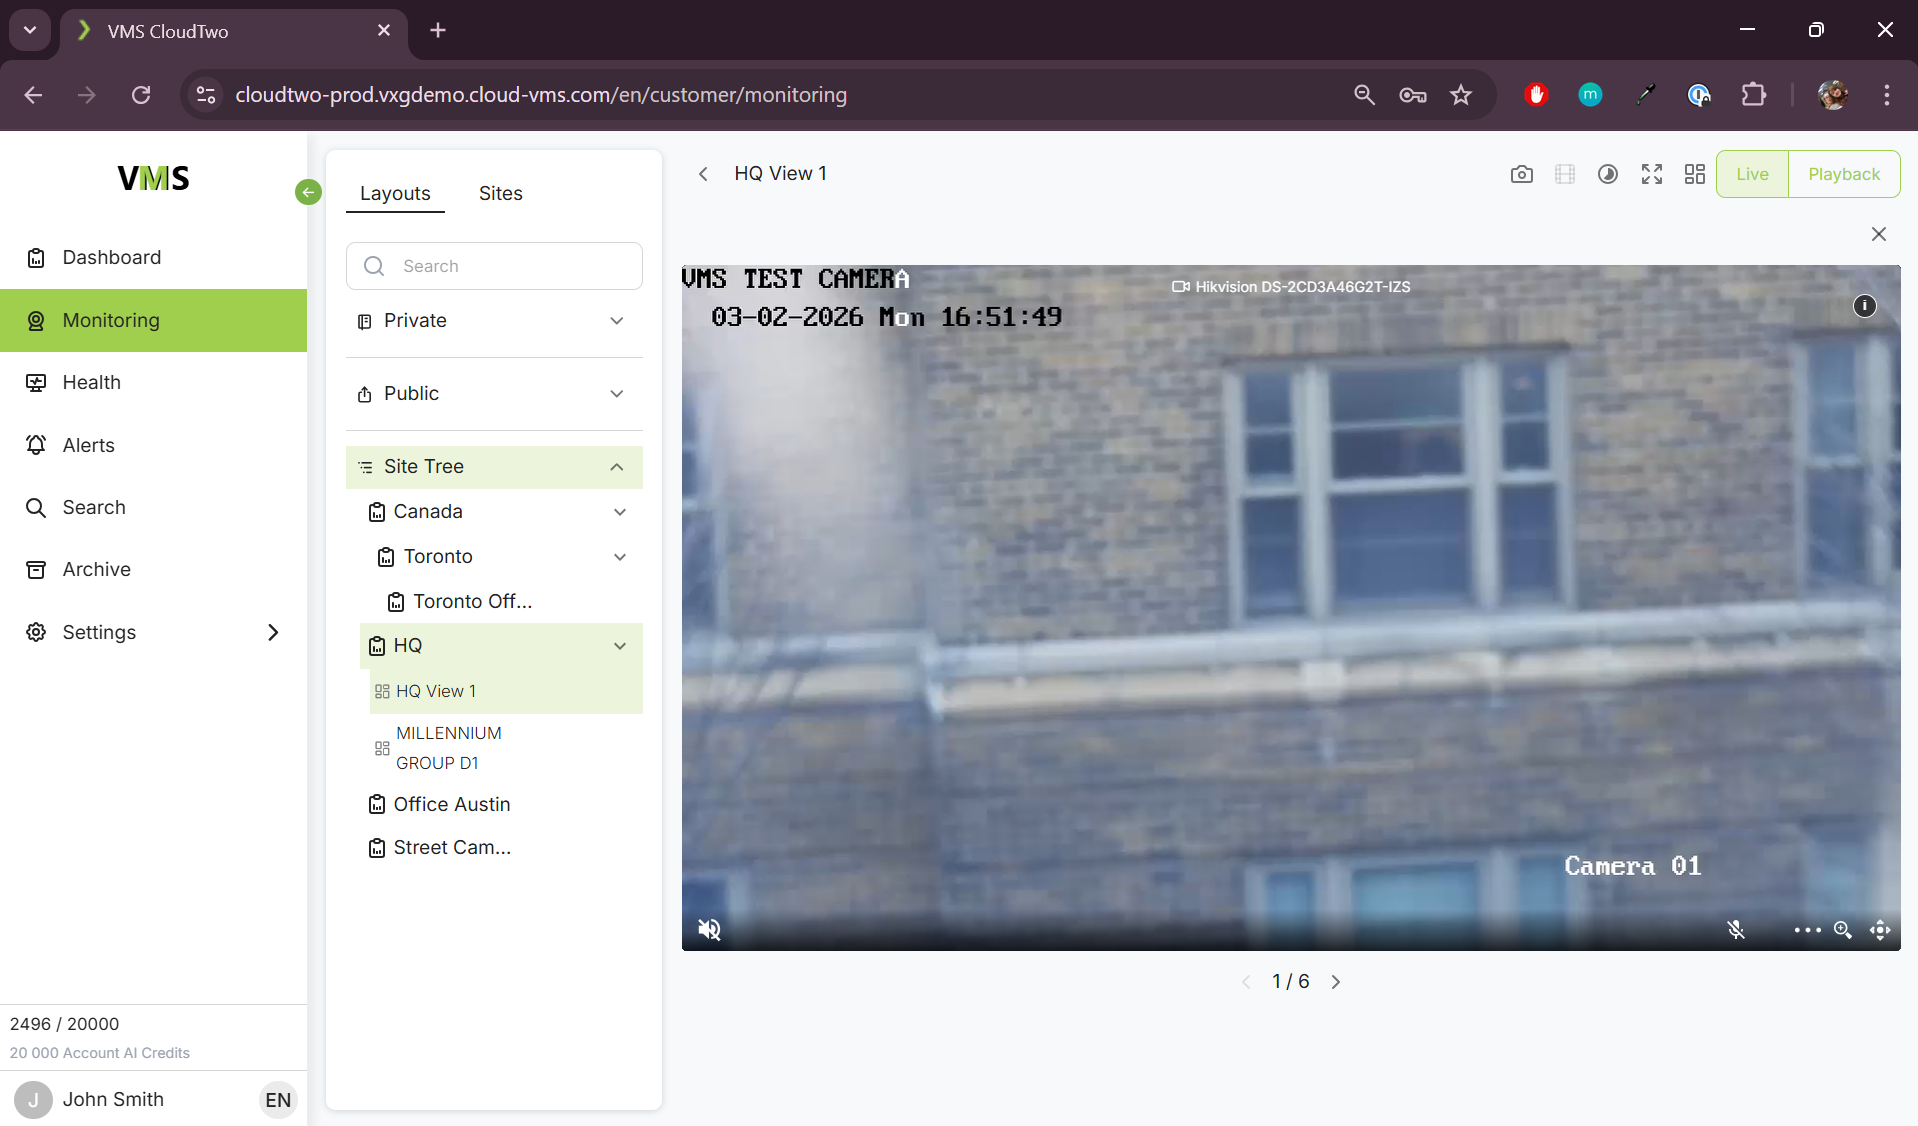
Live View Controls
-
PTZ (Pan-Tilt-Zoom) – Available if the camera supports it.
-
Microphone – Enables backward audio (if supported by the camera).
-
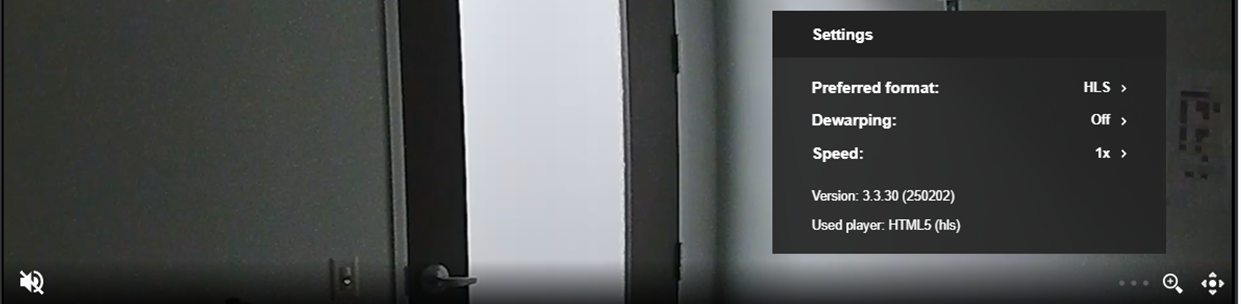
Streaming Format Options – HLS/DASH, WebRTC, JPEG polling.
-
Digital Zoom
-
Dewarping – For fisheye cameras.
-
Audio Volume Control
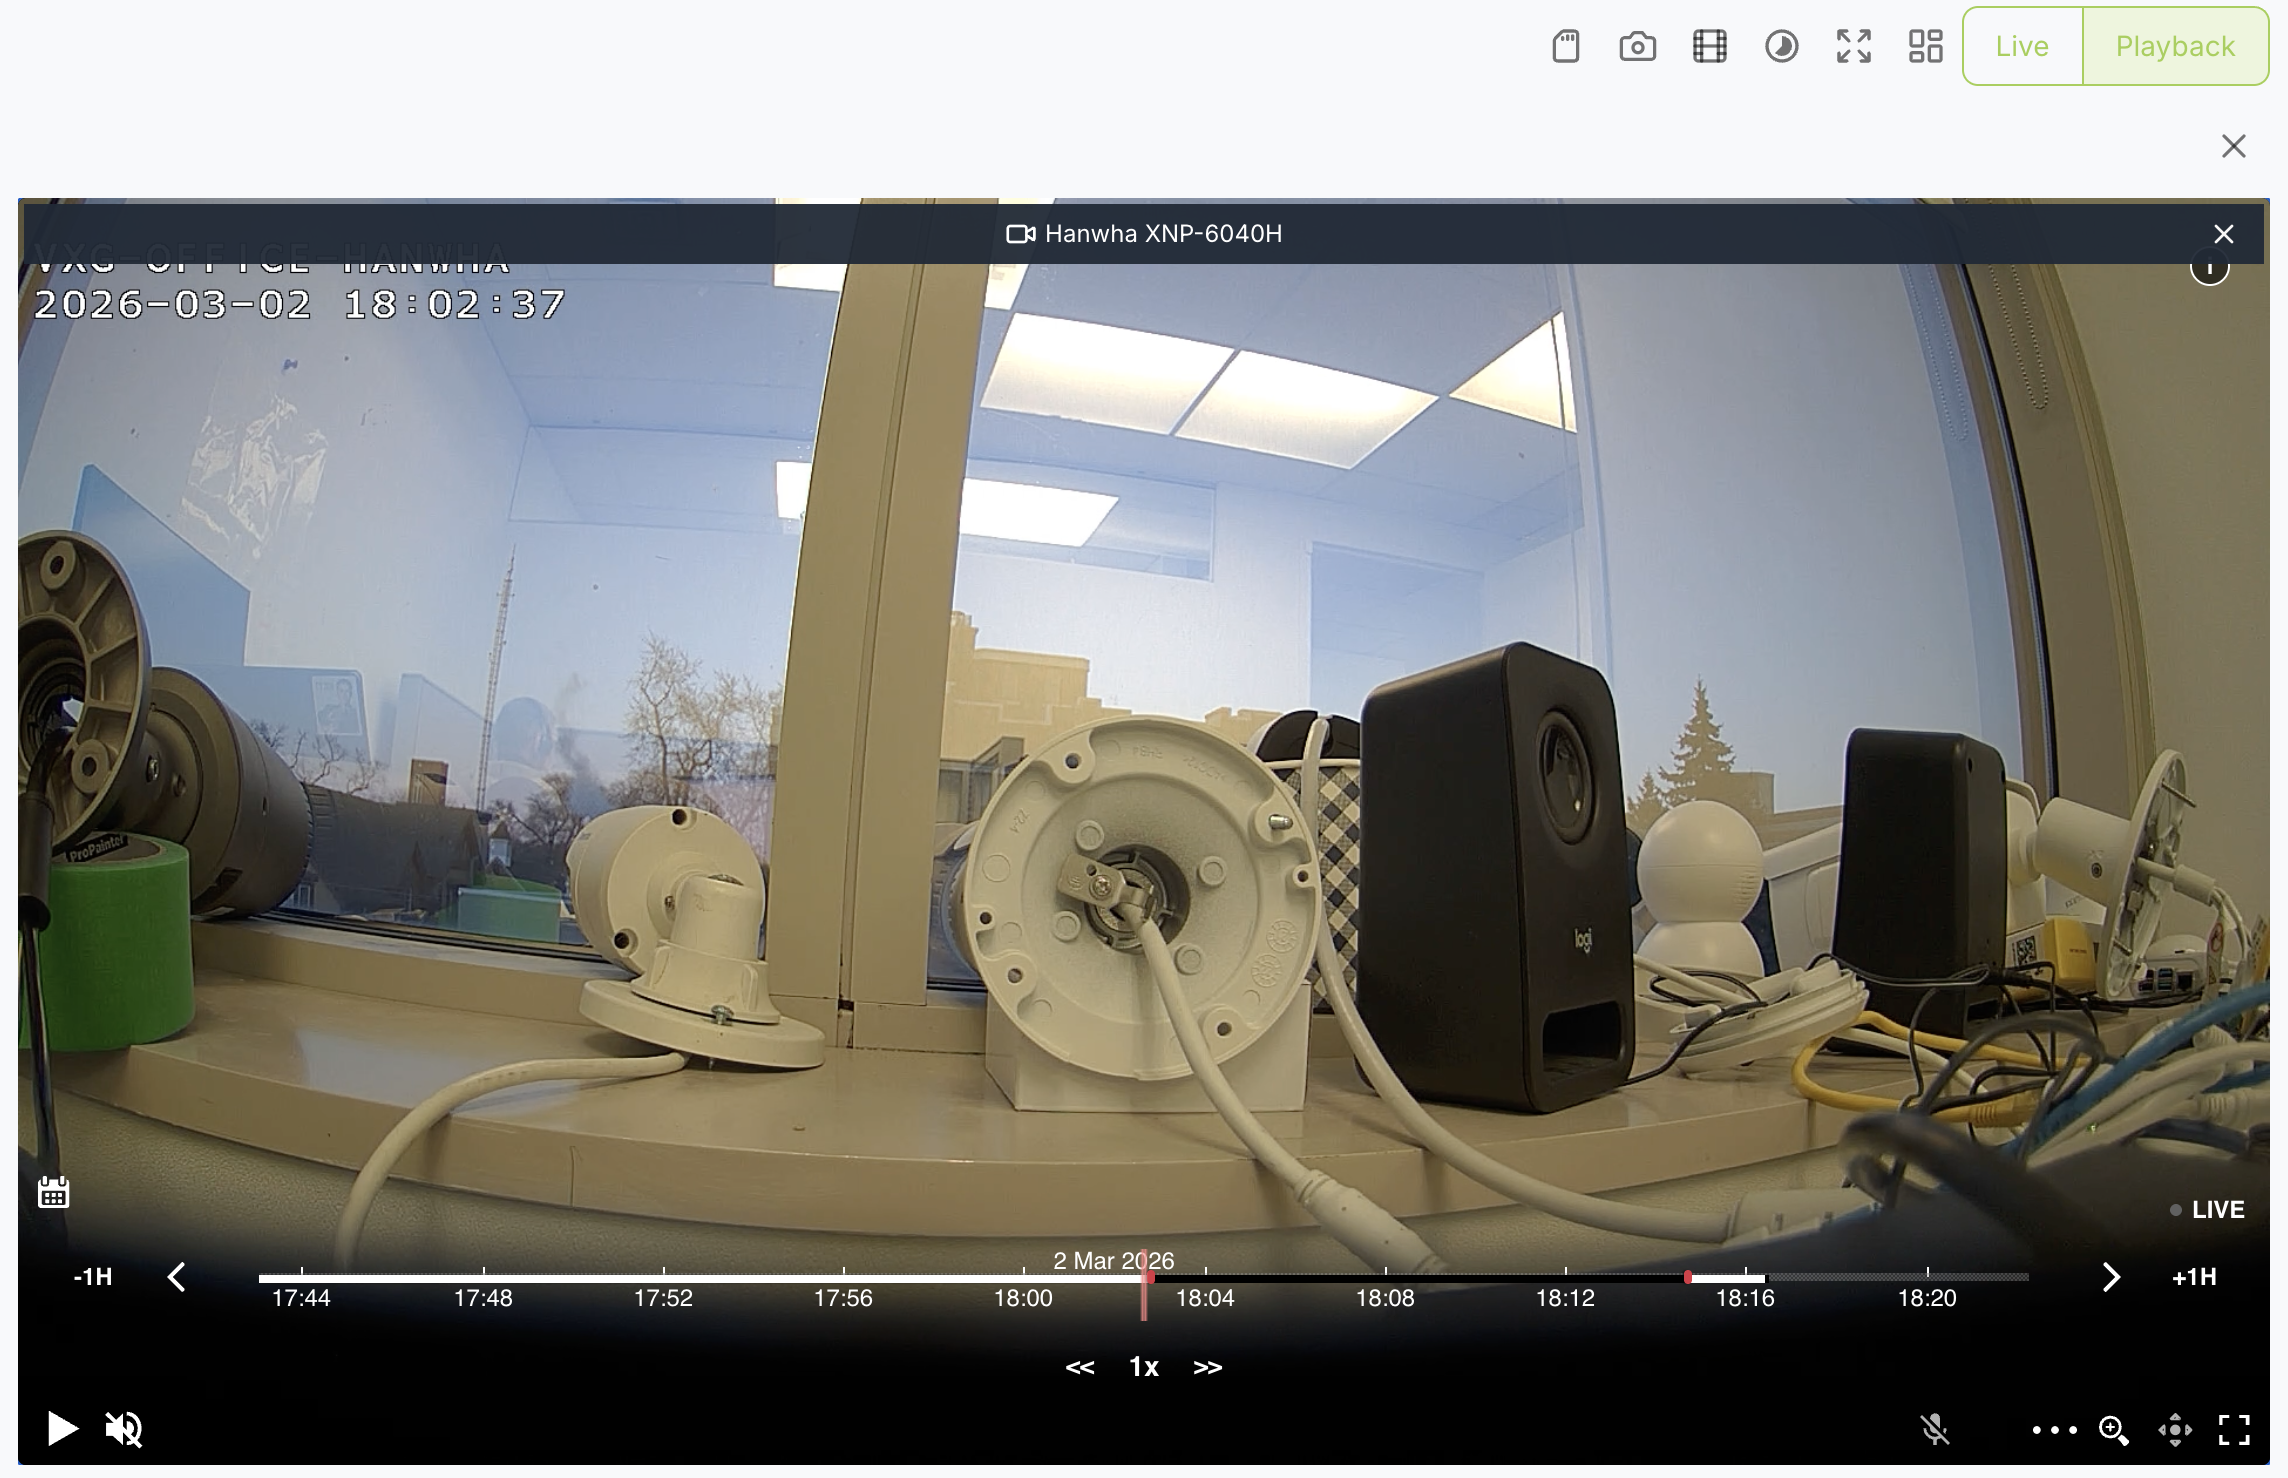
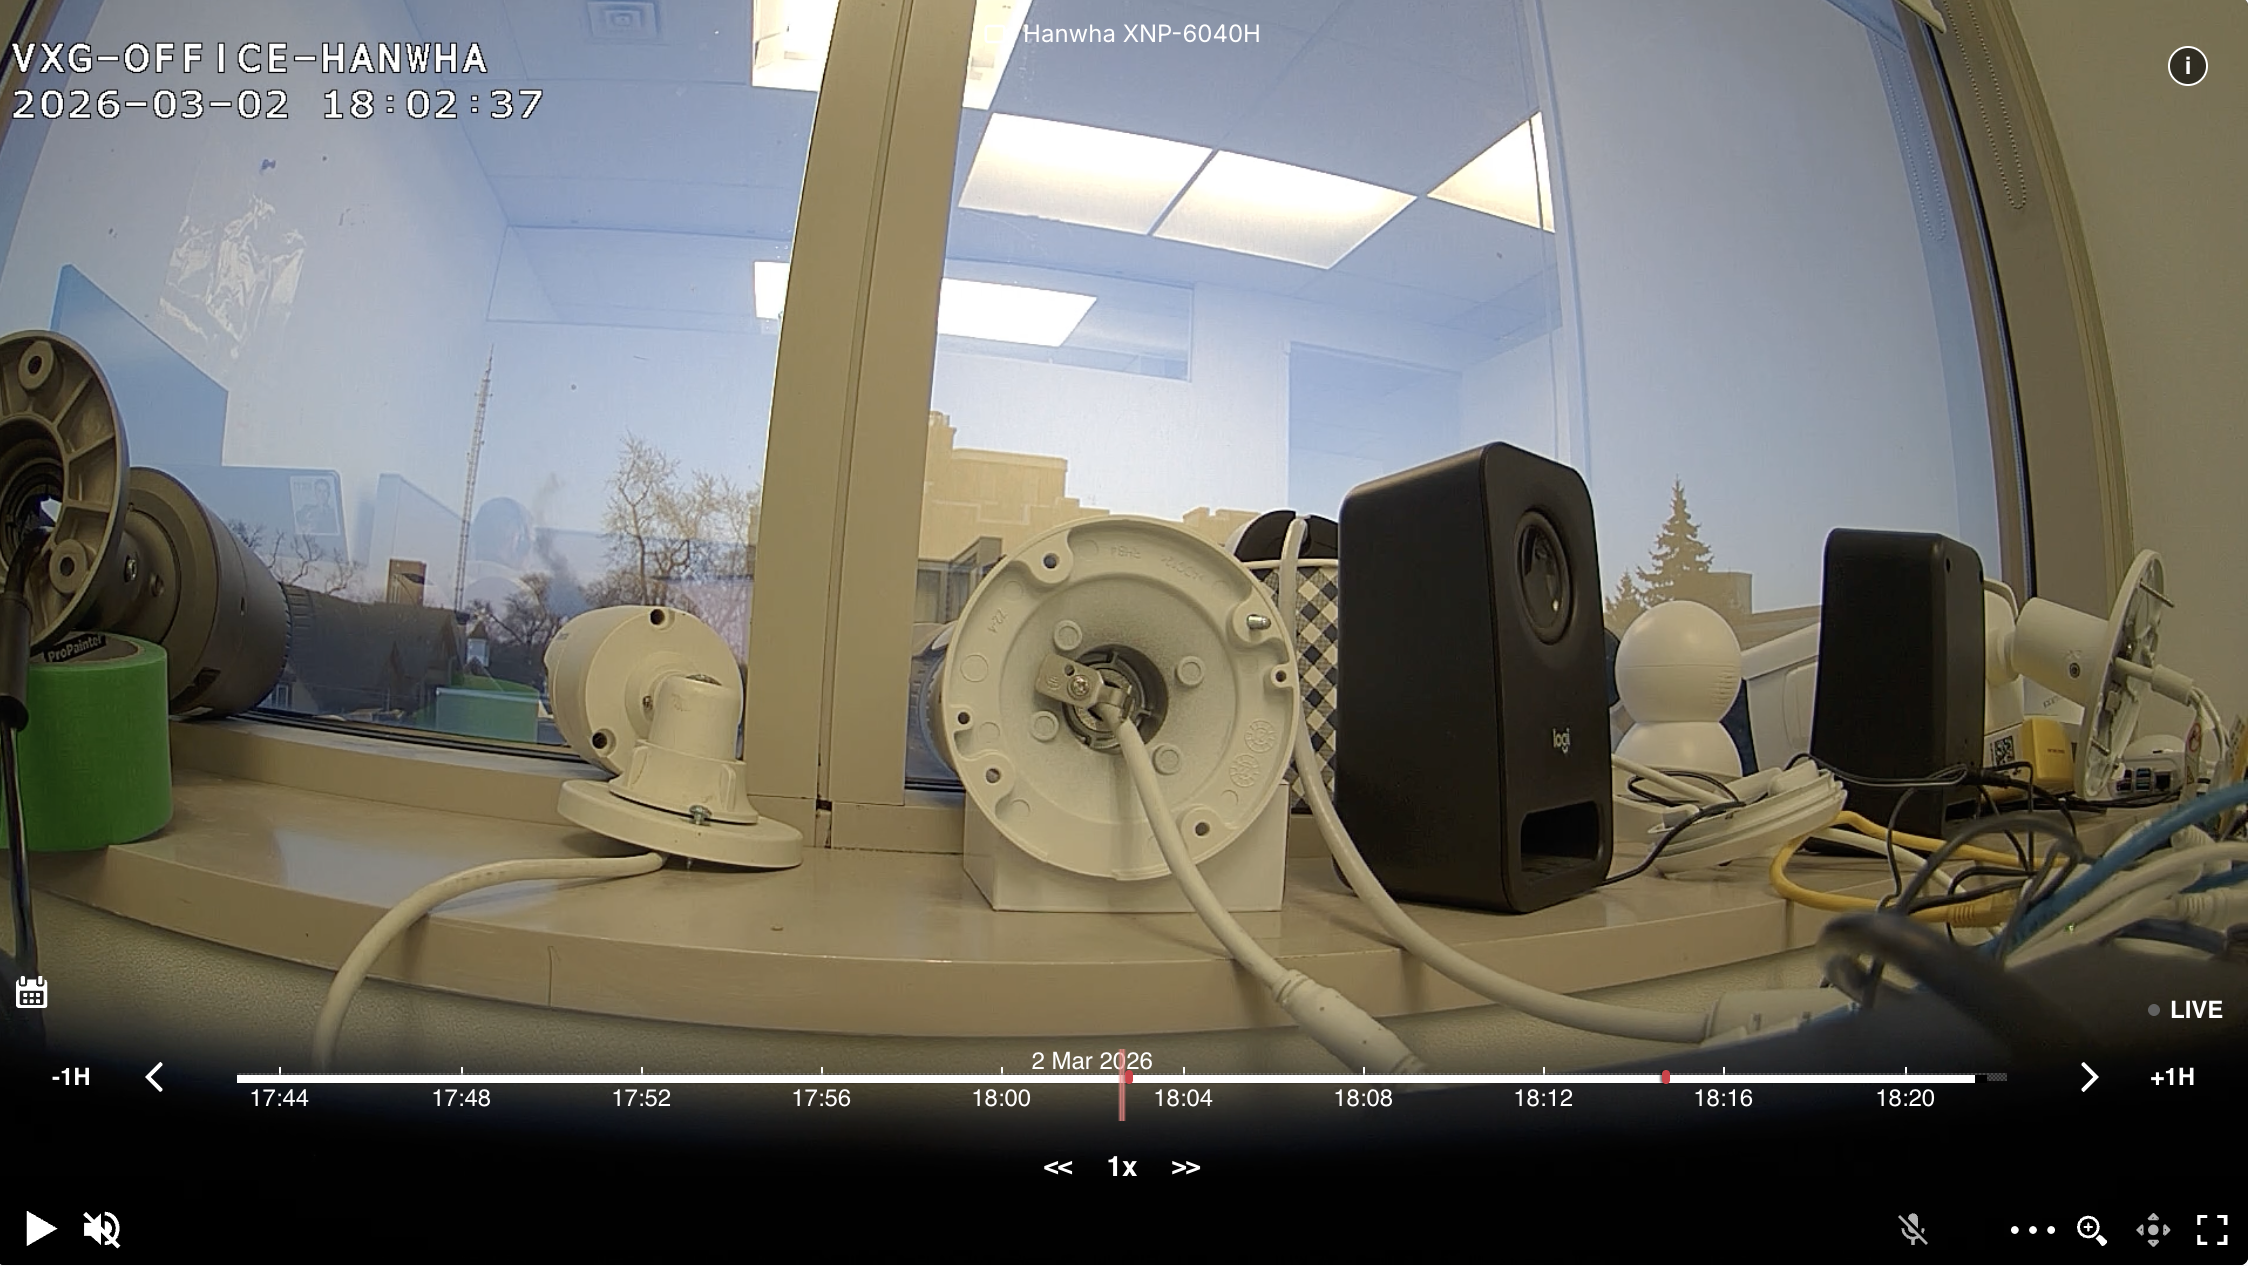
Recorded Video
Switching Between Live and Recorded Video
Use the "Live/Playback" switch above the video window.
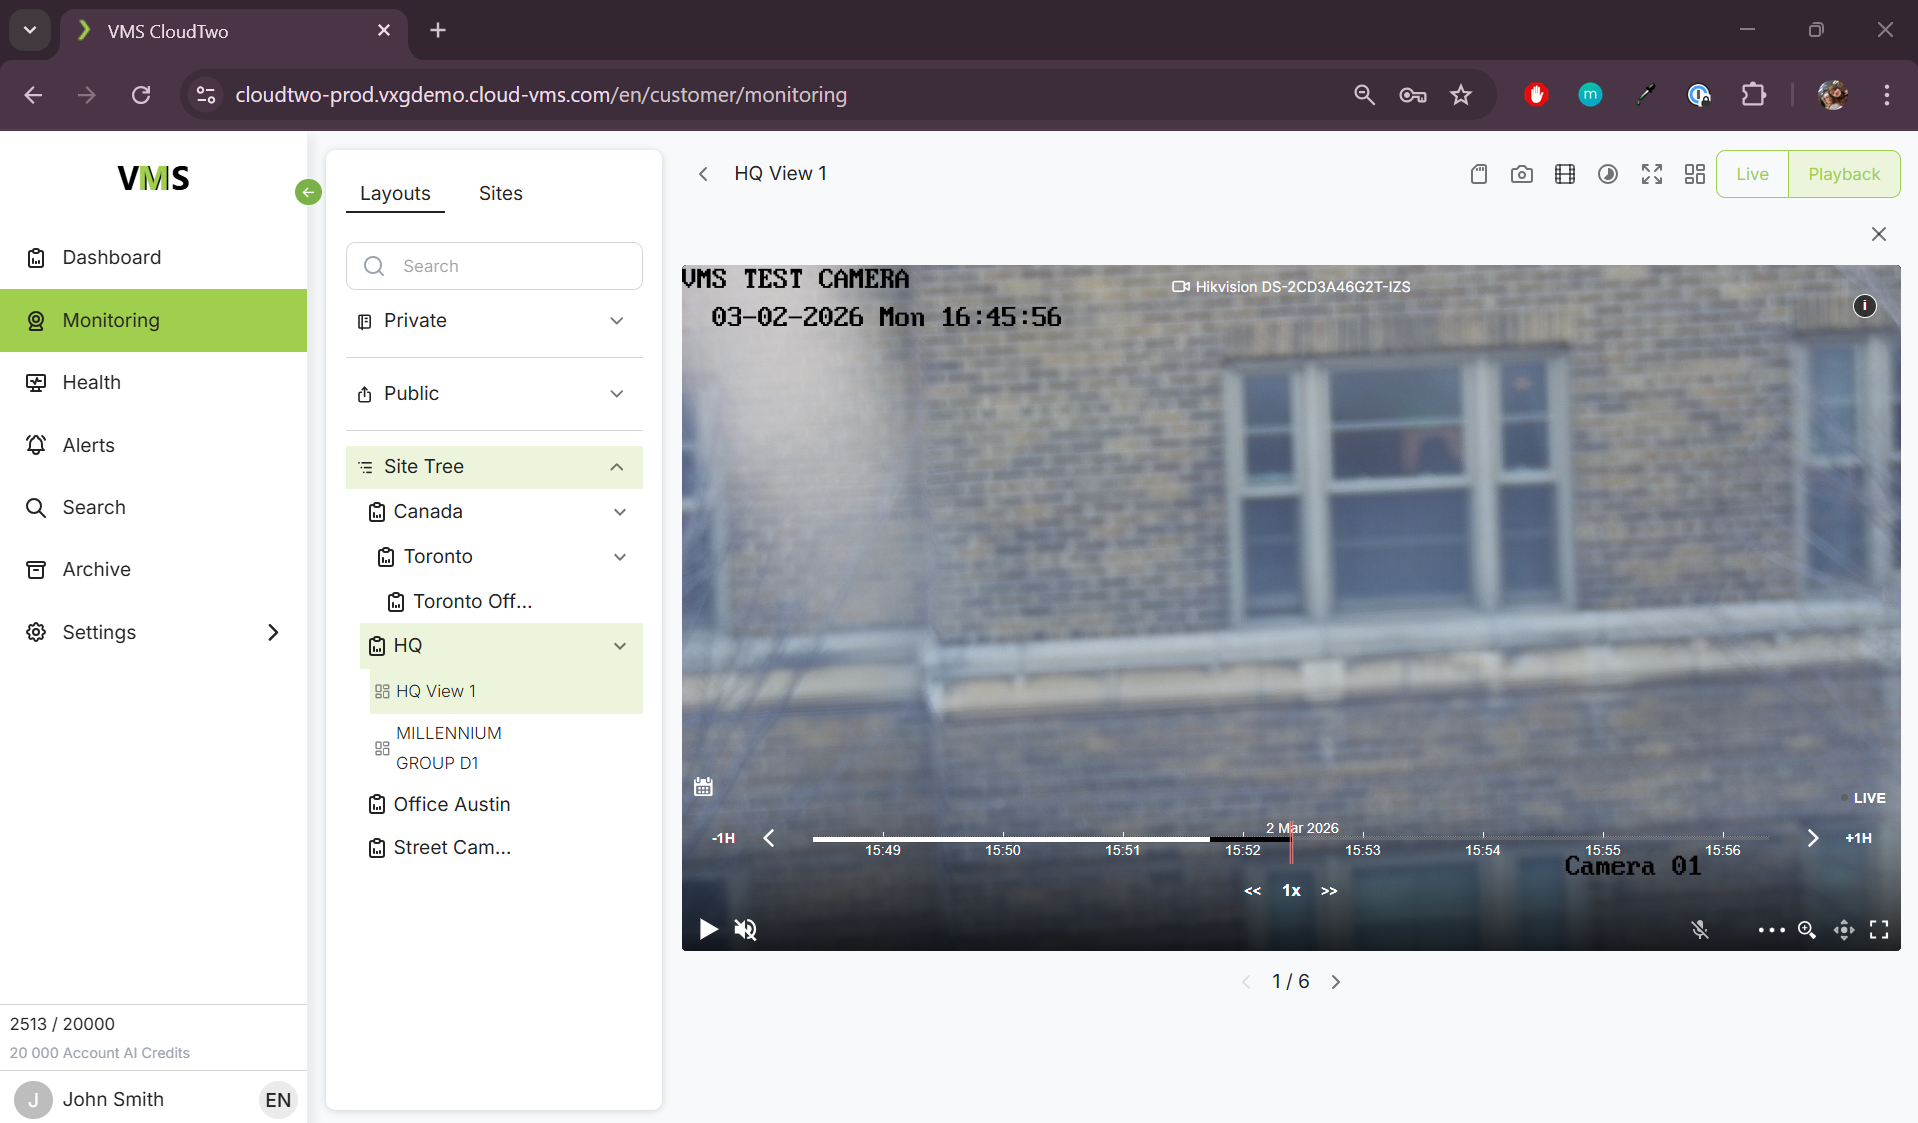
Recorded Video Playback Controls
-
Timeline – Adjustable scale, scrollable, and draggable.
-
Motion Marks – Shows detected motion events with snapshots.
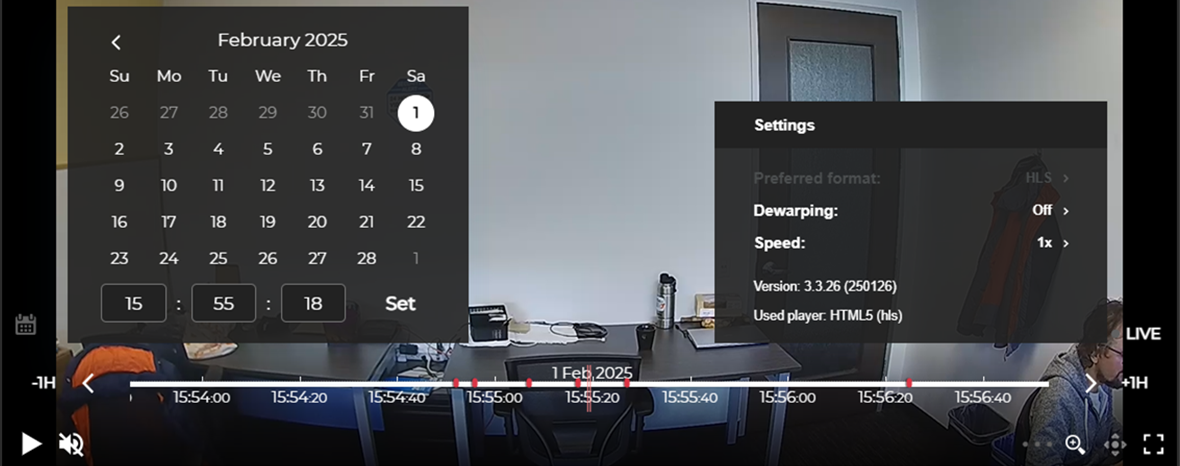
-
Calendar – Select playback date/time.
-
Digital Zoom
-
Dewarping – For fisheye cameras.
-
Playback Speed – Ranges from 0.125x to 16x.
-
Audio Volume Control
Scaling the Timeline
-
Scroll the mouse wheel over the left side of the timeline to adjust the scale.
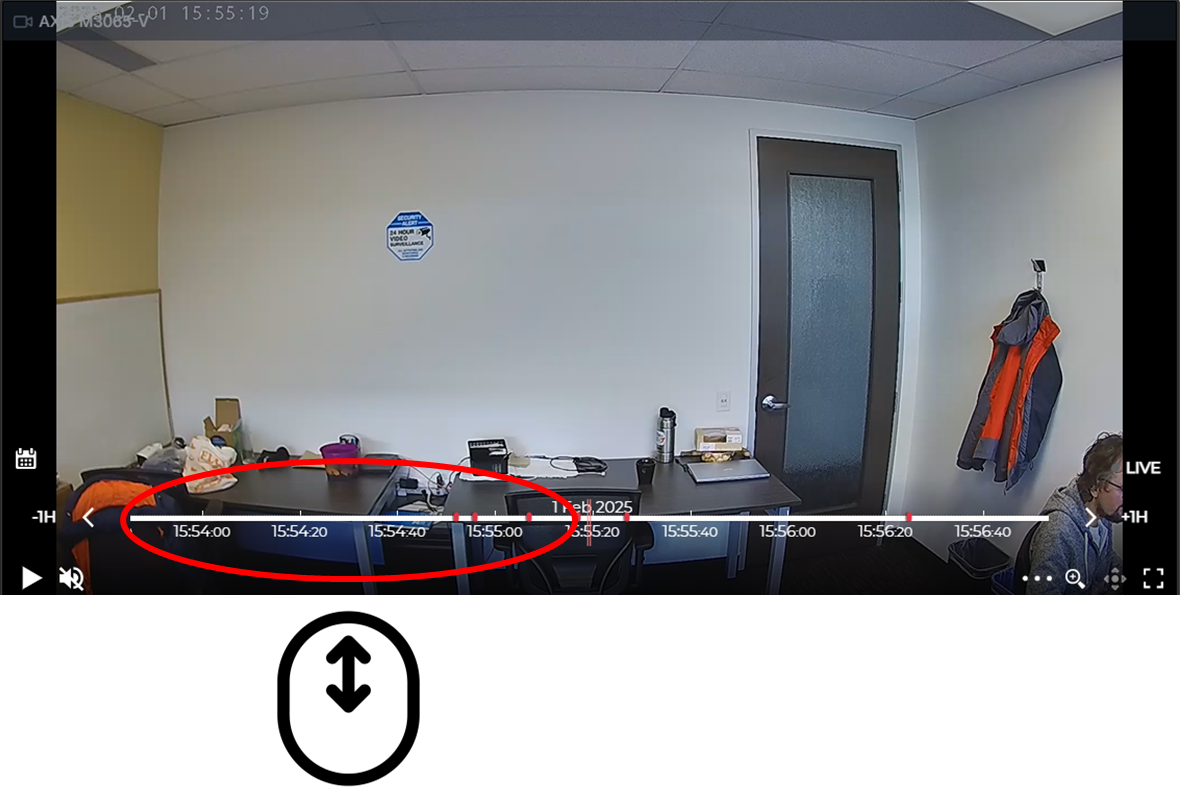
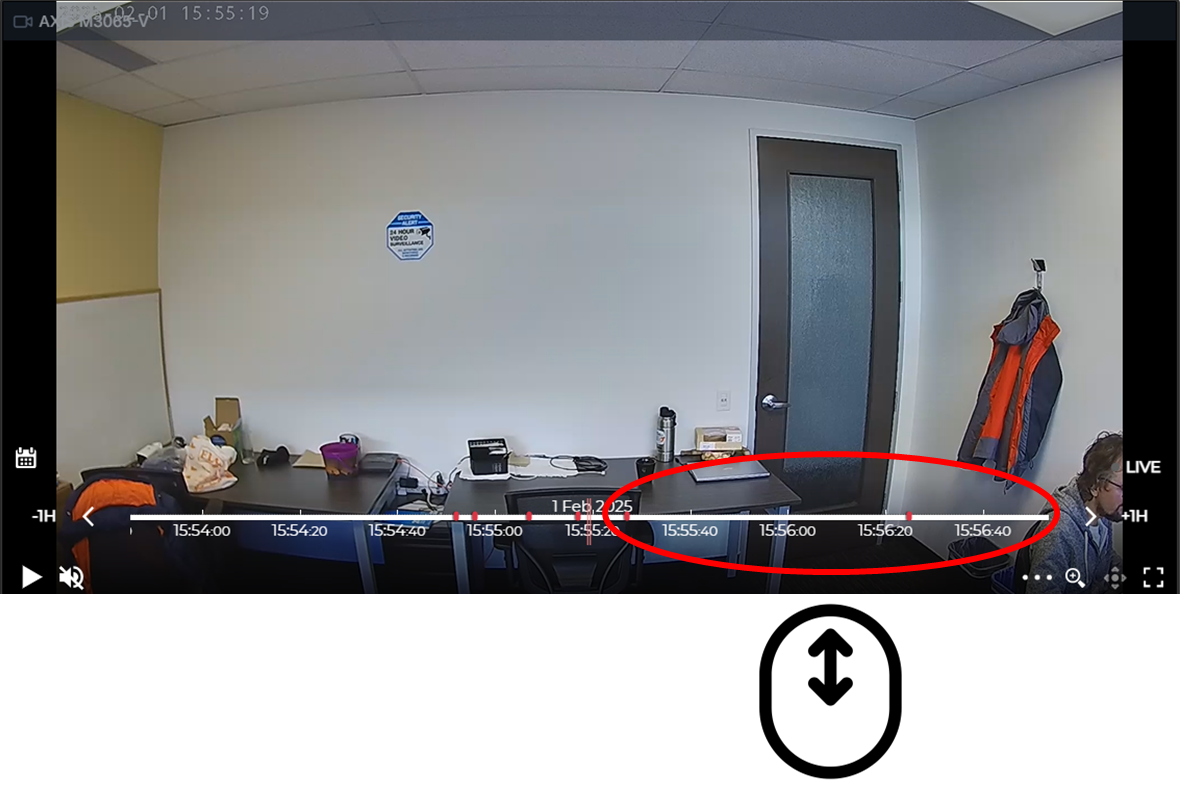
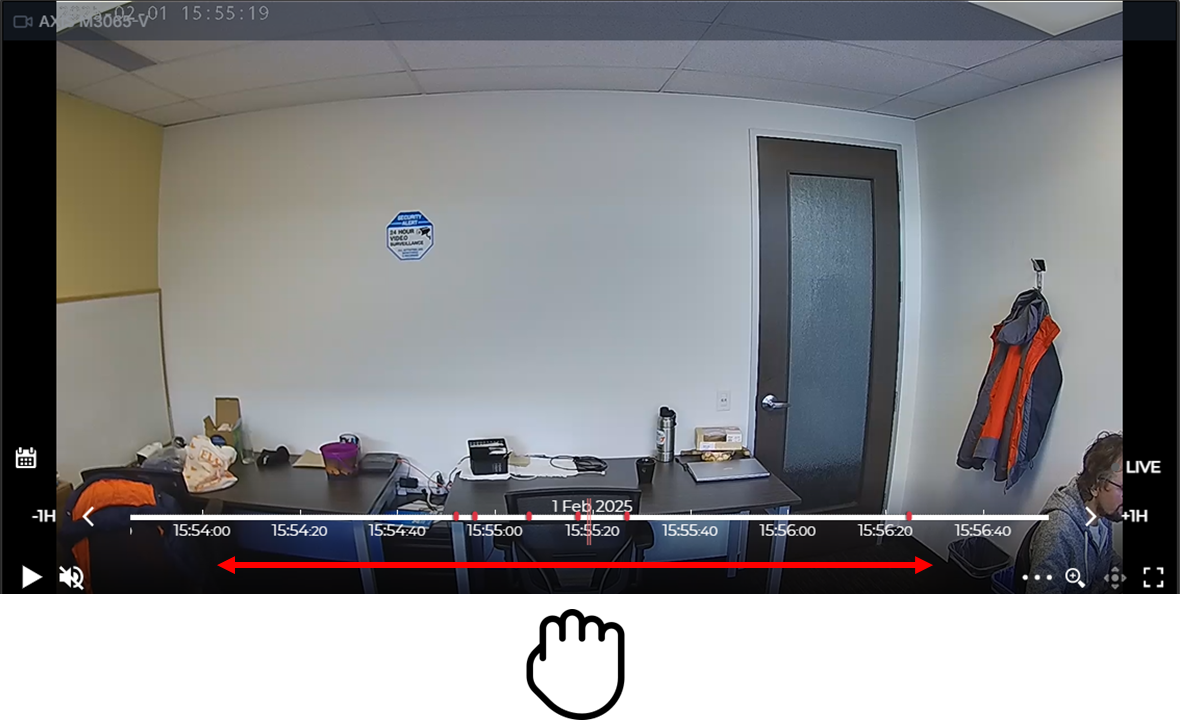
Scrubbing (Fast Scrolling Through Records)
-
Scroll the mouse wheel over the right side of the timeline to scroll through recorded video.
-
Images will be displayed (time-lapse effect), and when stopped, video chunks will load for playback.
-
For better performance, increase the timeline detail level before scrubbing.
Dragging (Frame-by-Frame Playback)
-
Click and drag the timeline left or right to play video frame-by-frame.
-
It is recommended to increase timeline scale before dragging.
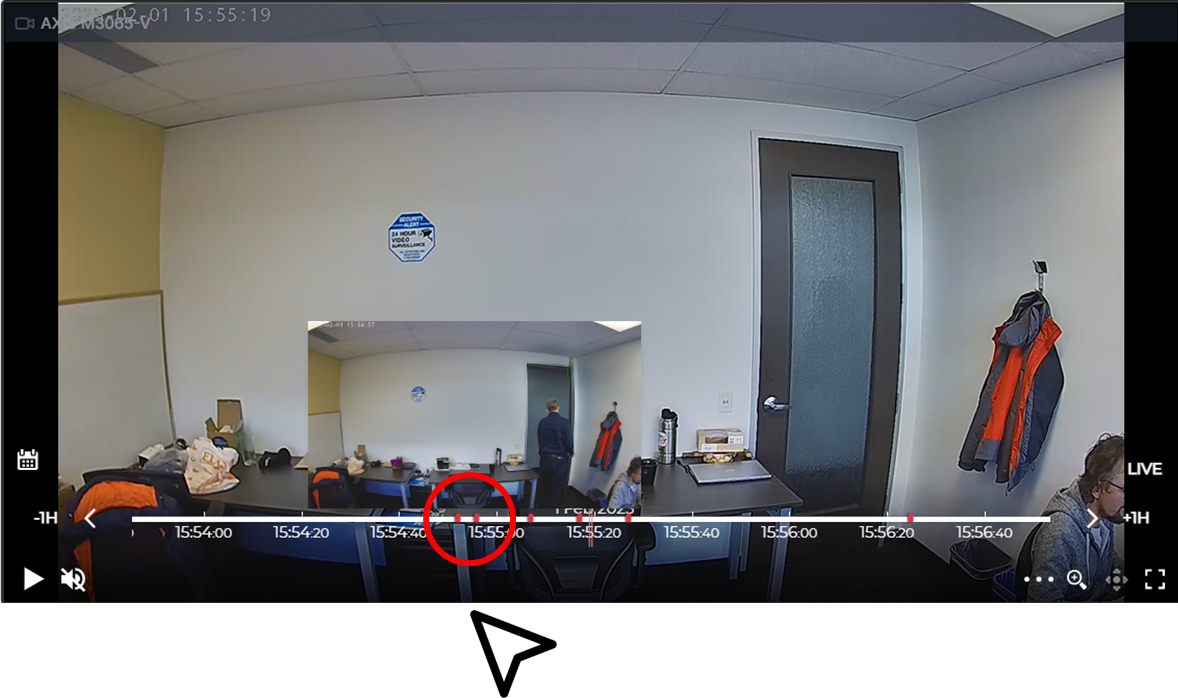
Motion Marks on the Timeline
-
The timeline highlights motion detection events.
-
Hover over a motion mark to preview snapshots.
Upper Menu Options

-
Manual SD card backup
-
Take a snapshot.
-
Extract a clip and store it in the Archive (Recorded mode only).
-
Create a time-lapse.
-
Switch to full-screen mode.
-
Toggle between live and recorded video.
Manual SD card backup
The camera must have continuous recording to the SD card enabled.
If video was not recorded to cloud storage due to a network failure, it can be recovered from the camera’s SD card.
The maximum duration that can be recovered in a single operation is 1 hour.
The maximum backup speed is 8× real-time.
Note:
This operation consumes additional network bandwidth. Higher backup speeds require proportionally more bandwidth.
For example, selecting 8× speed will consume approximately eight times the bandwidth of a standard live video stream.
Identify a time interval where no cloud recordings are available.
Click the SD card icon. Select the start time, end time, and backup speed, then click Start New Backup.
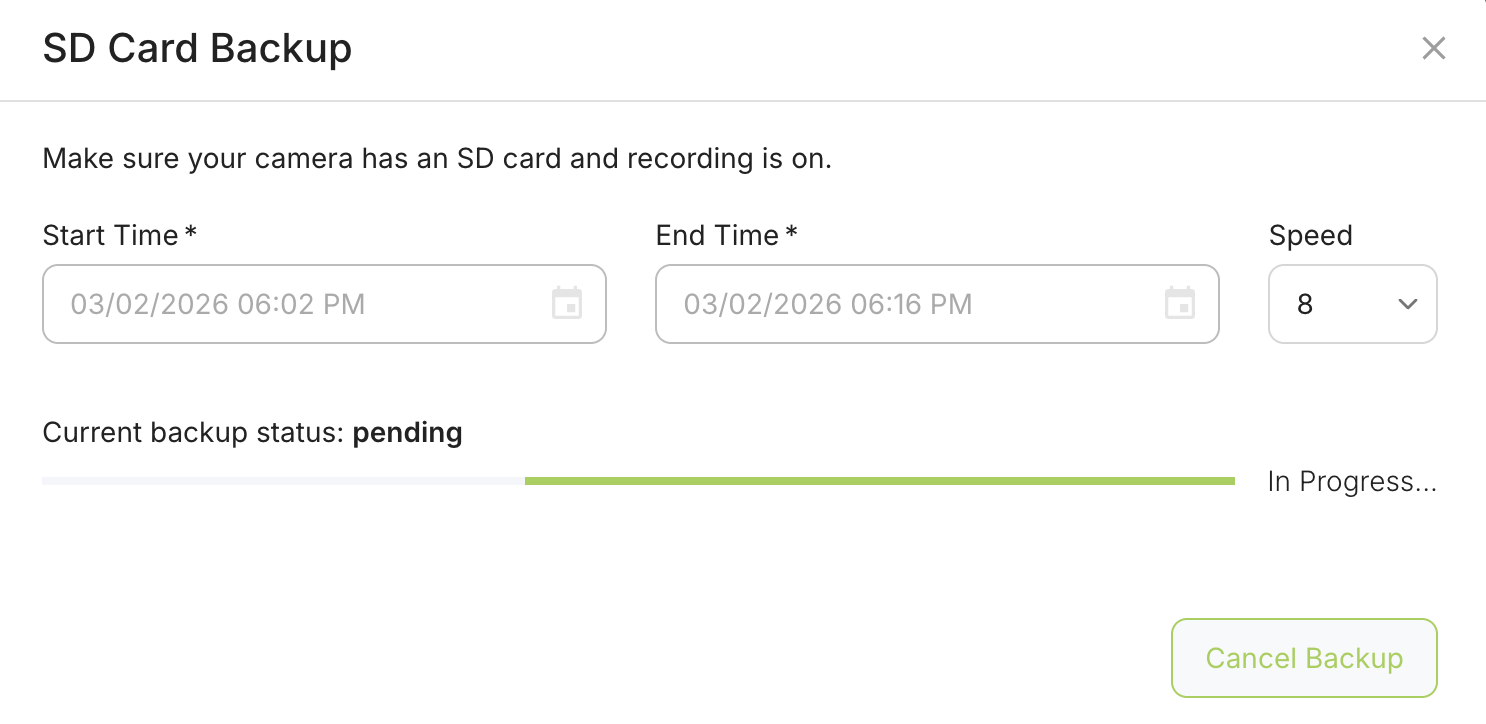
ou may close the dialog box after starting the backup. To check the backup status, click the SD card icon again. When the process is complete, the status will display Done.
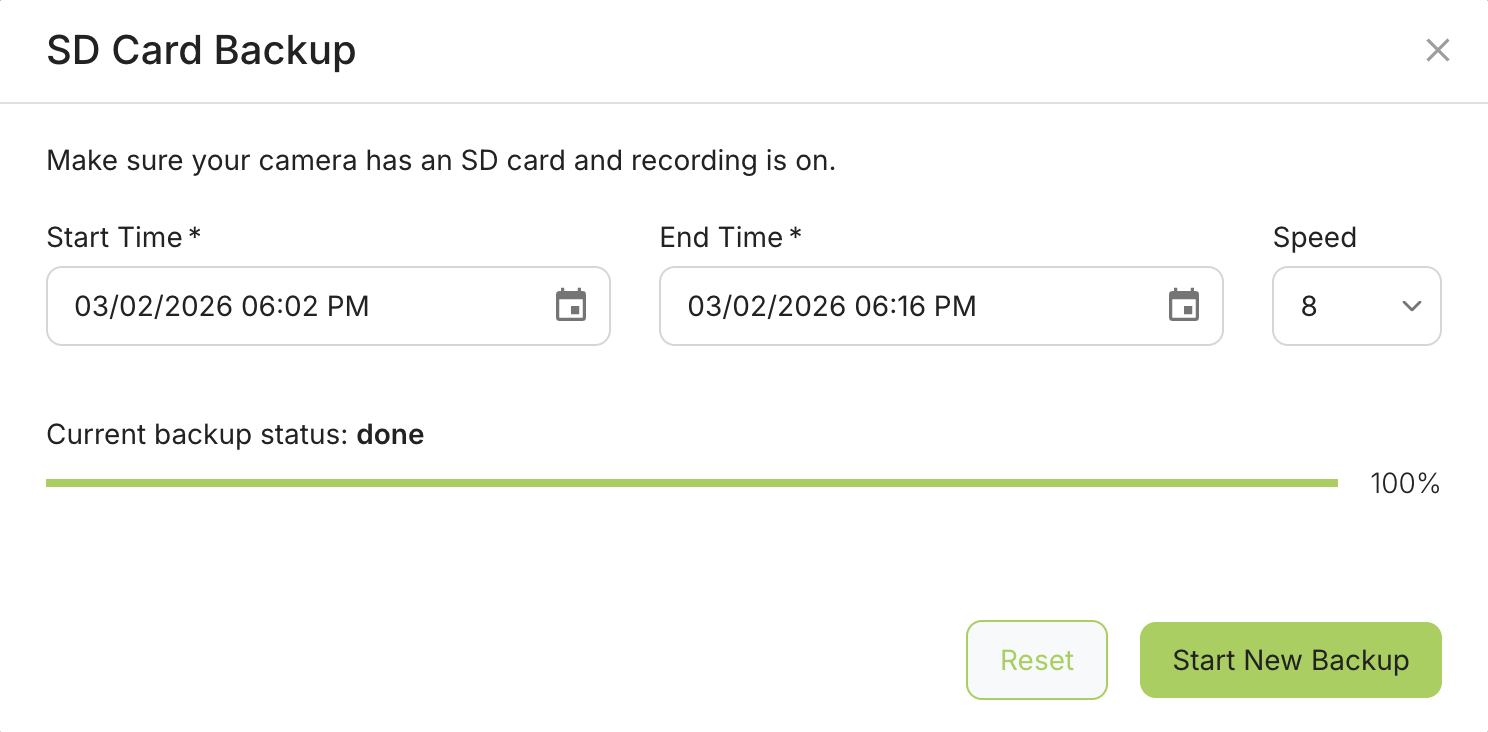
Click Reset to clear the backup state in the interface.
After the backup is completed, the timeline will be populated with the recovered recordings.
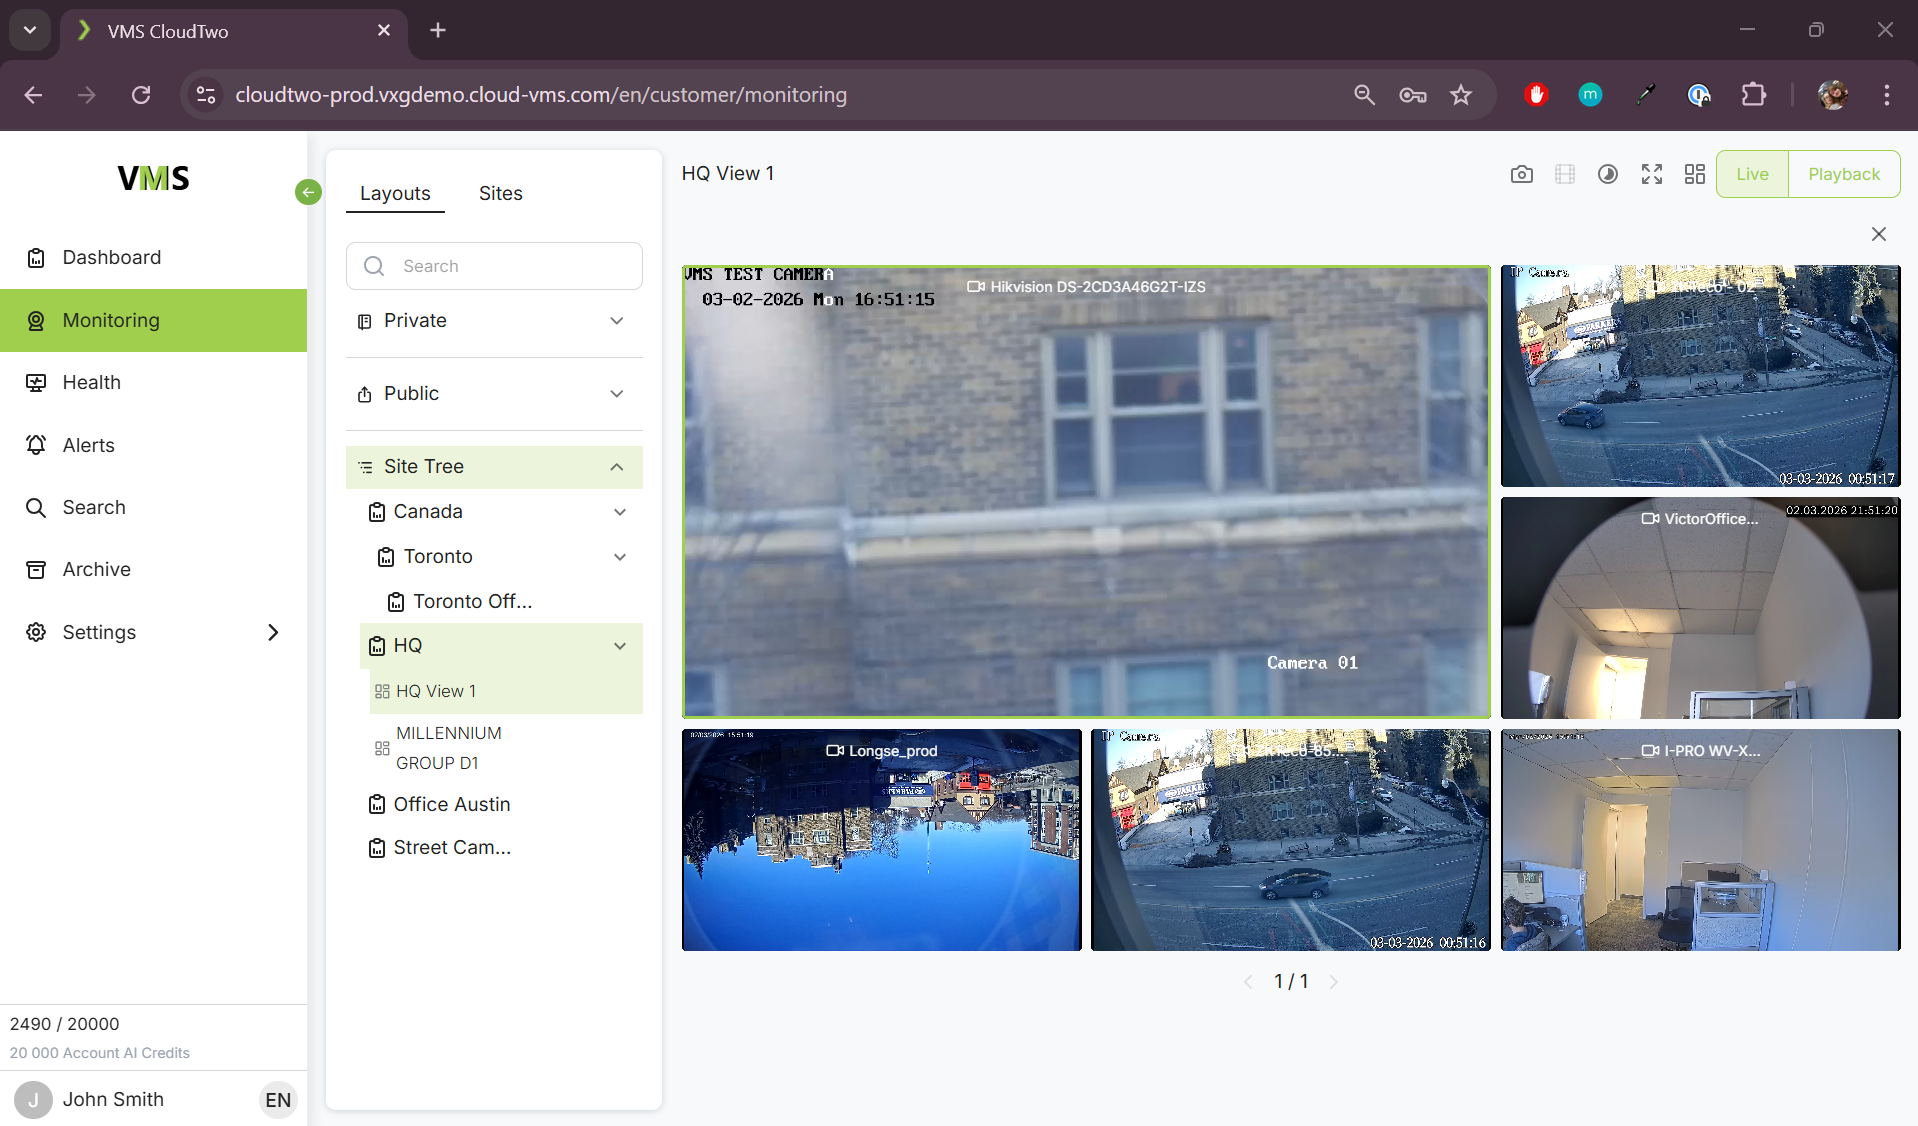
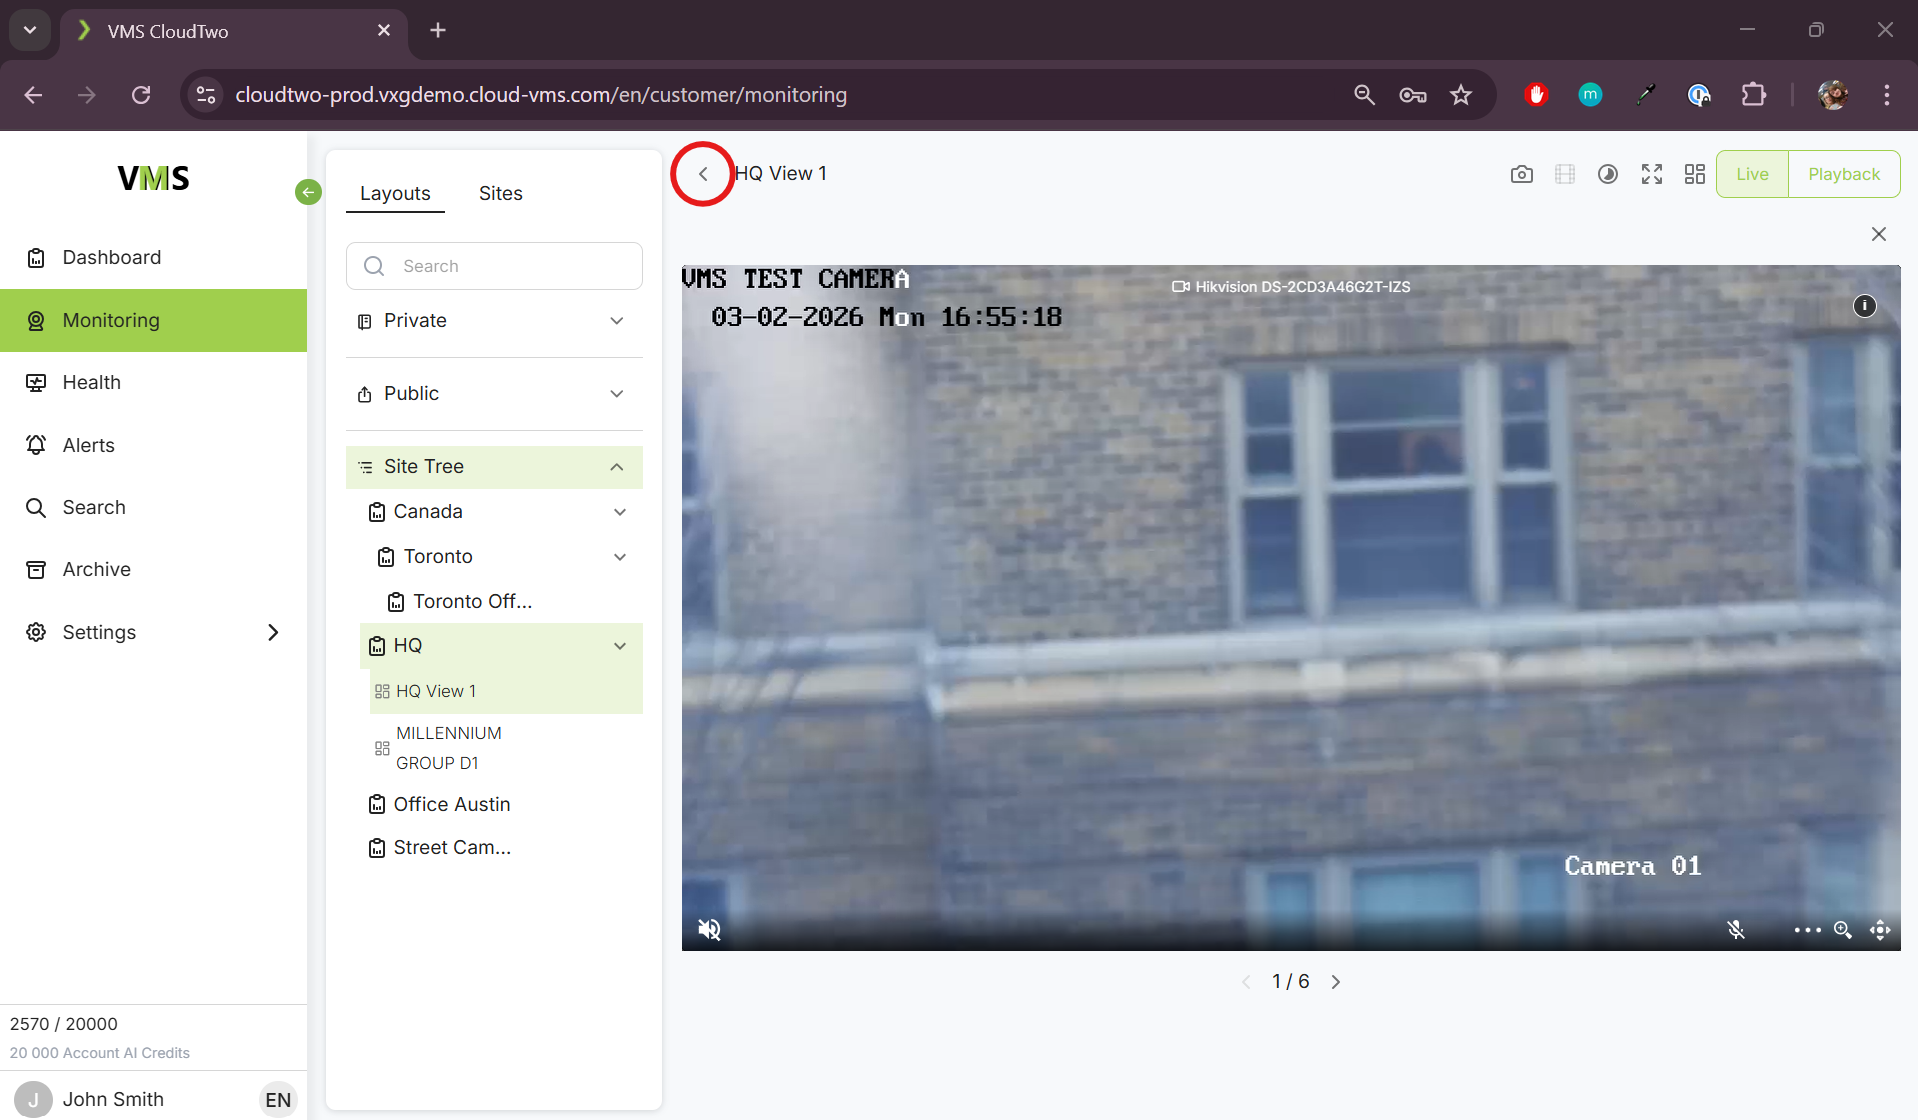
Multi-Camera Mode
-
Select a display to view cameras in a previously saved layout.
-
Double-click any camera to enter single camera mode.
-
Click the "<" button to return to multi-camera mode.
Recorded Mode in Multi-Camera View
-
Scaling – Change timeline scale using the mouse wheel over the left side of the timeline.
-
Scrubbing – Scroll through recordings using the mouse wheel over the right side of the timeline.
-
Dragging – Click and drag the timeline left or right to play video frame-by-frame.