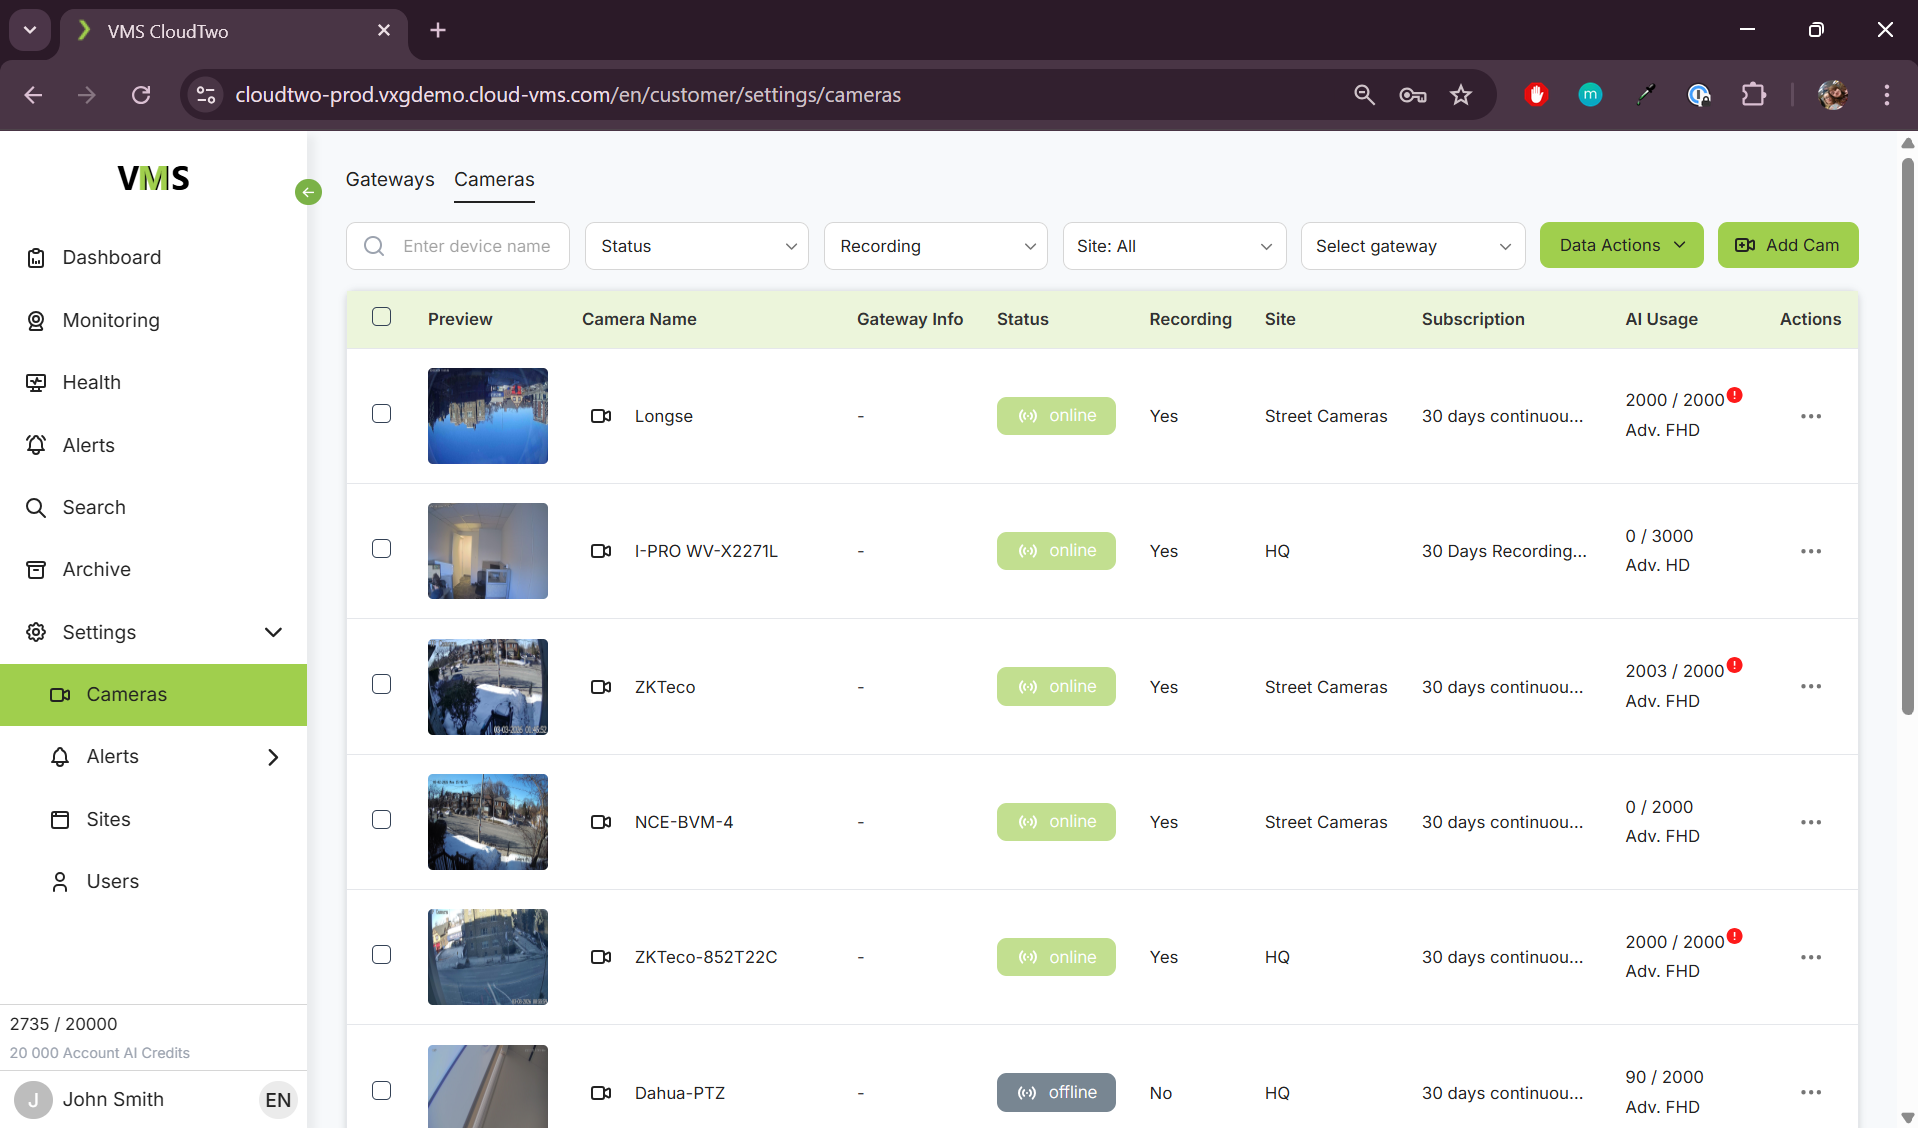
The Cameras page provides a list of all connected cameras and gateways, displaying key details and management options.
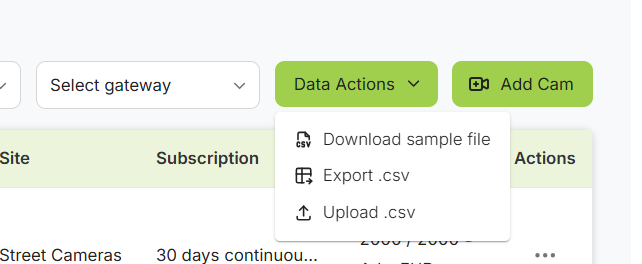
Data Actions
There are 3 data actions you can perform on all cameras
-
Download sample file - This downloads a CSV file that includes the structure and format needed when uploading your own bulk camera files
-
Export .csv - This exports the current camera data. If there are filters applied, this will download only information for cameras that fall within the defined filter
-
Upload .csv - This allows you to upload a csv file (in the format of the sample file you can download in the first option) so you can bulk upload multiple cameras at one time.
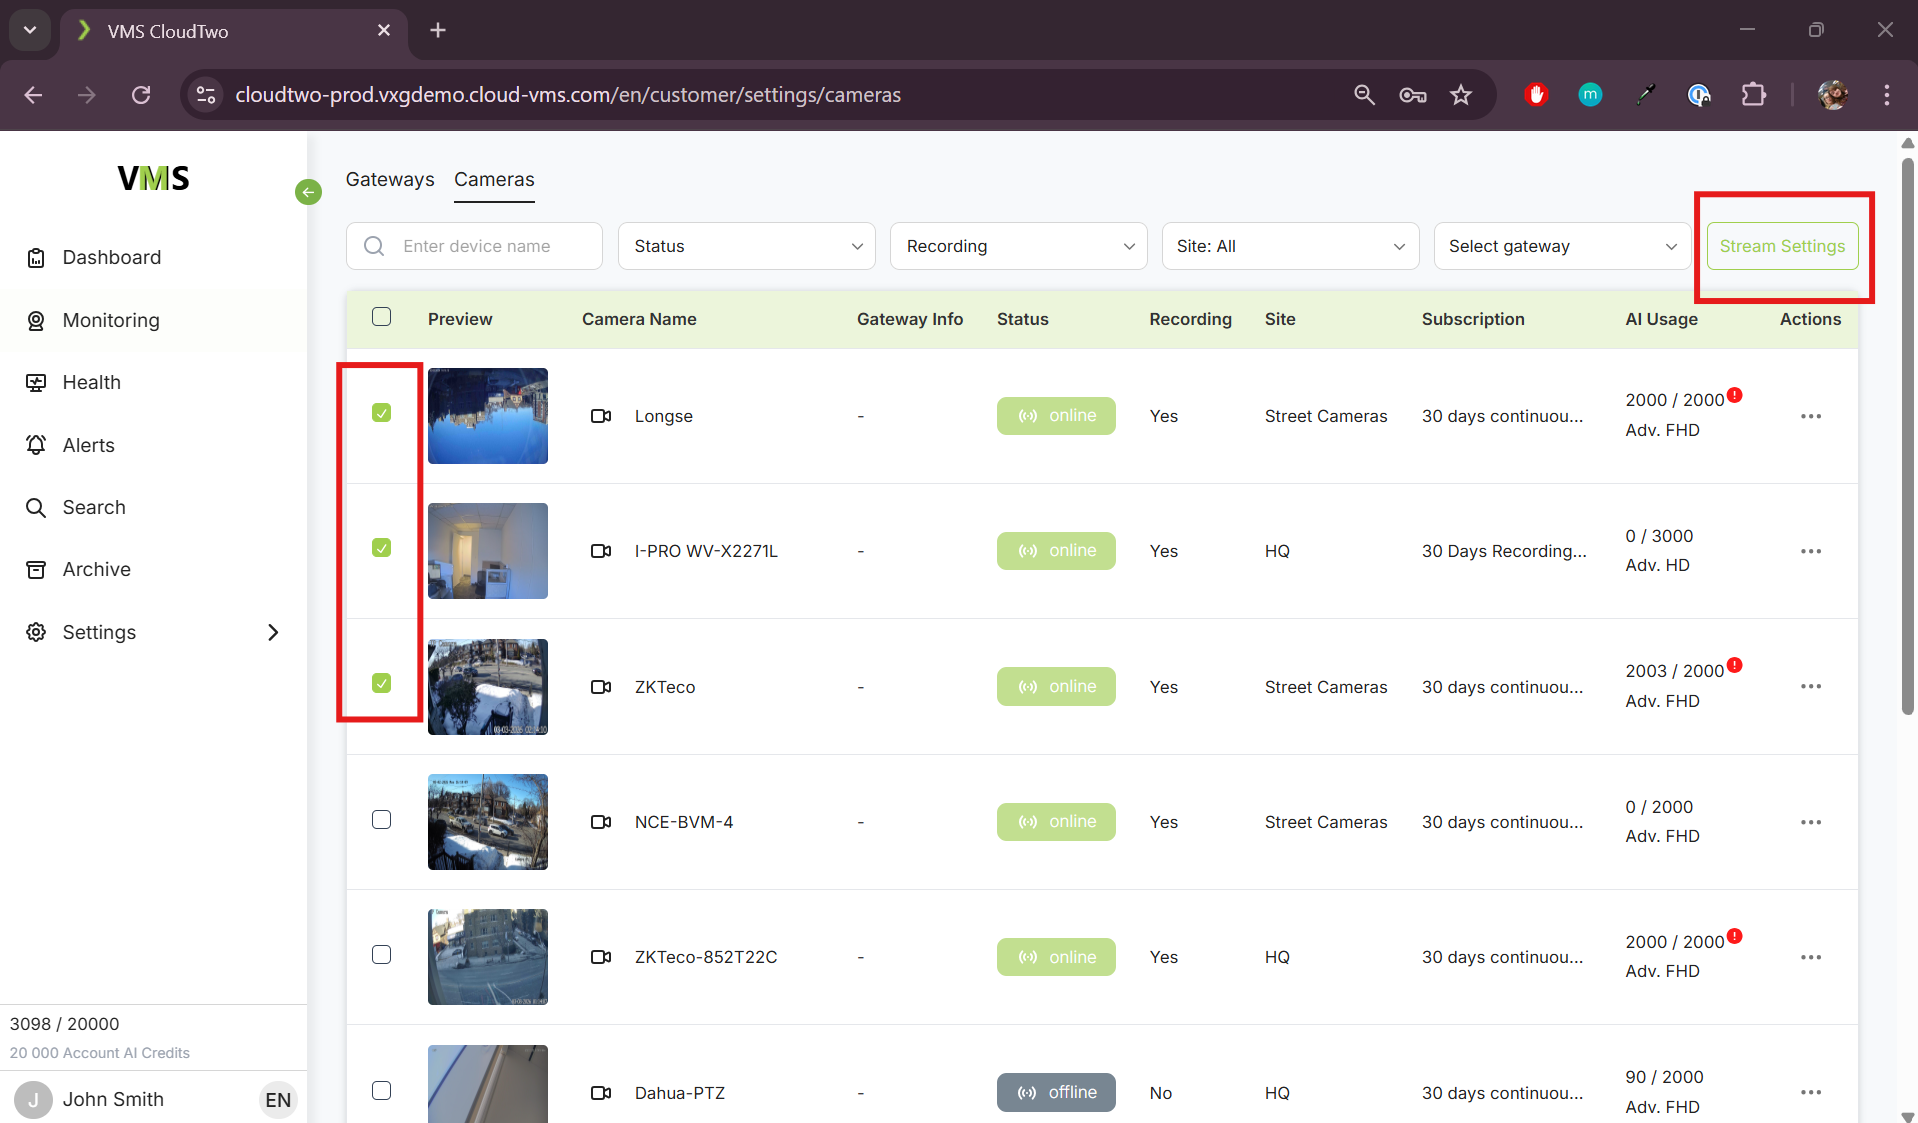
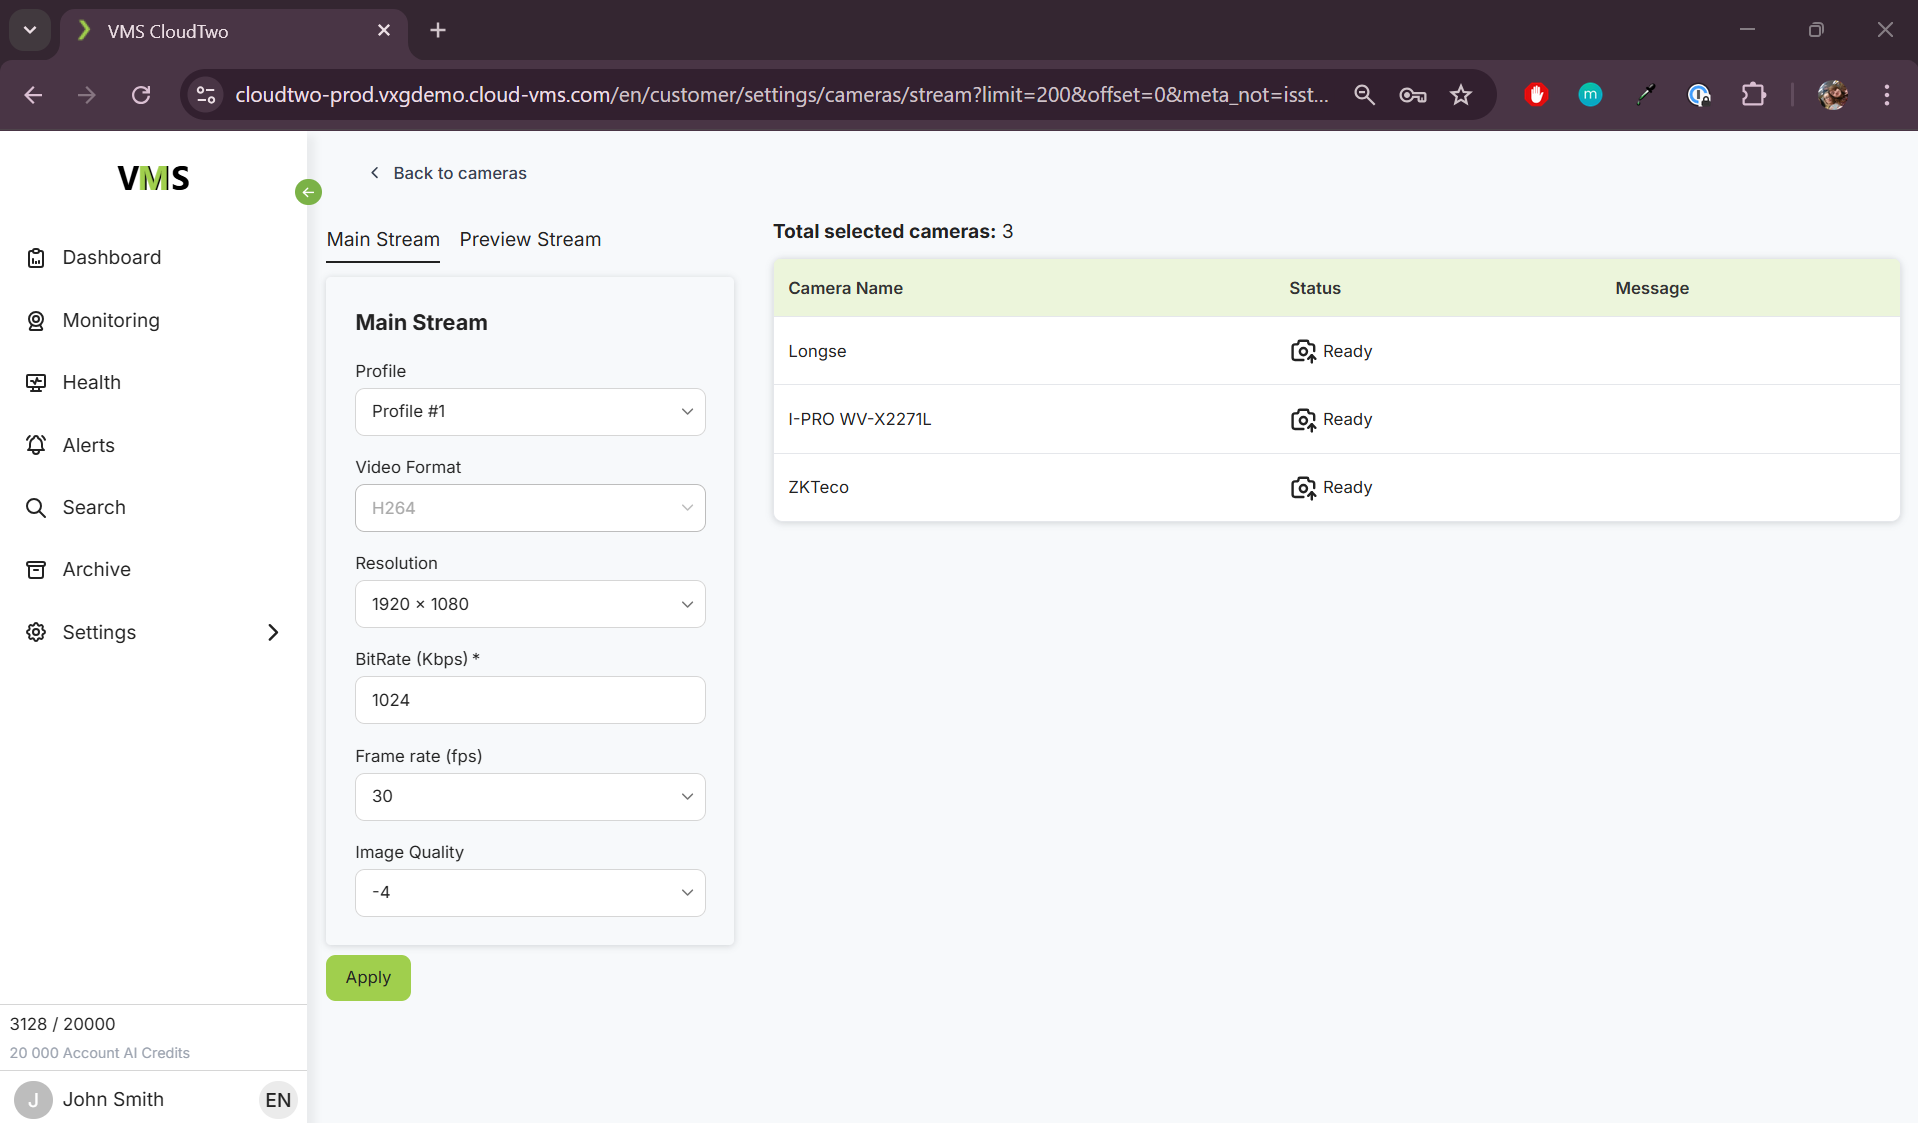
Multi camera select
Choosing multiple cameras with the checkboxes to the far left allows you to edit the stream settings for multiple cameras. This way you can set the same stream settings for multiple cameras at once.
Camera Information
For each camera, you can view:
-
Thumbnail
-
Name
-
Gateway information (when applicable)
-
Connection Status (Online/Offline)
-
Recording Status (Active/Inactive)\
-
Site (Location of the camera)
-
Subscription Plan
-
AI Credit Usage
-
Actions Menu
Camera Actions
The Action Menu allows you to:
-
Adjust Streaming Settings
-
Access the Camera Web UI
-
Modify Camera Settings
-
Remove the Camera
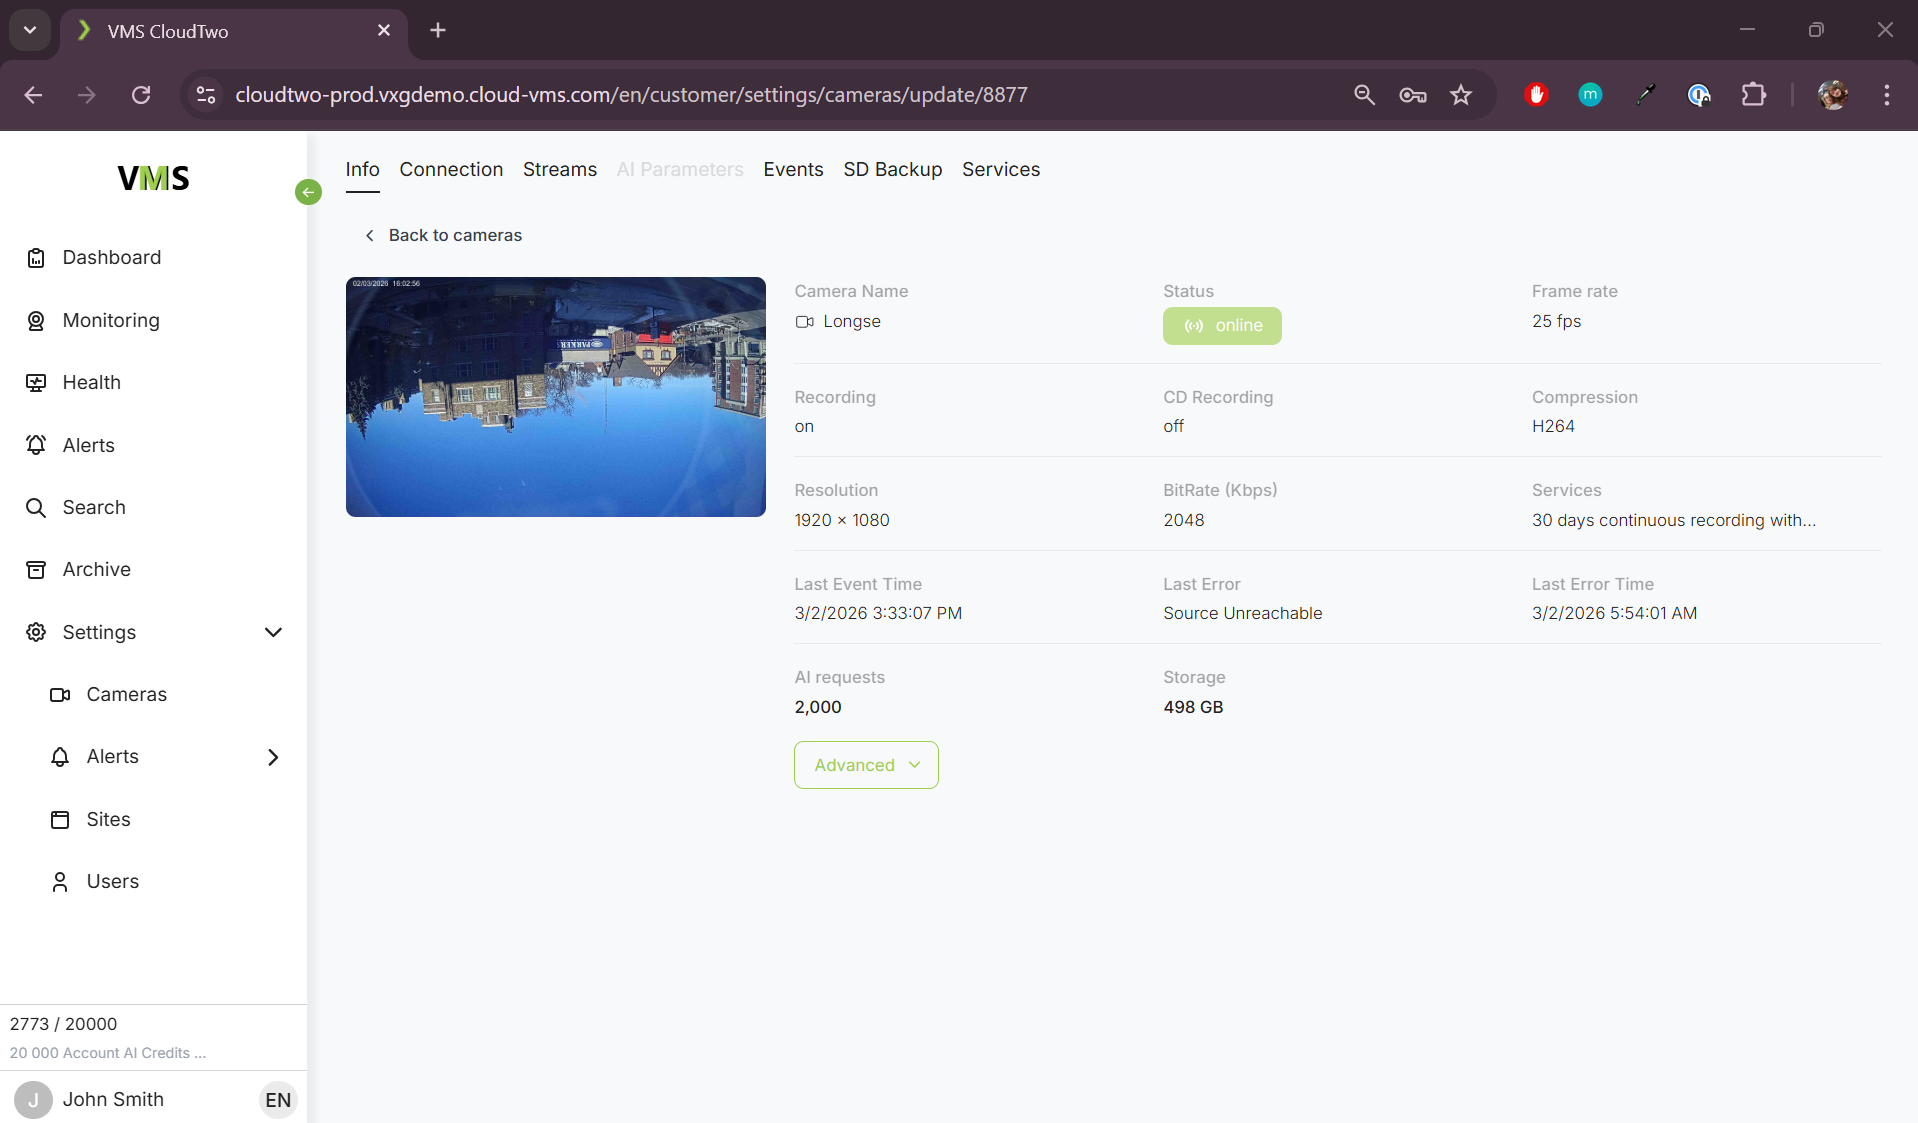
Camera Settings
The Camera Settings page consists of five tabs, each providing specific configuration options for managing your camera.
Tabs Overview
-
Info
-
Displays key details about the camera, including its name, model, and location.
-
The “Advanced” button shows information key for debugging such as camera ID and access token.
-
-
Connection
-
Configure camera connection parameters, such as:
-
IP address and ports (for network-connected cameras).
-
Serial Number (S/N) and MAC address (for Uplink cameras).
-
-
-
Streams
-
Adjust video encoding parameters, including:
-
Resolution
-
Frames per second (FPS)
-
Bitrate
-
-
-
AI Parameters
-
Allows you to choose between Advanced, Pro and Lite as well as HD or FHD as the model/resolution of AI to be used by default for this camera.
-
The tab is disabled when the camera has no AI plan attached, or has hit the maximum usage for it’s assigned plan
-
-
Events
-
Map ONVIF Profile S and M events to standard event names for easier identification.
-
-
SD Backup
-
Enables auto backups from the SD card for this camera.
-
-
Services
-
Manage virtual plans assigned to the camera, such as:
-
"30 Days Recording"
-
"30 Days Recording with AI"
-
-
When a camera runs out of AI credits - unassign the current AI plan, either to a new one with a different number of AI credits, or assign “No Plan” and then assign the previous plan again. the system keeps track of the usage on every plan and when reassigning will choose the plan with the lowest current usage. However, if all plans of a certain type already have 100% usage, you will not have any fresh plans to choose from. In this case you need to contact the admin user to assign new fresh plans.
-
Adding a New Camera
To add a new camera, follow the three-step setup wizard after clicking the "Add Cam" button.
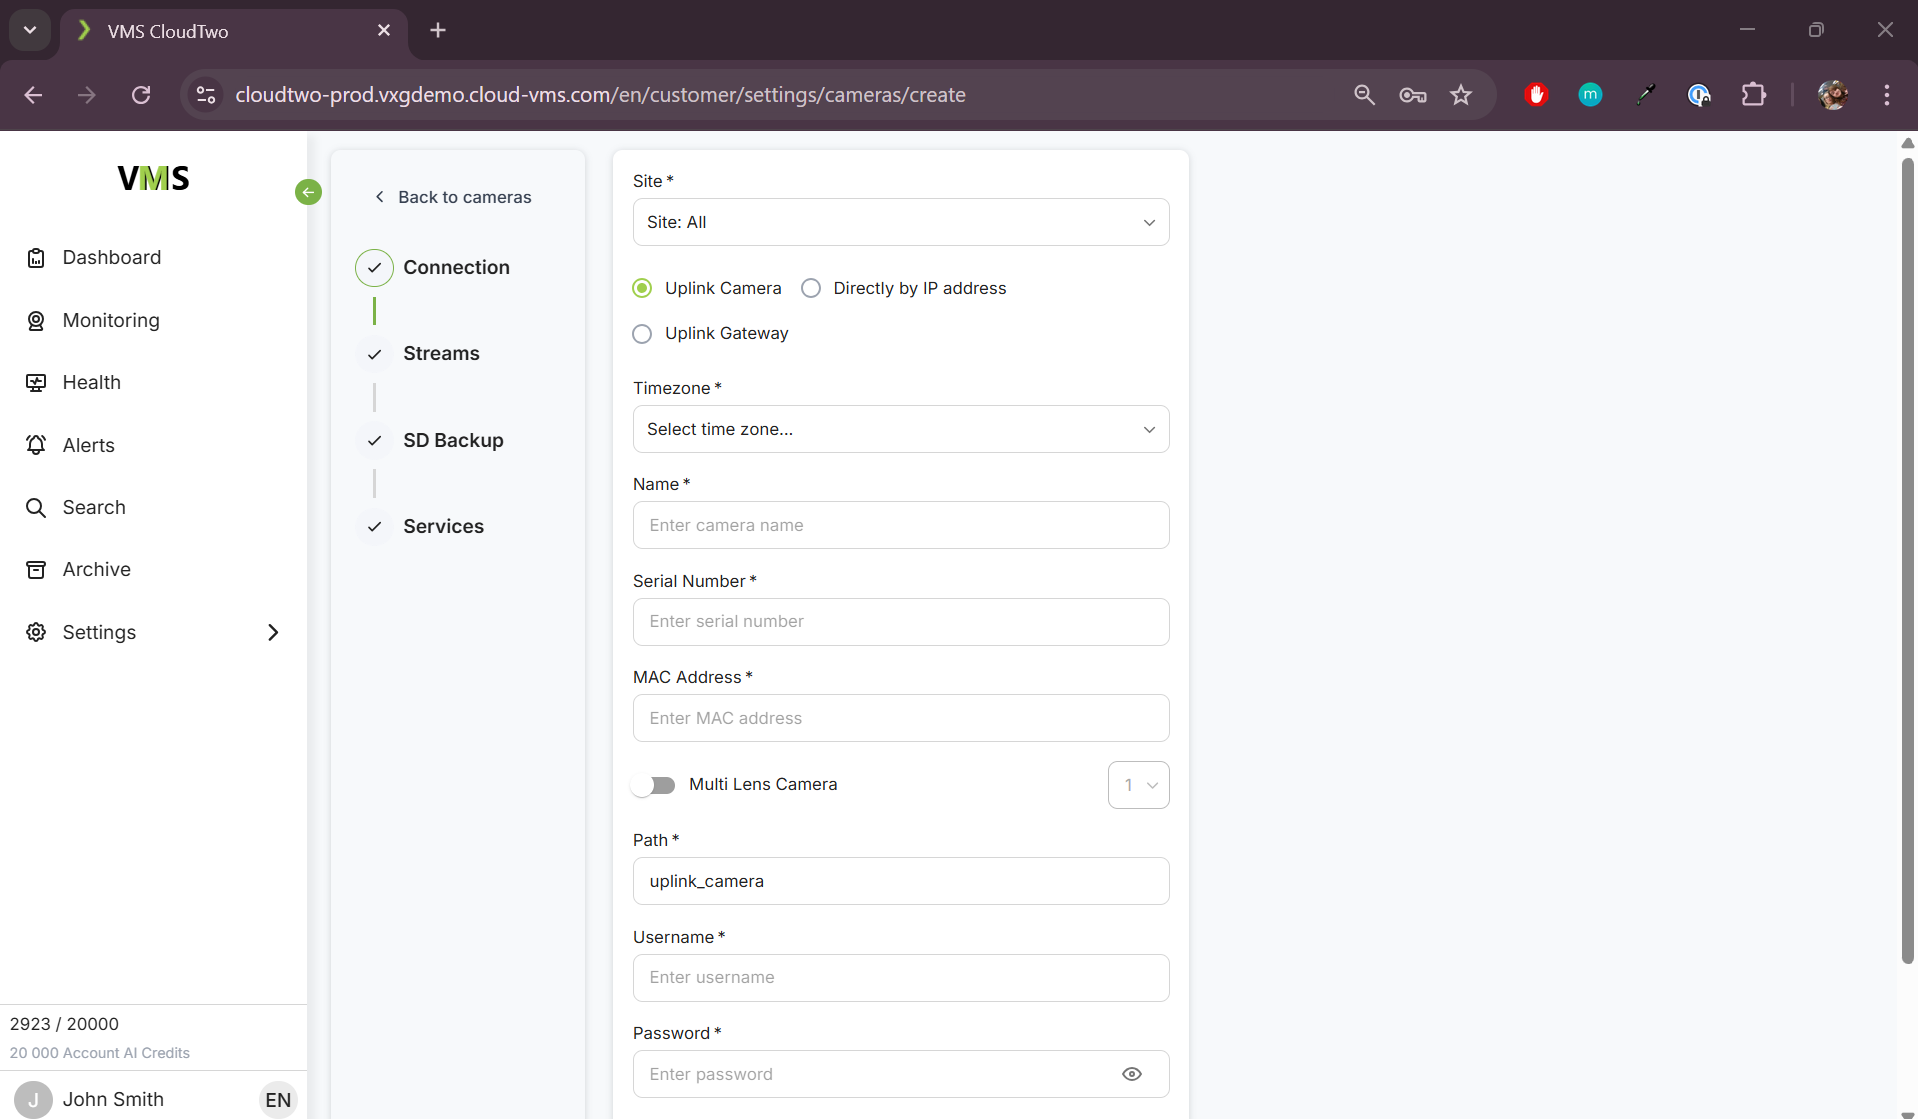
Step 1: Enter Connection Parameters
Depending on the camera type, enter the required details:
Uplink Cameras

Please note that all letters in the S/N and MAC address must be capitalized
-
Serial Number (S/N)
-
MAC Address
-
Username and Password (if the camera has a dedicated ONVIF user, then use its credentials)
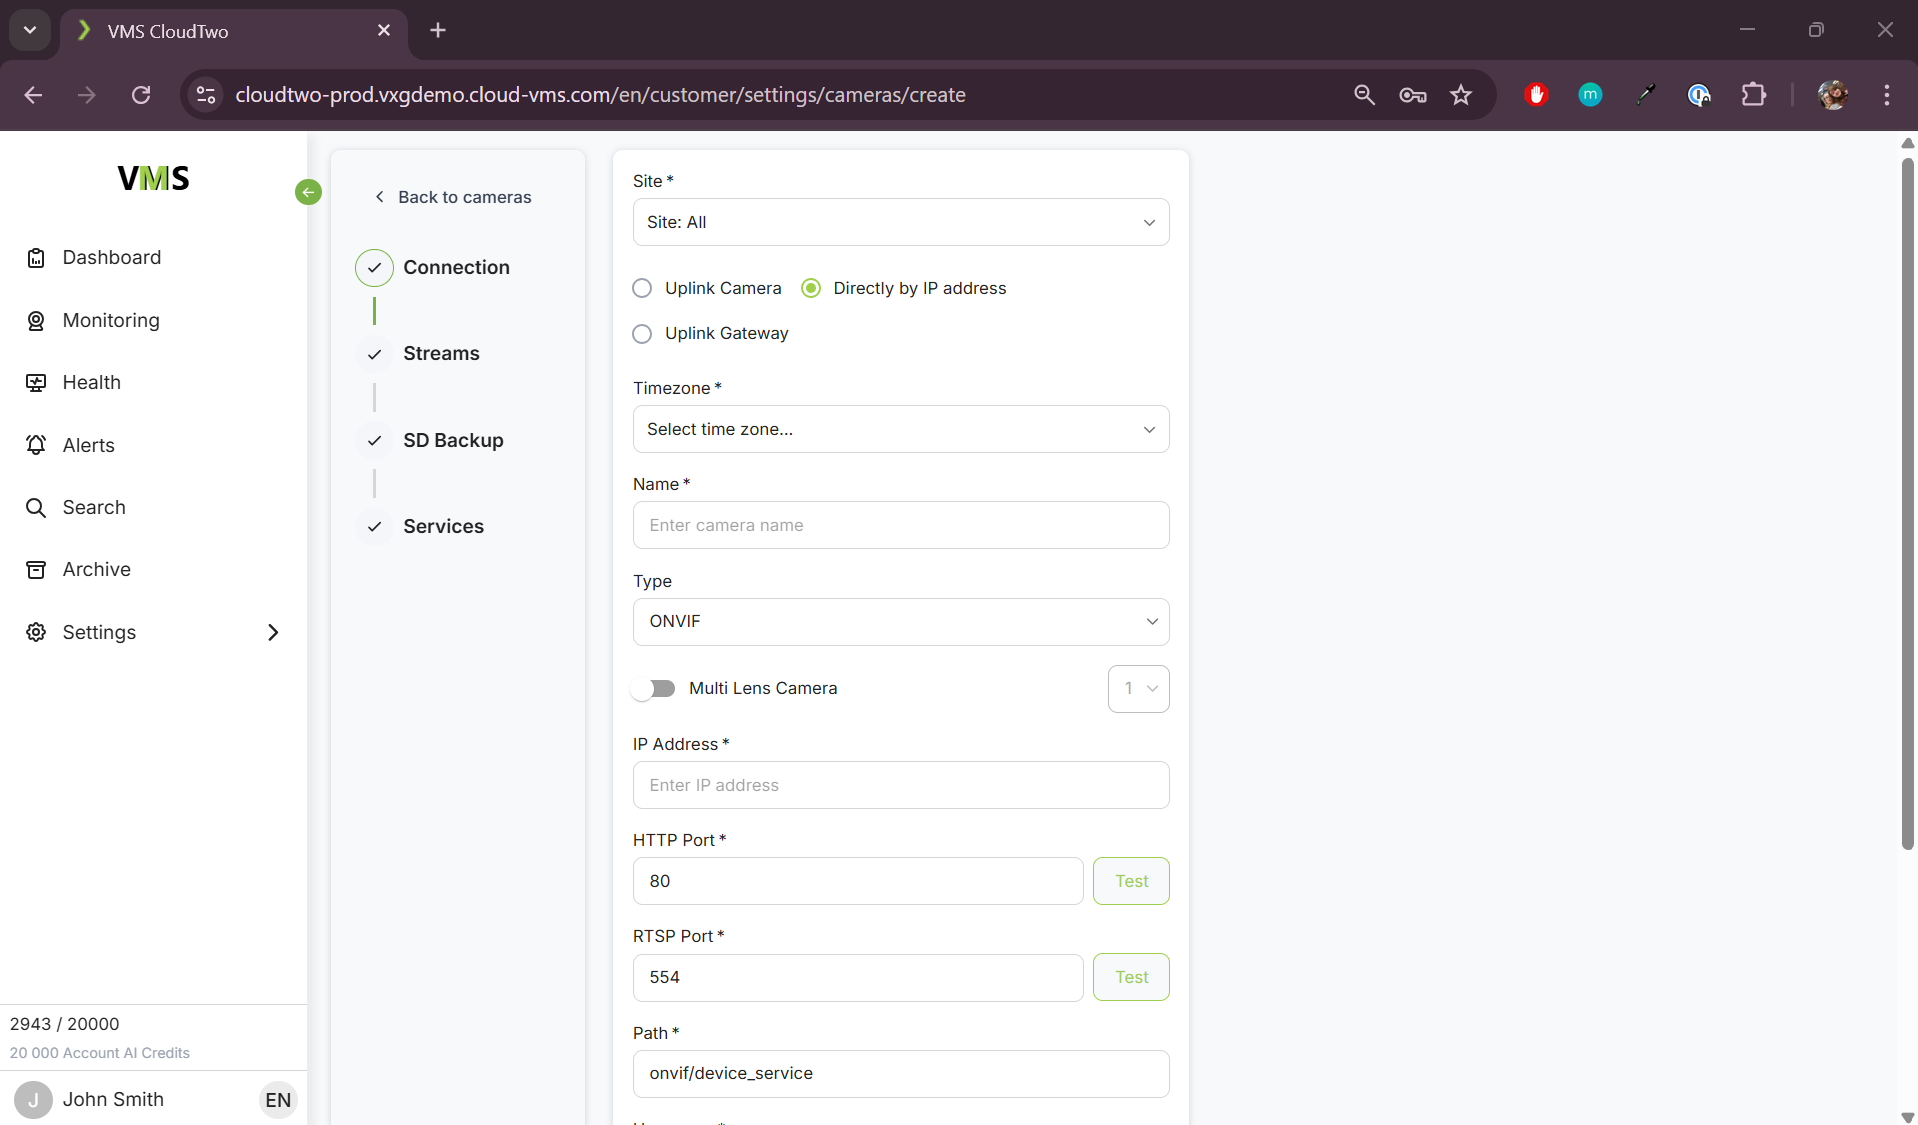
Direct IP Cameras
-
IP Address or Domain Name
-
HTTP Port
-
RTSP Port
-
Username and Password (if the camera has a dedicated ONVIF user, then use its credentials)
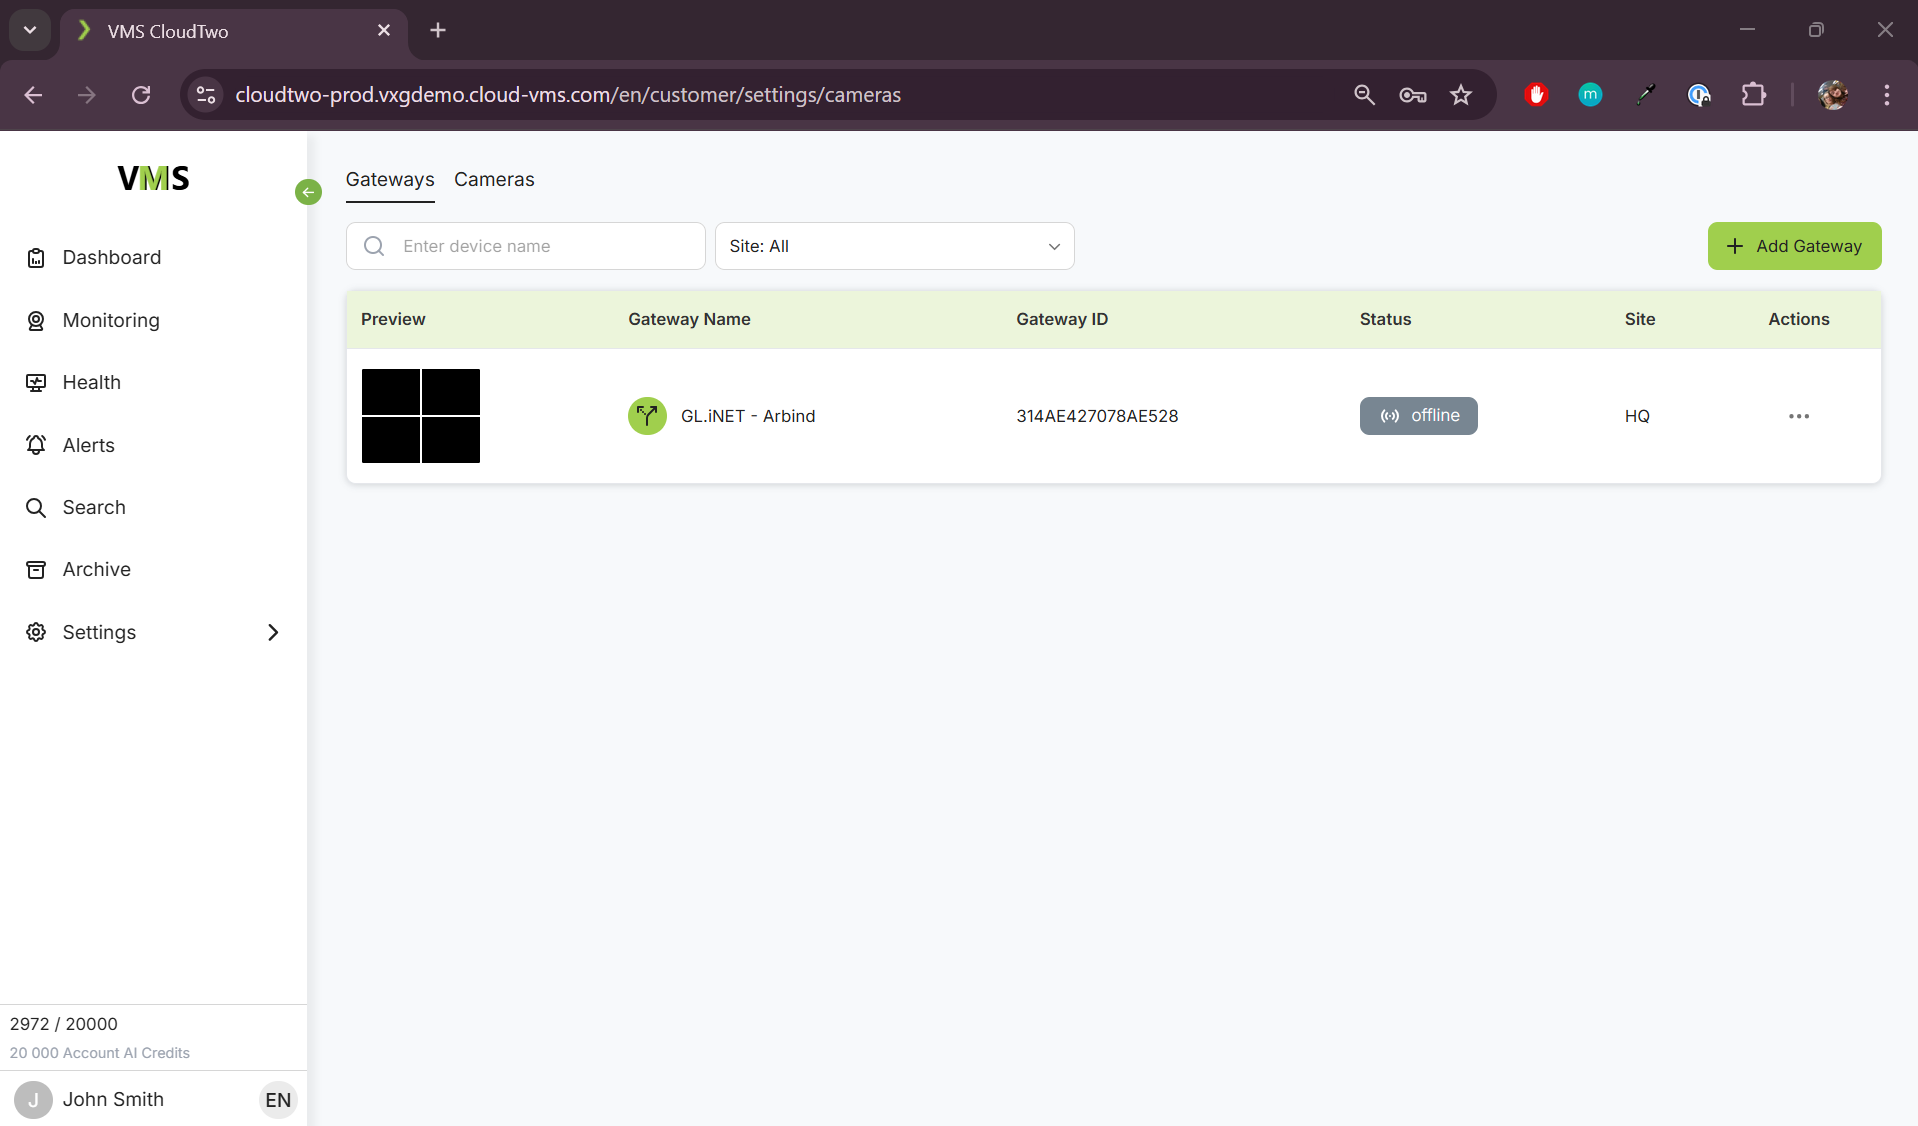
Uplink Gateway
Existing Gateway
If the gateway is already connected, then select a Gateway
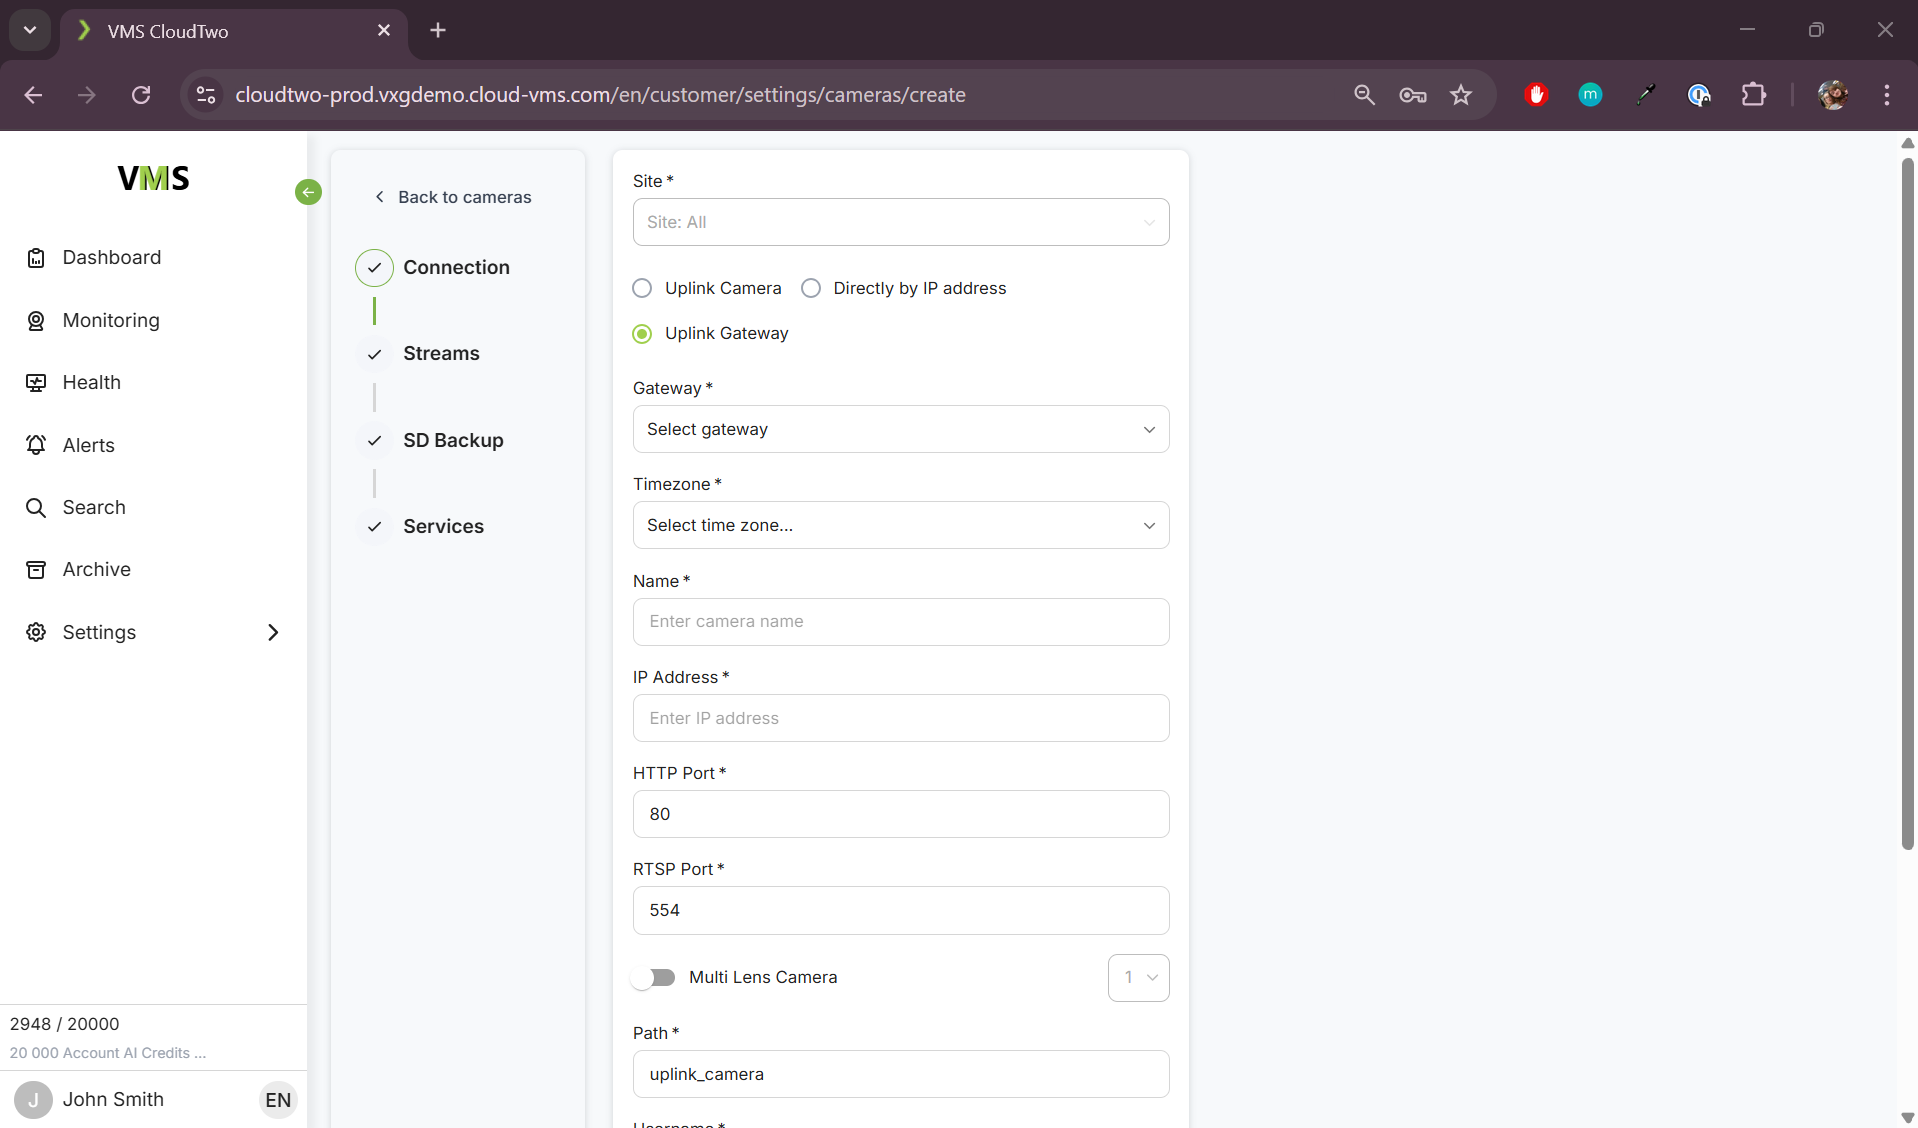
and then enter the local IP address and ports of the camera that is in the same network with the Gateway:
-
Local IP Address
-
HTTP Port (usually 80)
-
RTSP Port (usually 554)
-
Username and Password (if the camera has a dedicated ONVIF user, then use its credentials)
New Gateway
Add a new Gateway by clicking on “Add Gateway” button.
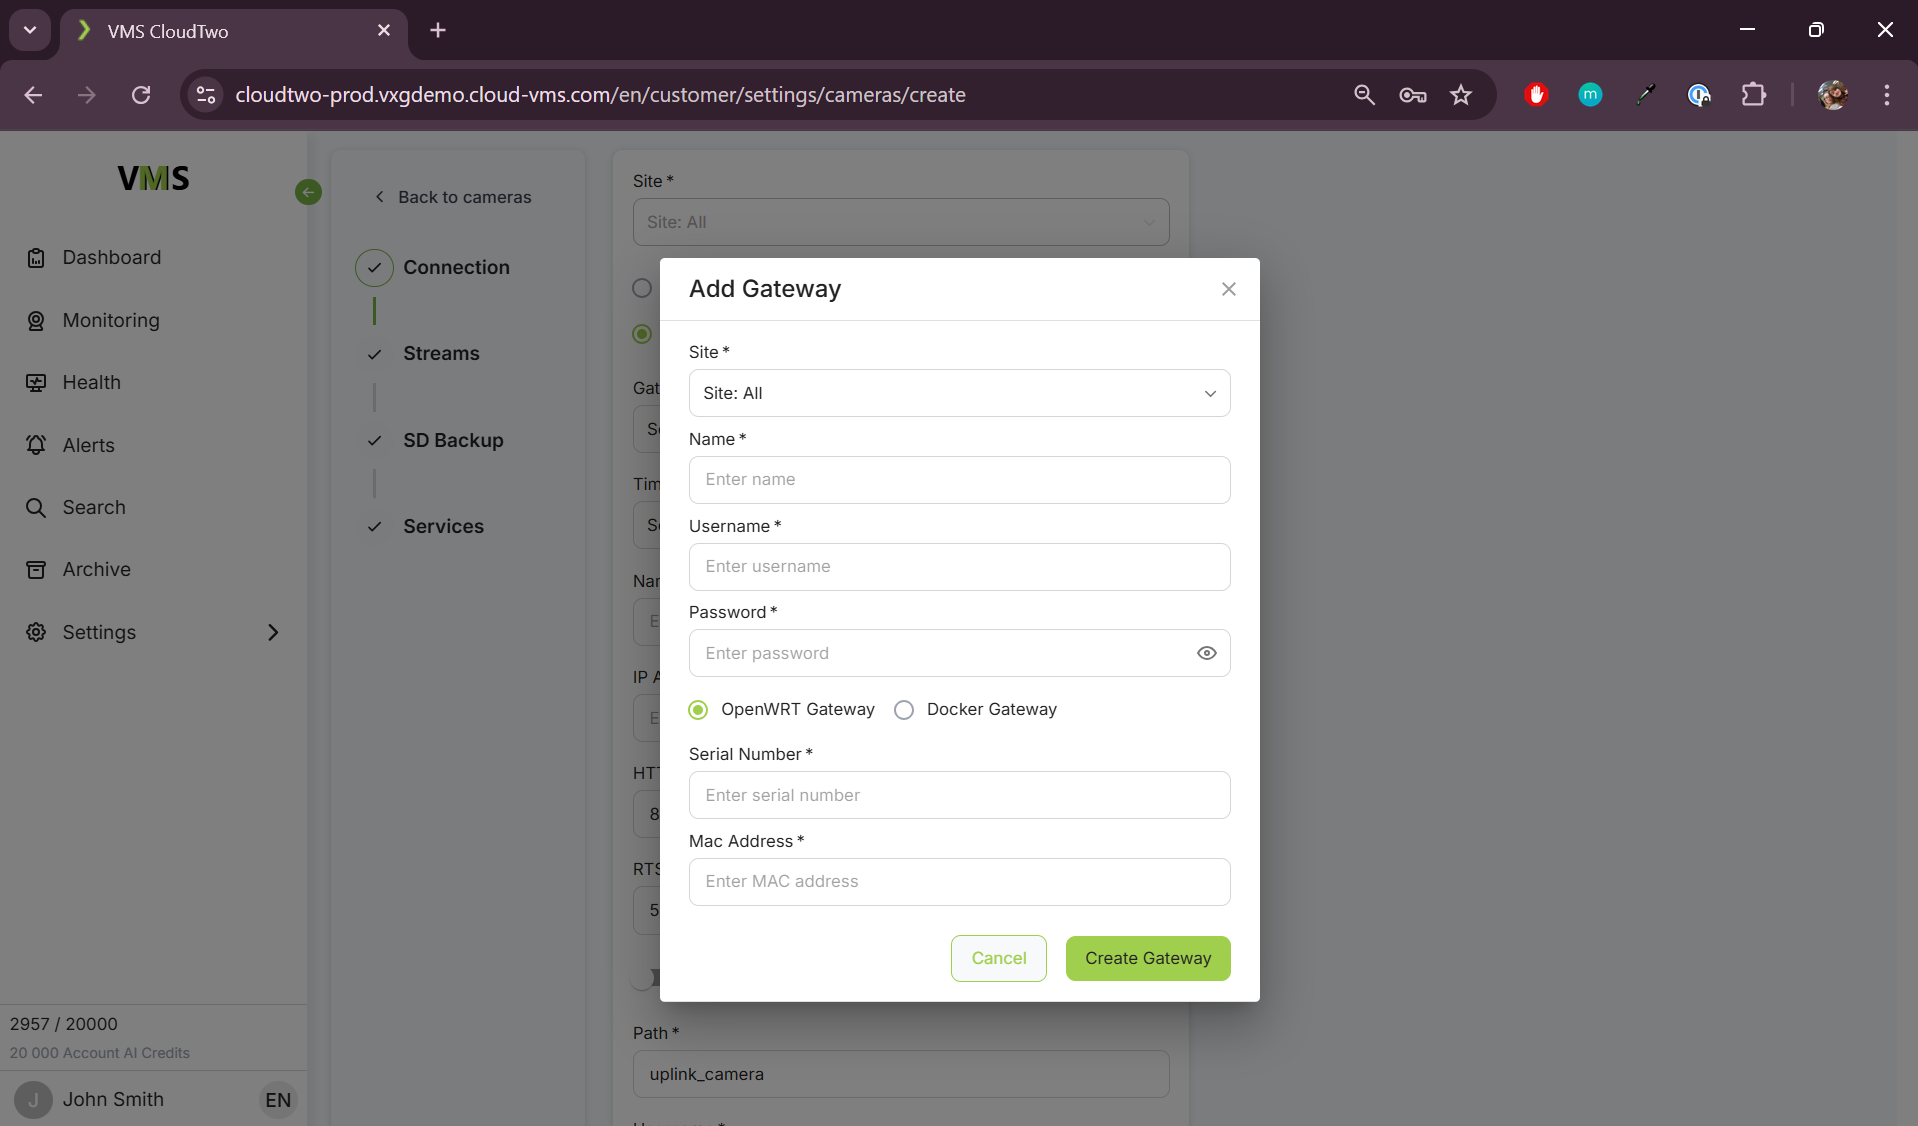
For OpenWRT Gateways enter the following:
Please note that all letters in the S/N and MAC address must be capitalized
-
Serial Number (S/N)
-
MAC Address
-
Gateway Username and Password
For Docker Gateways:
-
Gateway ID
-
Gateway Username and Password
Proceed with adding cameras as for the existing gateways.
Please note that it can take up to 1 minute for a new Gateway to become available
Step 2: Configure Stream Parameters
-
Select the desired:
-
Resolution
-
Frame Rate (FPS)
-
Bitrate
-
Step 3: Assign a Virtual Plan
-
Choose an available service plan, such as:
-
"30 Days Recording"
-
"30 Days Recording with AI"
-
Once completed, the camera will be added and ready for use.