
Docker Gateway
Download the Uplink Gateway package from here.
Windows Installation
Install Docker Desktop for Windows.
Download and unzip the Gateway package.
Open Powershell and go to your working directory.
If your system has Windows Subsystem for Linux (WSL) or Git installed you can start the application using the start script.
CODE./start.shOtherwise, run the following commands in Windows Powershell from the Gateway package directory.
CODE.\start.batThe Gateway should now be accessible from the address localhost:80 or <device-ip>:80
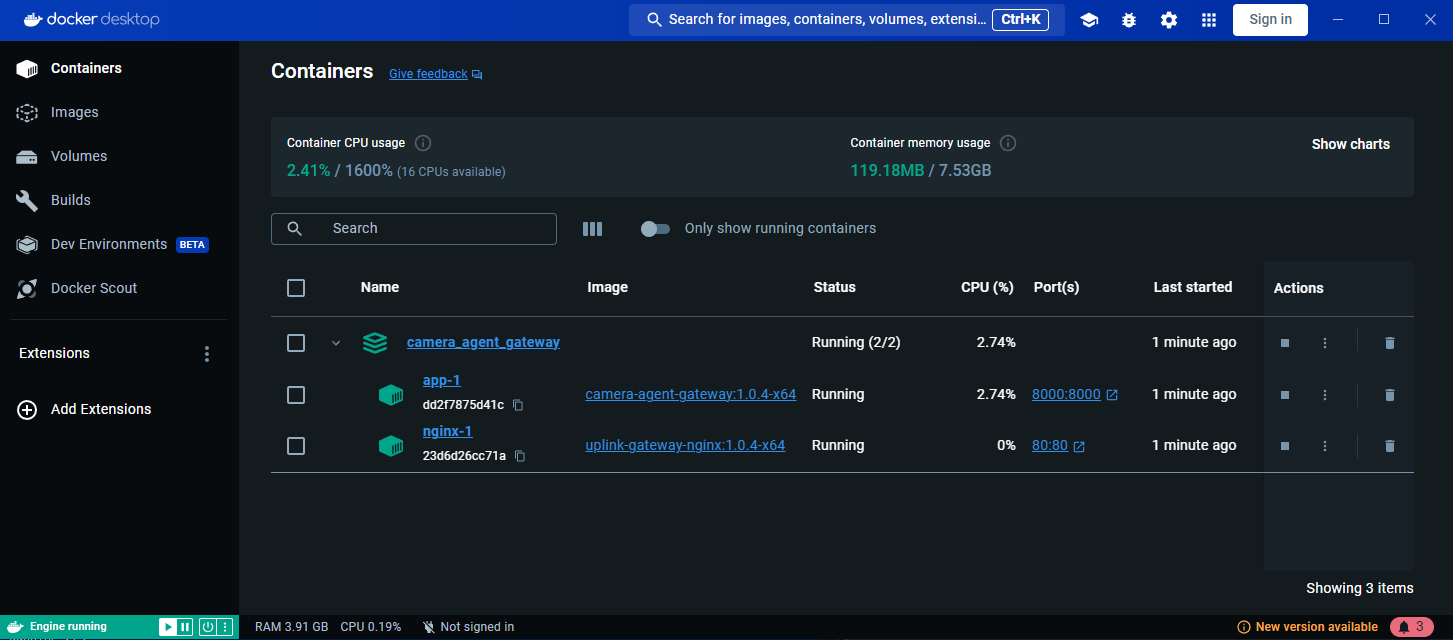
You should see the container running in your Docker Desktop
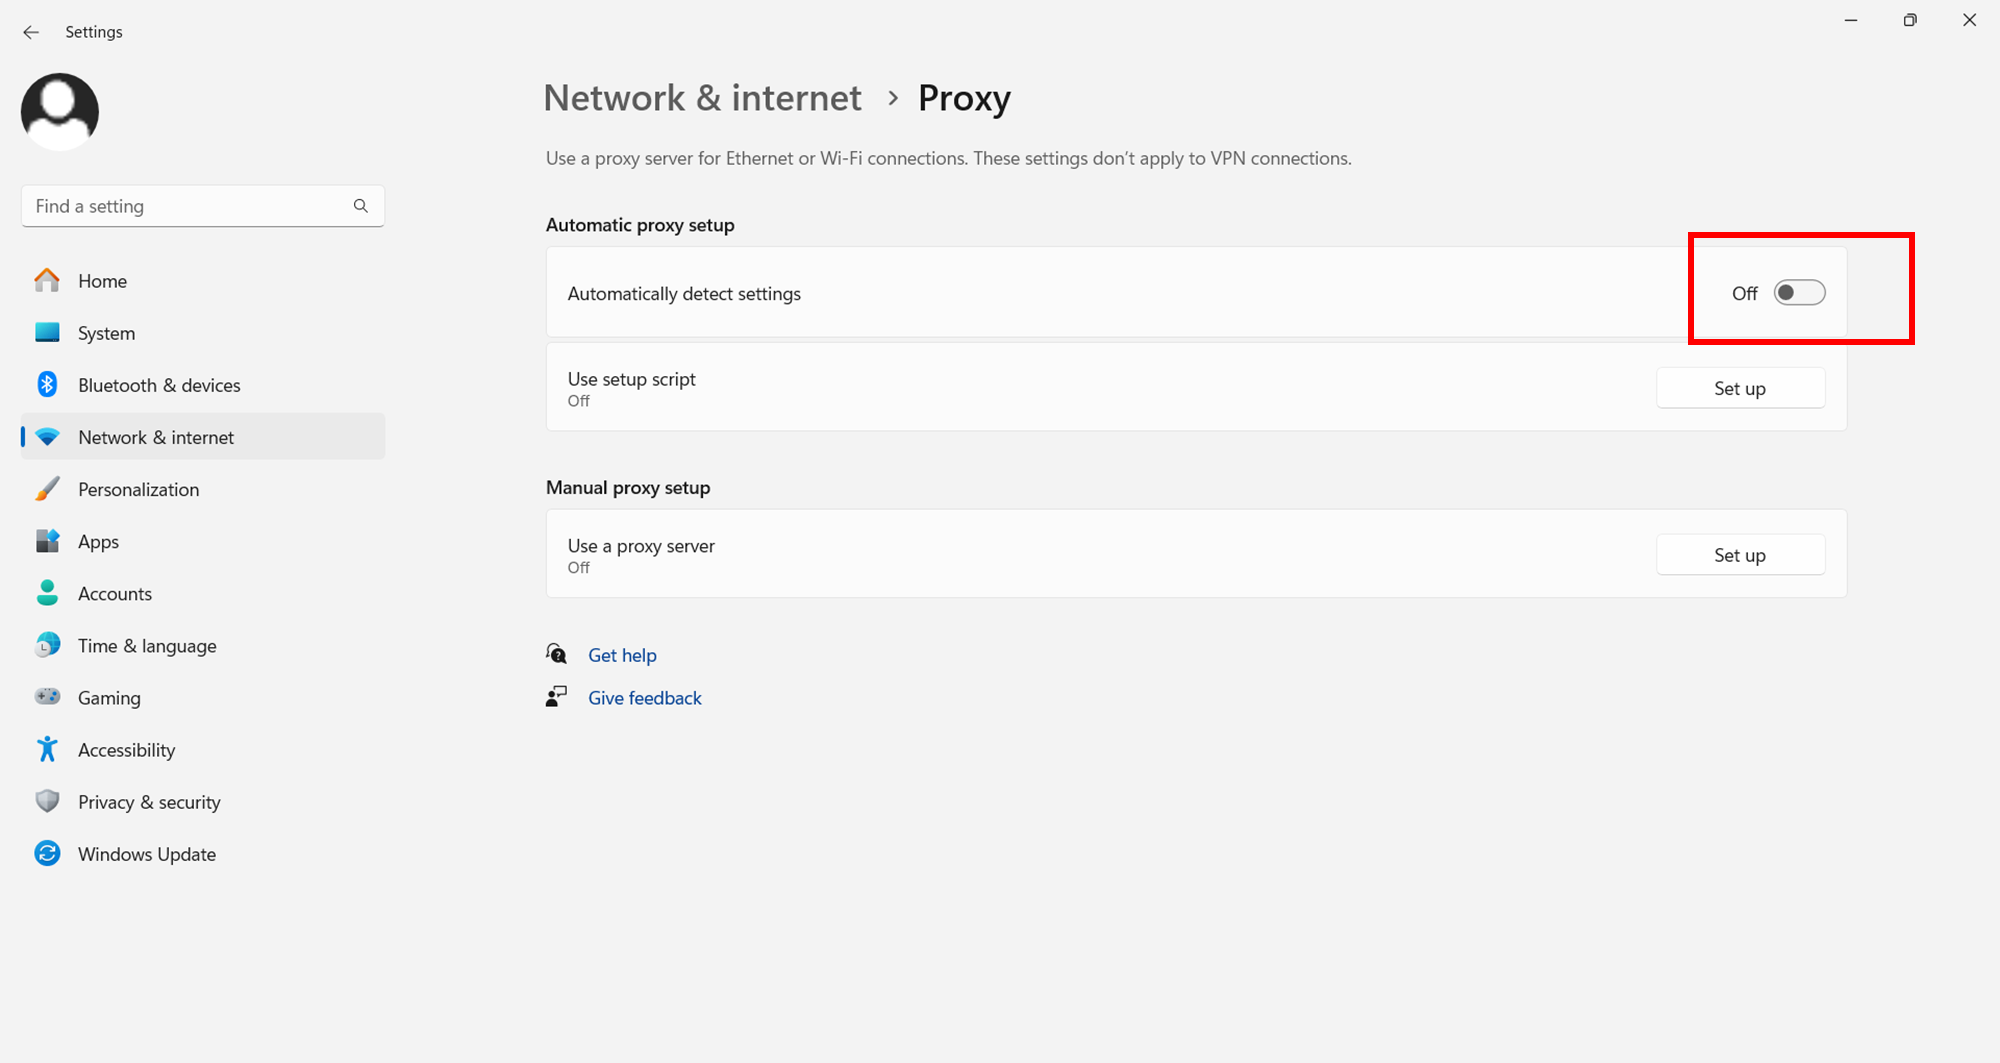
Disable Windows automatic service detection
Linux Installation
Download and unzip the Gateway package.
Install Docker Engine and Docker Compose.
Run the Gateway using the start script.
CODE./start.shThe script should automatically detect your system’s architecture.
If you have issues with this, the script can be run in the following was to enforce a specific architecture.CODE# For x64 arch ./start.sh x64 # For arm64 arch ./start.sh arm64The Gateway should now be accessible from the address localhost:80 or <device-ip>:80
Adding Gateway to the Cloud
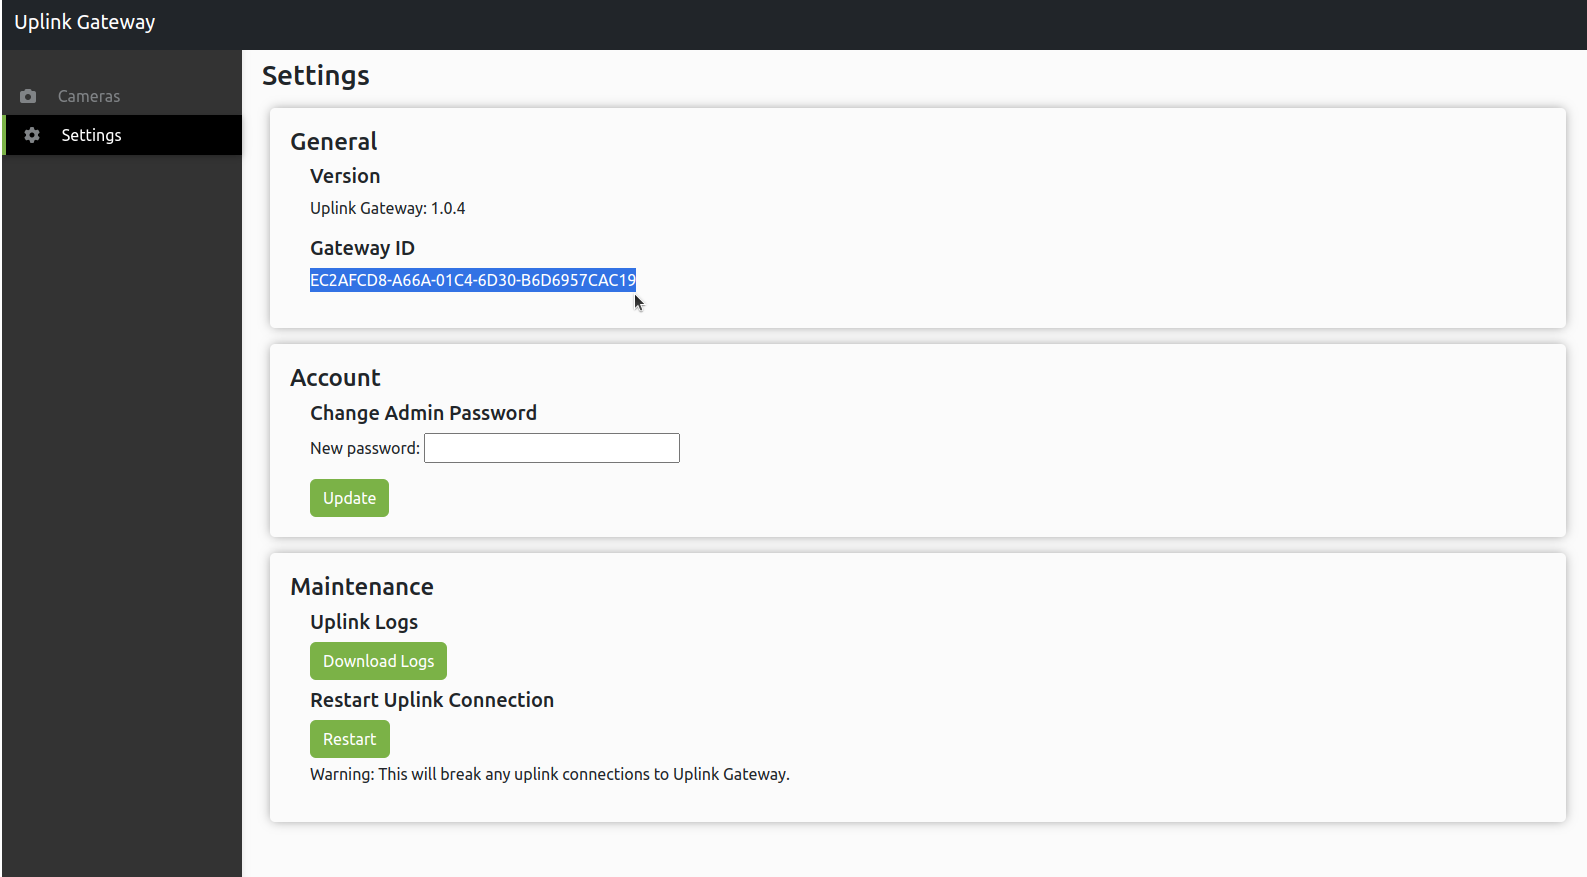
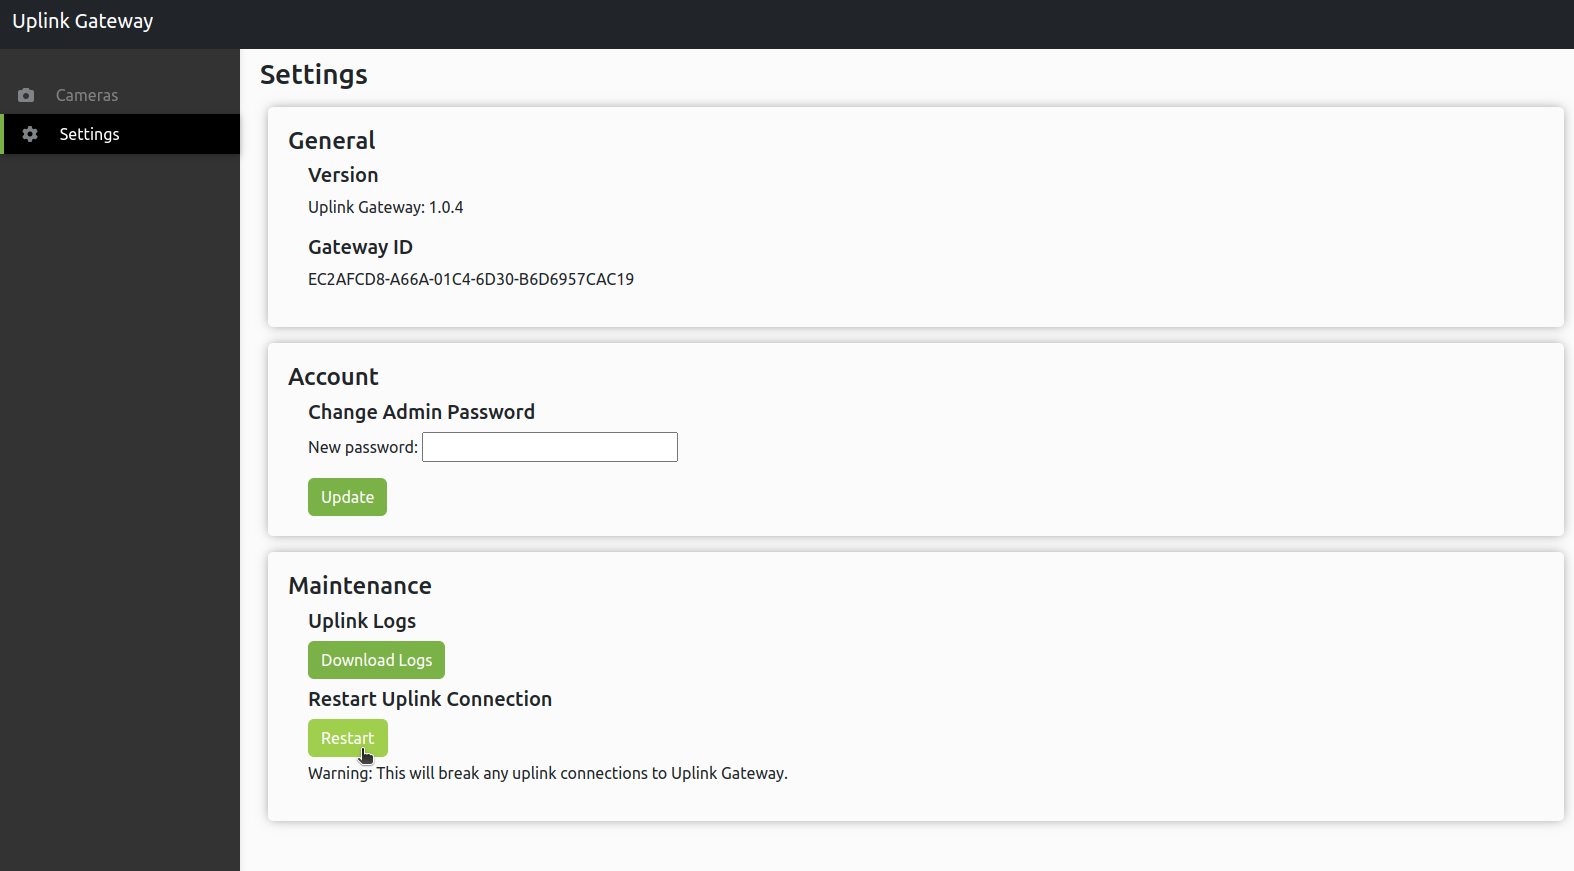
Navigate to 127.0.0.1 or <device-ip>, login with username: admin, password: admin, then navigate to the settings page and copy the Gateway ID.
To add a Gateway, you need to start adding a camera: go to Settings > Cameras > Add Cam. Then select the option Uplink Gateway, Select Gateway > Add Gateway.
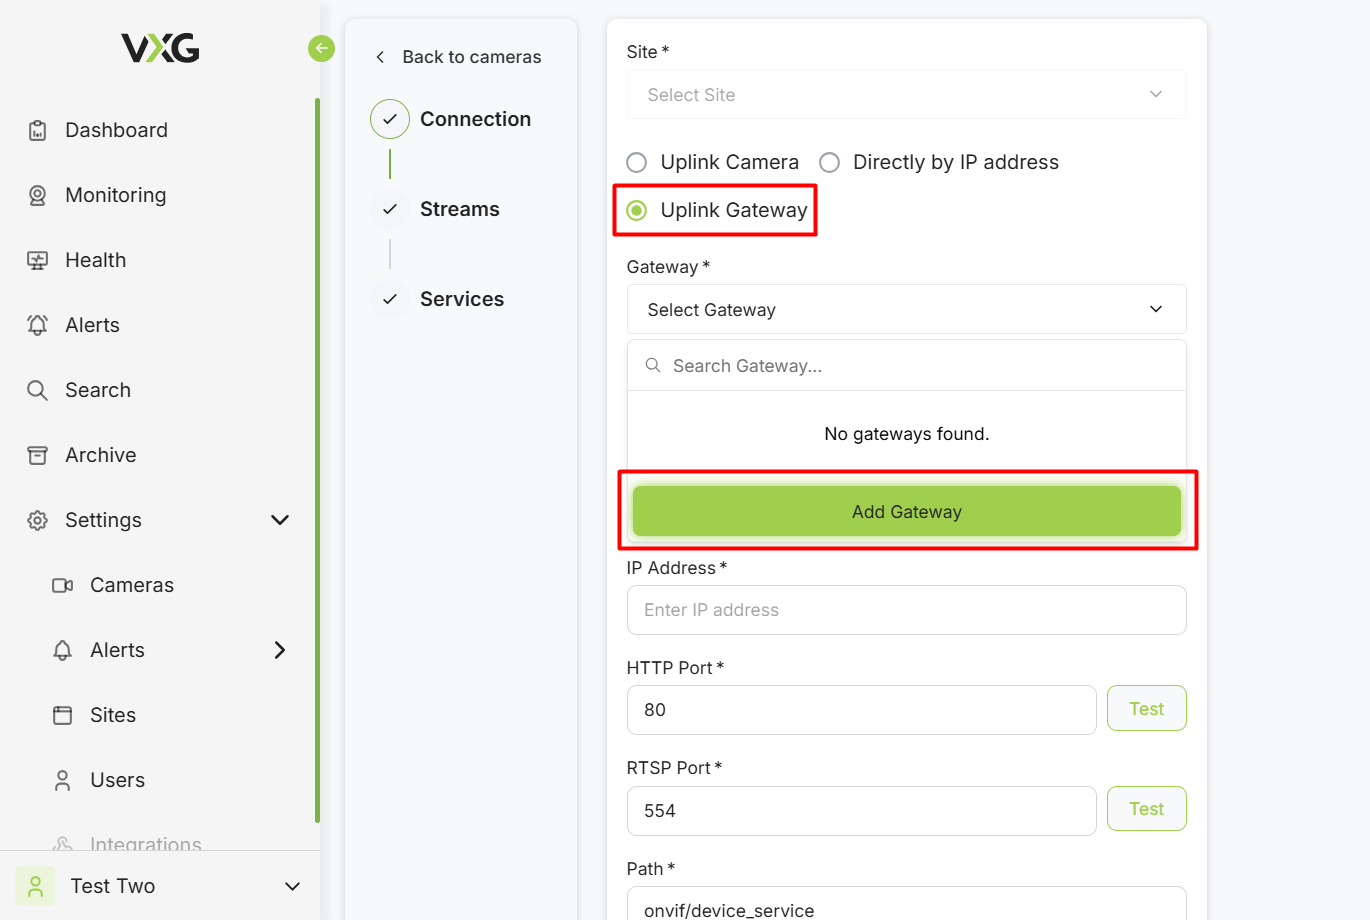
Select the Site, enter the desired name for the gateway, enter the gateway credentials (admin/admin by default), select Docker Gateway, and enter the Gateway ID from Step 1 and click Create.

Return to the Cameras page and wait for about 30 seconds until the Gateway becomes Online. Then you can proceed with adding cameras: Add Cam > Uplink Gateway > Select Gateway and enter the camera’s local IP, local HTTP and RTSP ports, and the camera’s Onvif user credentials.
How to Stop Gateway
Execute the stop script.
LinuxCODE./stop.shWindows
CODE.\stop.bat
How to Update Gateway
Local Update
Ensure that the old version of Gateway is running.
Navigate to the extracted folder of the new version of the Gateway.
Execute the script
update.shby providing the old Gateway directory and new Gateway directory.
LinuxCODE./update.sh -orig <path_to_old_version_directory> -dest <path_to_new_version_directory>Windows
CODE.\update.bat -orig <path_to_old_version_directory> -dest <path_to_new_version_directory>
Remote Update
Note that this requires an SSH Server to be installed on the Gateway’s Host system.
Get service information of the gateway’s connection.
CurlCODEcurl --location 'https://<UPLINK SERVICE URL>/api/device/<CAMERA_ID FROM GATEWAY ACCESS TOKEN>' --header 'Authorization: Bearer <UPLINK SERVICE PASSWORD>'Response
CODE{"camid": "3045", "proxy_id": "b4d185e7efdfa0f4ce01", "forwards": [{"name": "camera-gateway-http", "protocol": "http", "host": "127.0.0.1", "port": 80, "proxy_port_number": 33984, "proxy_host": "b4d185e7efdfa0f4ce01.proxy.cloud-vms.com", "proxy_url": "http://b4d185e7efdfa0f4ce01.proxy.cloud-vms.com:33984", "proxy_port": 33984}, {"name": "camera-gateway-ssh", "protocol": "tcp", "host": "172.31.2.21", "port": 22, "proxy_port_number": 33985, "proxy_host": "b4d185e7efdfa0f4ce01.proxy.cloud-vms.com", "proxy_port": 33985}]}Connect to device via the SSH info.
CODEssh -i <PATH TO .PEM> <USERNAME>@a4f9efe5b9e887b79001.proxy.cloud-vms.com -p 34917Connection method may vary depending on how your SSH Client is configured on the host machine.
Upload or download the Gateway version you want to update to onto the Gateway device.
Navigate to the directory containing the new version of the Gateway.
Execute the update script as a background process. Note that the connection will be broken as the Gateway restarts.
LinuxCODEnohup sudo ./update.sh -orig <path_to_old_version_directory> -dest <path_to_new_version_directory> &Windows
CODEStart-Process .\update.bat -orig <path_to_old_version_directory> -dest <path_to_new_version_directory> -NoNewWindow
If done successfully the Gateway should be accessible from it’s original IP.
API Examples
Request authorization token from Gateway
Retrieve authorization token to send valid API requests.
curl -X POST -L 'http://<DEVICE_IP>:8000/api/auth-token/' -H 'Content-Type: application/json' -d '{"username": "user", "password": "pass"}'Valid response: 200
{
    "token": "8656763e69dd6ead1d167b865f8caf08bf907227"
}
Get list of cameras on Gateway
Retrieve list of cameras from Gateway database.
curl -H 'Authorization: Token 8656763e69dd6ead1d167b865f8caf08bf907227' -X GET 'http://<DEVICE_IP>:8000/api/cameras/'Valid response: 200
[
    {
        "camera_id": 1,
        "access_token": "",
        "ip": "104.251.103.214",
        "http_port": 7080,
        "rtsp_port": 7554,
        "is_active": true,
        "pid": 151,
        "serial": "FAKECAMERA69",
        "mac": "FAKECAMERA69",
        "rtsp_only": false
    }
]
Add camera to Gateway
When adding a camera, it is suggested to create an Uplink camera on the Cloud VMS without the provisioning server and then copying the created access token to use in the token field when creating a camera on the gateway. Otherwise, you must create an Uplink camera using the provisioning server and use the same serial number and MAC Address values when creating the camera on the gateway.
curl -H 'Authorization: Token 8656763e69dd6ead1d167b865f8caf08bf907227' -X POST http://<DEVICE_IP>:8000/api/add-camera/ -H "Content-Type: application/json" -d '{"ip": <CAMERA_IP>, "http_port": <HTTP_PORT>, "rtsp_port": <RTSP_PORT>, "serial": <CAMERA_SERIAL>, "mac": <CAMERA_MAC>, "token": <CLOUD_ACCESS_TOKEN>}'Valid response: 201
{
    "camera_id": 1,
    "access_token": "",
    "ip": "192.168.40.21",
    "http_port": 80,
    "rtsp_port": 554,
    "is_active": false,
    "pid": null,
    "serial": "FAKECAMERA",
    "mac": "FAKECAMERA",
    "rtsp_only": false
}
Delete camera from Gateway
When deleting a camera, the camera ID for the camera on the gateway can be used. If the camera was added using an access token, you can also use the camera’s ID on the Cloud VMS to remove the camera.
curl -H 'Authorization: Token 8656763e69dd6ead1d167b865f8caf08bf907227' -X DELETE http://<DEVICE_IP>:8000/api/cameras/<GATEWAY_CAMERA_ID OR CLOUD_CAMERA_ID>/Valid response: 204 No Content
Restart Gateway service connection
curl -H 'Authorization: Token 8656763e69dd6ead1d167b865f8caf08bf907227' -X POST http://<DEVICE_IP>:8000/api/restart/Valid response: 200
{"message":"Server restarted successfully"}Troubleshooting
Gateway Connectivity Issues
The connection between the gateway and the cloud can be checked by attempting to access the Gateway UI through Cloud One.

If the Gateway cannot be accessed in this manner, it is usually a result of two errors:
The gateway’s uplink connection timed out. The connection can be reset in the Gateway’s Settings page.
This will restart the connect and the Gateway will attempt to access the cloud.
The Gateway’s ID was entered incorrectly when adding the Gateway to the cloud. In this case you will need to delete and re-add the Gateway with the correct Gateway ID found in the Gateway’s Settings page.
In any case it is also helpful to contact support and provide Logs from the Gateway which can be downloaded from the Gateway’s Settings page.
Updating Camera’s IP Address
The camera’s IP address is stored on the Gateway, which means if it is entered incorrectly on Cloud One when adding the camera then it needs to be updated on the Gateway.
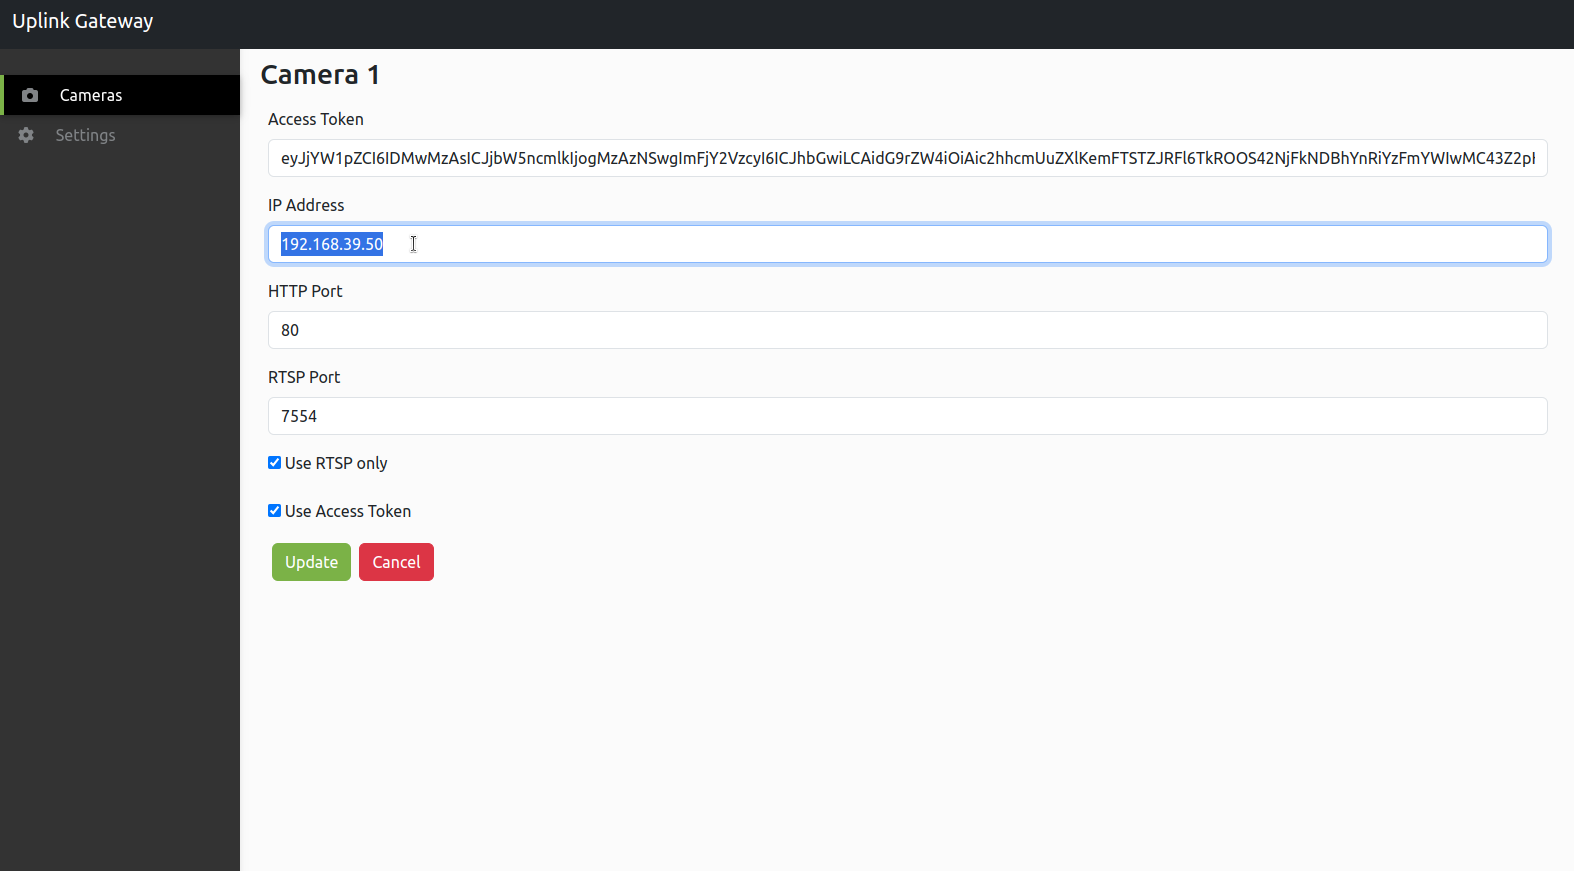
Navigate to the Gateway’s Cameras page and click edit on the camera you want to change the IP of.
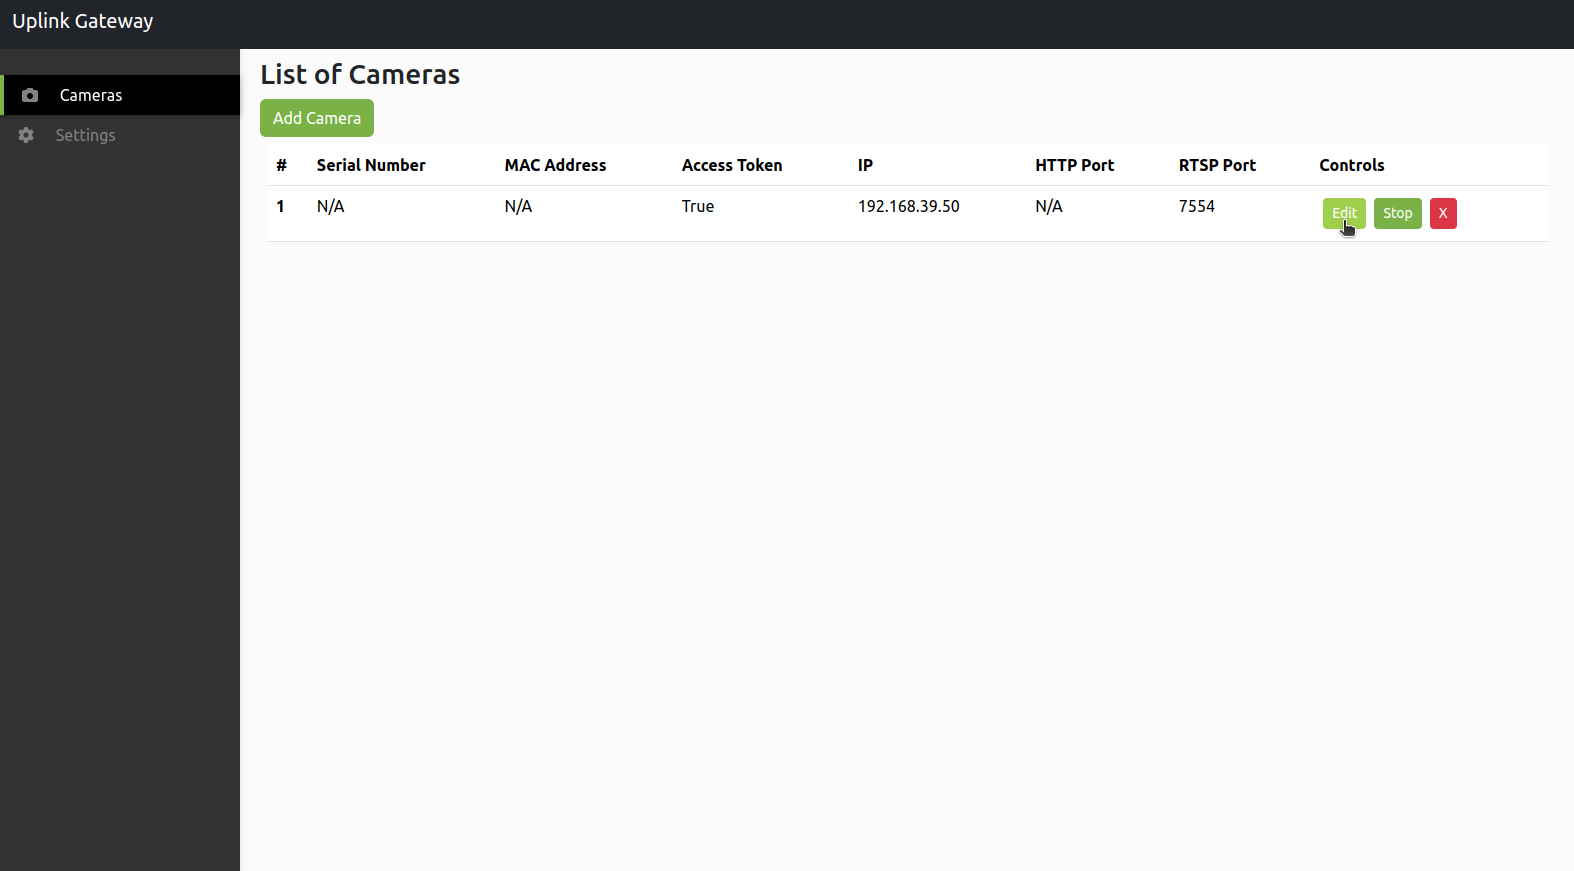
From the editing form you can then update the IP and click Update.
Remote Connection to Gateway Device
The Uplink Gateway not only creates a connection to the user interface, it also creates a connection to the hosting device on port 22 which can be used to connect to the device using SSH.
Get service information of the gateway’s connection.
CurlCODEcurl --location 'https://<UPLINK SERVICE URL>/api/device/<CAMERA_ID FROM GATEWAY ACCESS TOKEN>' --header 'Authorization: Bearer <UPLINK SERVICE PASSWORD>'Response
CODE{"camid": "3045", "proxy_id": "b4d185e7efdfa0f4ce01", "forwards": [{"name": "camera-gateway-http", "protocol": "http", "host": "127.0.0.1", "port": 80, "proxy_port_number": 33984, "proxy_host": "b4d185e7efdfa0f4ce01.proxy.cloud-vms.com", "proxy_url": "http://b4d185e7efdfa0f4ce01.proxy.cloud-vms.com:33984", "proxy_port": 33984}, {"name": "camera-gateway-ssh", "protocol": "tcp", "host": "172.31.2.21", "port": 22, "proxy_port_number": 33985, "proxy_host": "b4d185e7efdfa0f4ce01.proxy.cloud-vms.com", "service_port": 33985}]}Connect to device via the SSH info.
CODEssh -i <PATH TO .PEM> <USERNAME>@a4f9efe5b9e887b79001.service.cloud-vms.com -p 34917Connection method may vary depending on how your SSH Client is configured on the host machine.