i-PRO Camera Uplink Plugin
Setup
When you have connected a new camera to your router, you need to open its web interface - just type in the local IP address of your new camera in a web browser - you can find this local IP address (usually in format 192.168.x.x) in your router among other connected devices.
When you have just opened the camera’s web interface, you need to activate it first by setting up a password.
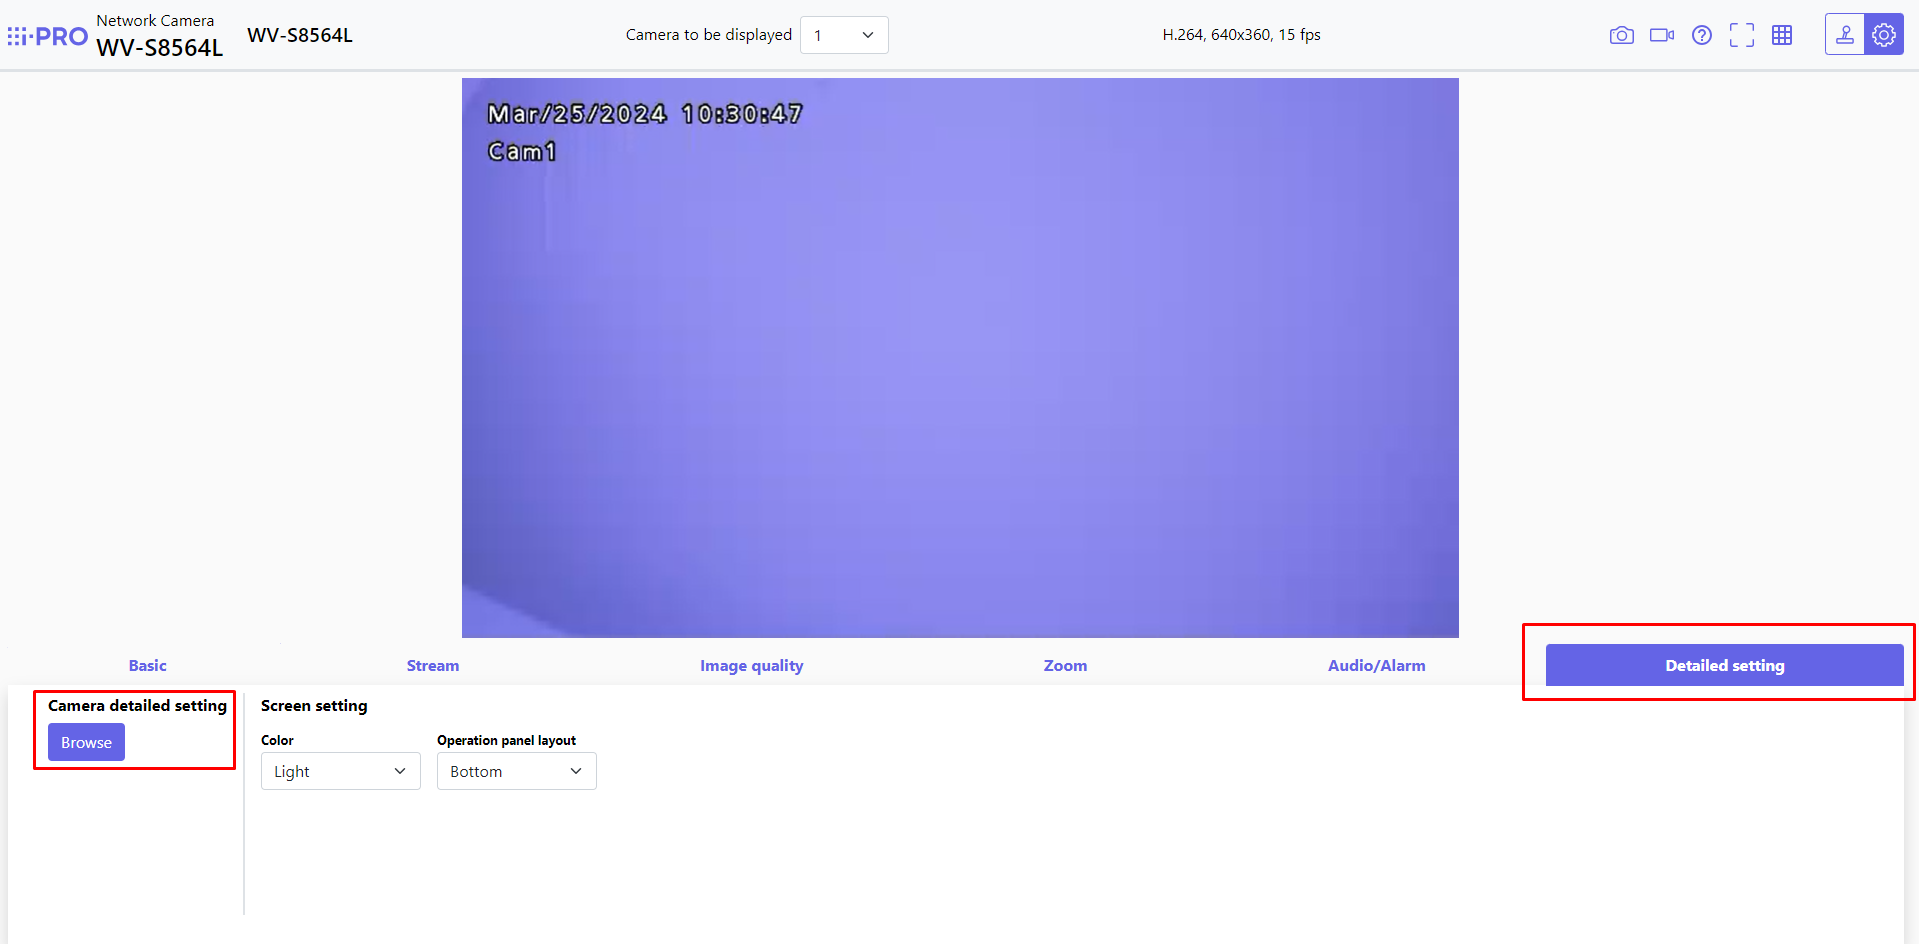
Login to the camera using the password and navigate to Setup > Detailed setting > Camera detailed setting and click Browse:
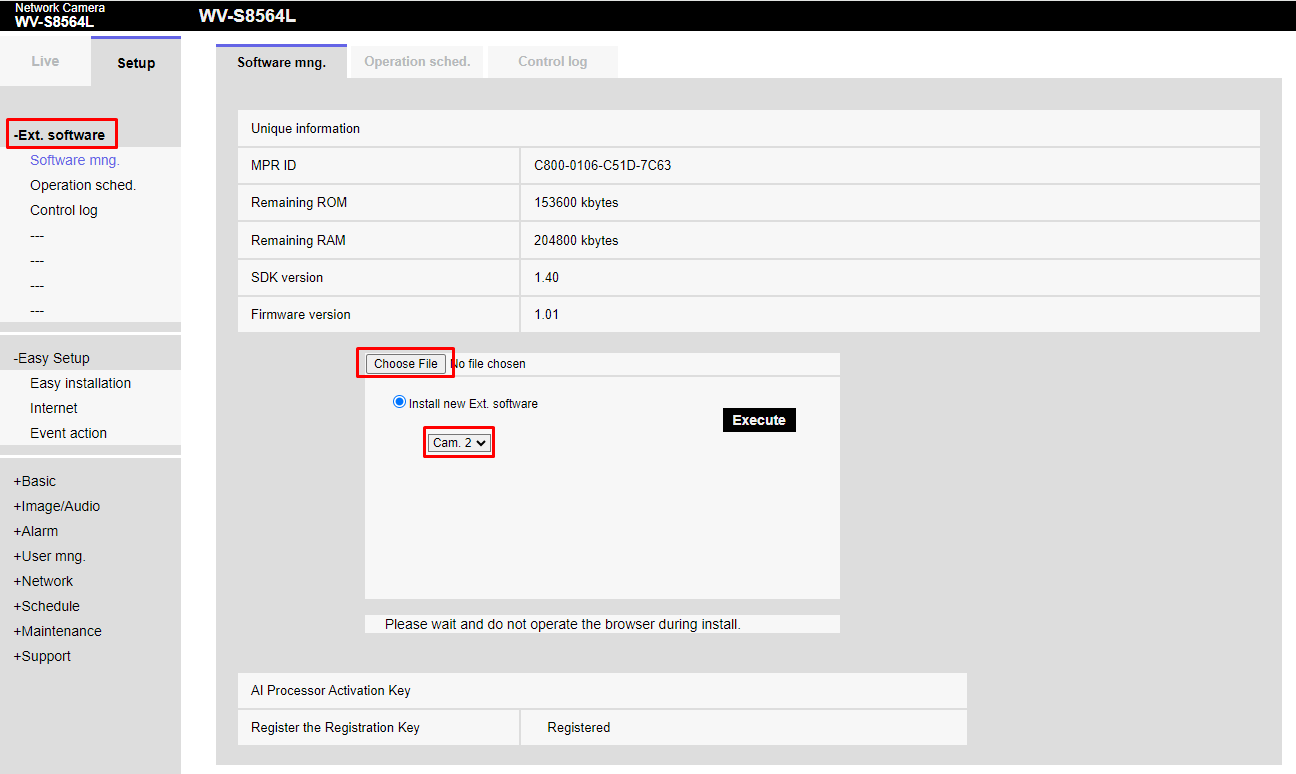
In the detailed settings go to Maintenance > Upgrade and find the camera’s Serial number and MAC address.
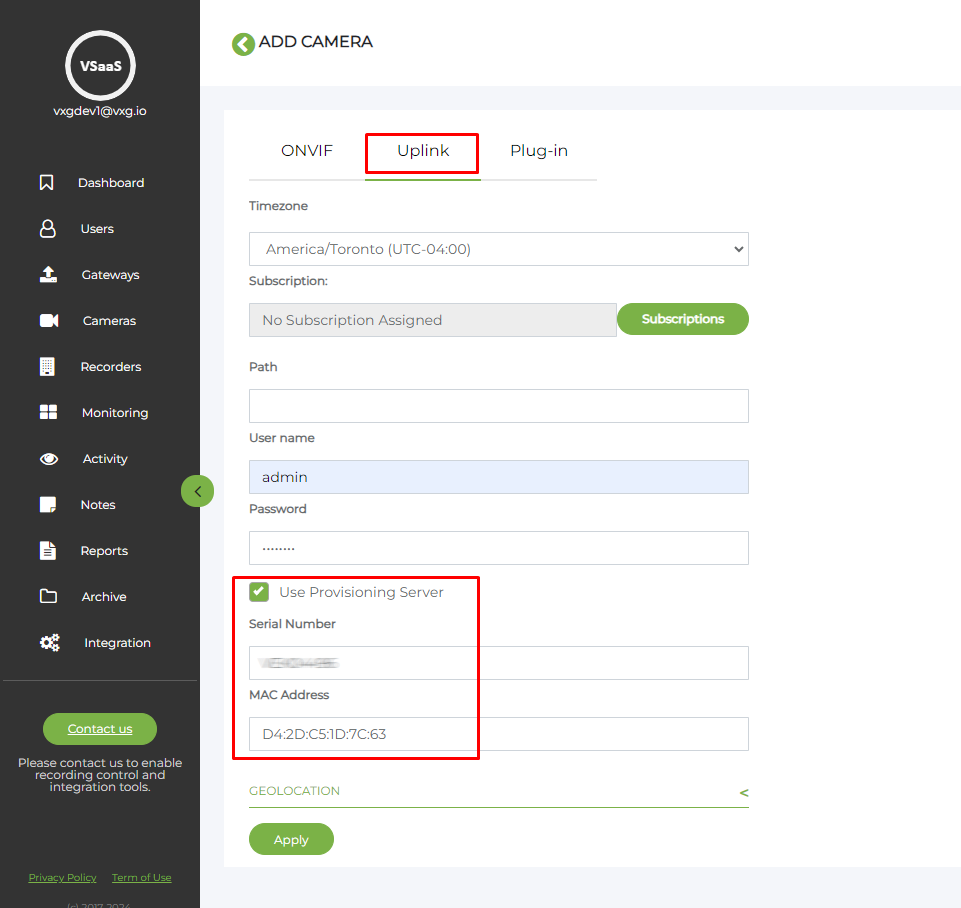
Go to your VMS web UI and add a Uplink Camera - input the camera name and camera credentials (username and password). Make sure to check the Use Provisioning Server box and input the Serial Number and MAC Address of the camera.
IMPORTANT!
The MAC Address in the camera interface contains hyphens. Please change them to colons when copying MAC to the web client UI (as seen in the screenshot) - this is a requirement of the system.
Download the i-PRO Uplink Application (supports all S-series and X-series i-PRO cameras with the ambaCV2X platform) - https://dashboard.videoexpertsgroup.com/downloads/uplink/
Open the camera web interface and navigate to the Ext. software. Upload the plugin .ext file, select the camera lens for streaming (in case of multi-lens cameras), and click Execute.
Now the application should be running and you can check the camera stream on your VMS web client.
Troubleshooting
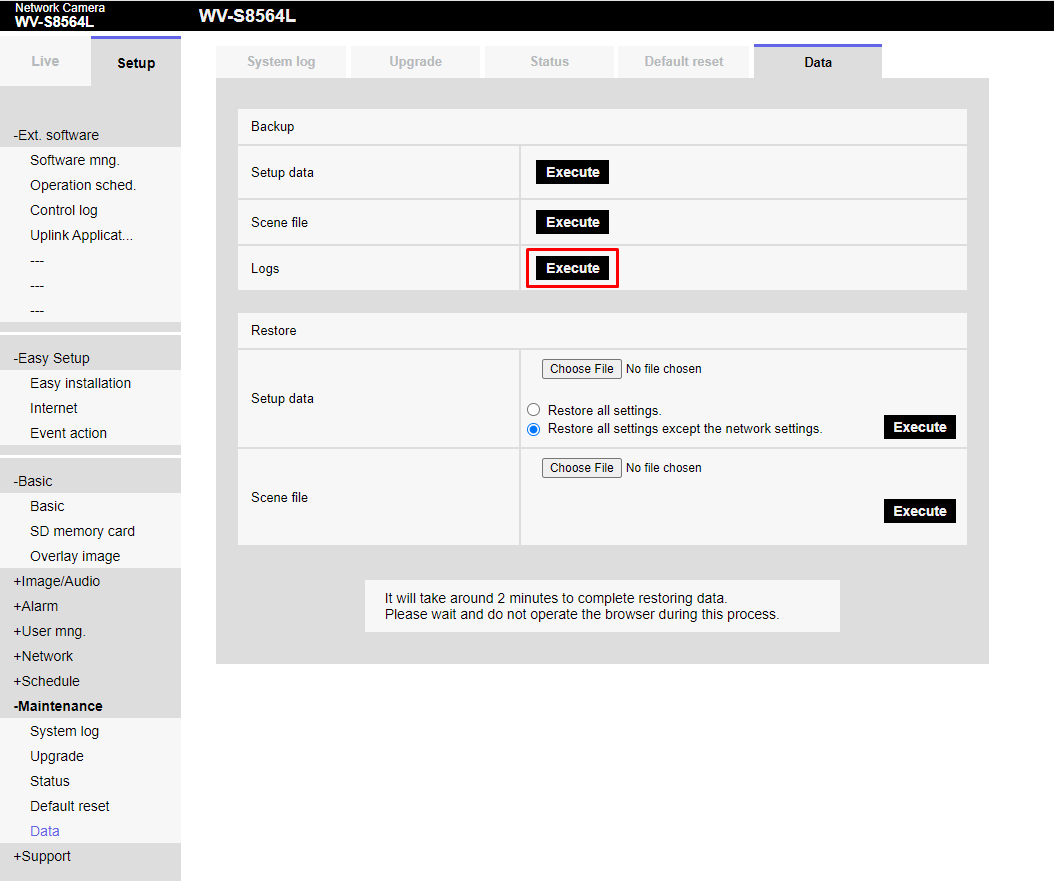
In case of any technical problems, please download the camera logs (Maintenance > Data > Logs) and send them to VXG technical support.