
Connecting IP cameras using VXG Camera Finder
There are several different ways how you can connect your IP camera to VXG Cloud - Camera Finder is a tool that helps to choose the right one for you and makes the process easy.
Download, unzip, and install VXG Camera Finder for Windows.
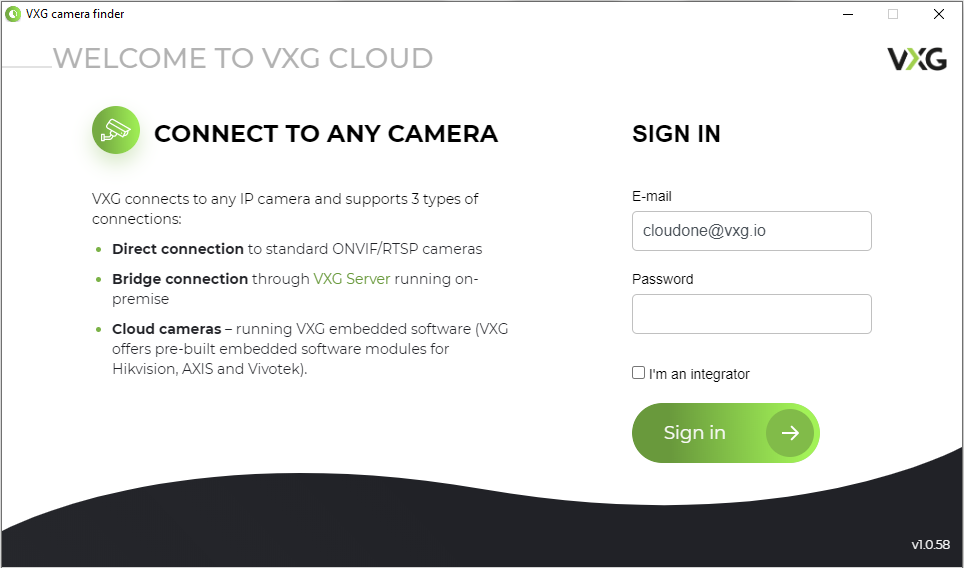
Run the application. First, you need to sign in with your web client user account:
After you signed in, you will see the list of cameras found in your network. There are two ways of connecting cameras:
a) Simple or Cloud camera connection - it installs the VXG application on the camera (here’s the list of supported cameras) and it doesn’t require any additional setup. This way is chosen by default.
b) Advanced or Onvif connection - this option will work for all other cameras, but it requires port forwarding on your router. To select this way of connection, you need to click “Advanced”.
Simple or Cloud camera connection
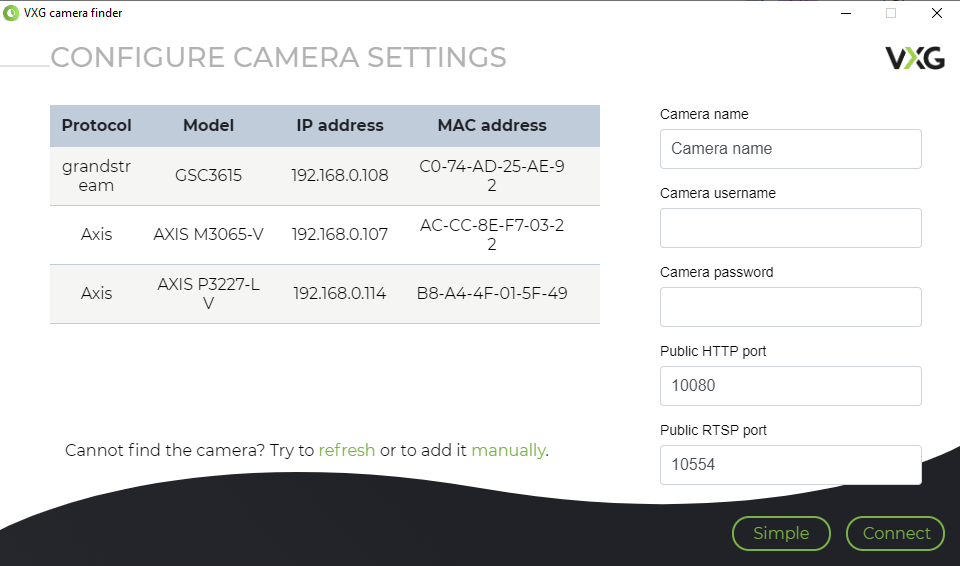
The application will find all suitable cameras in the local network that can be connected. Select a camera you would like to start with and enter the following parameters:
• Camera name - any name you prefer
• Camera username - it is admin for Hikvision cameras, root for Axis and Vivotek.
• Camera password - enter the current camera’s password. If it’s a new camera that hasn’t been activated yet, then enter the password you would like to use.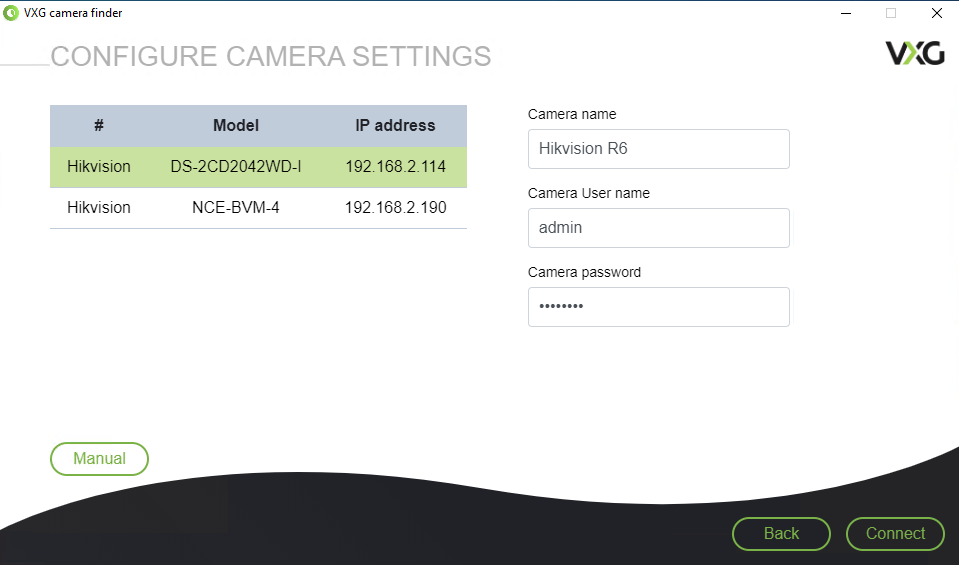
The application will activate the camera (if needed), update the firmware, and install VXG Streamer App on the camera. Wait until you see the video in the Preview window - now you can click “Done” to return to the previous step if you would like to add more cameras or you can close the Camera Finder app.
If you see any kind of error, please click “Done” and try the process once again.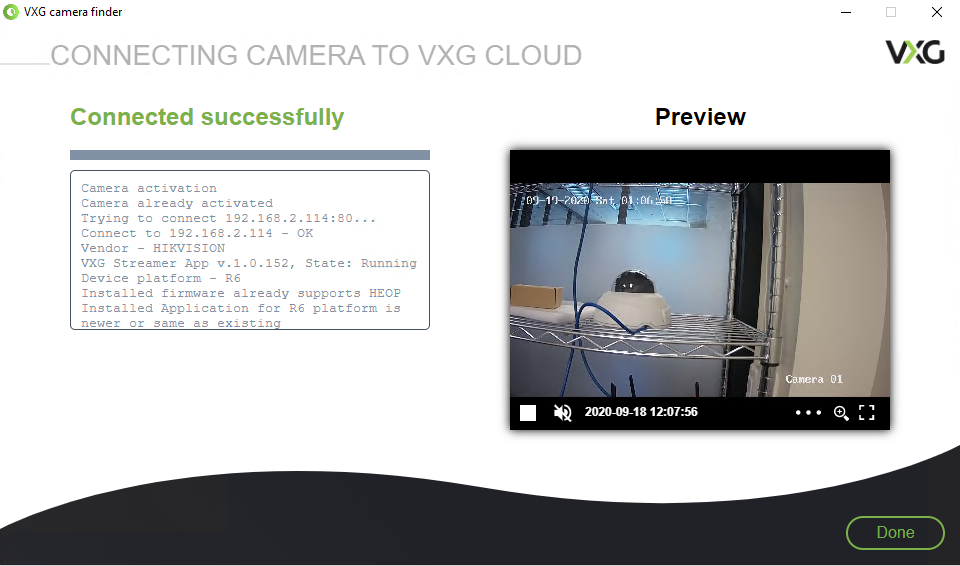
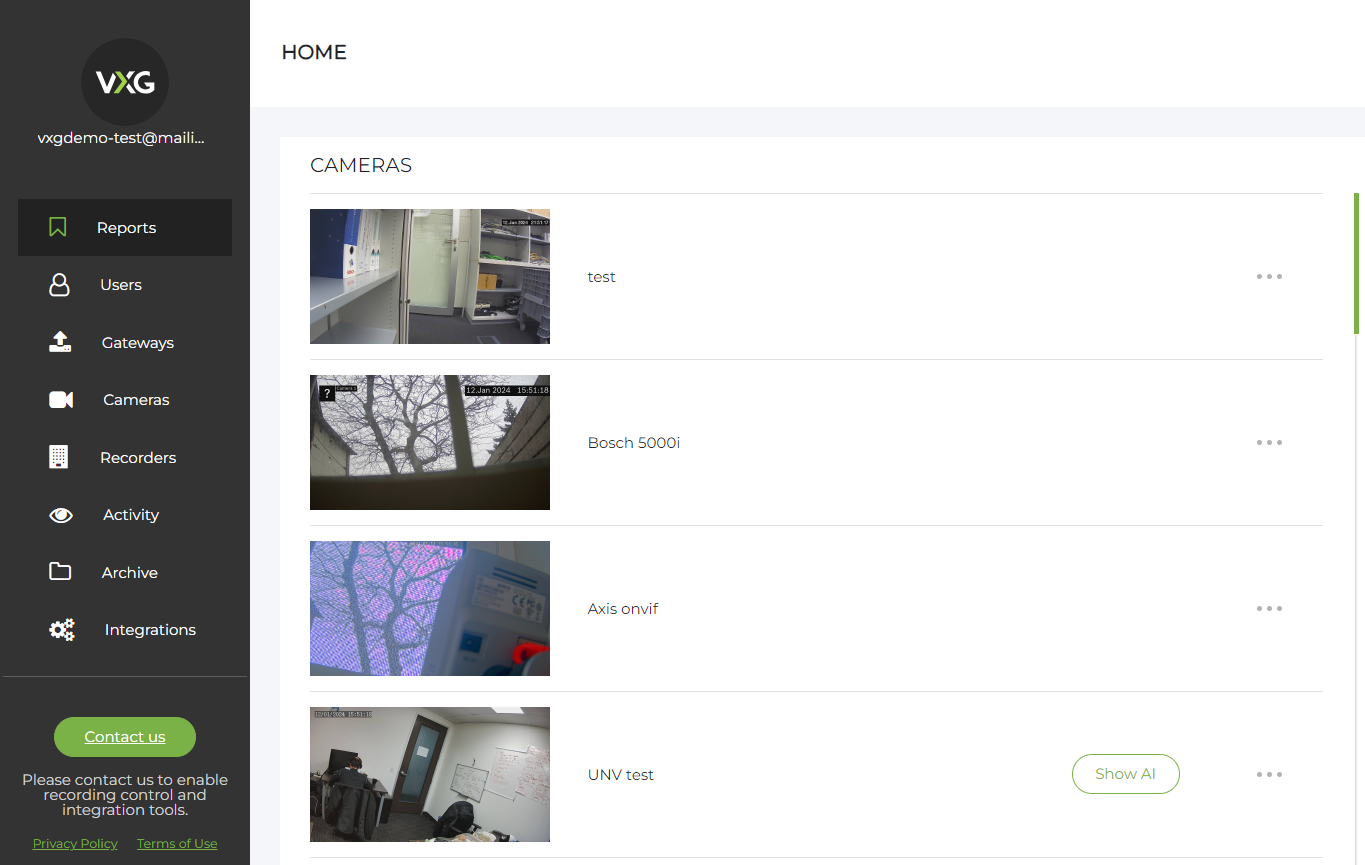
Sign in to your web client - you will see your IP camera in the list:
Advanced or Onvif connection
The application will find all suitable cameras in the local network that can be connected. Select a camera you would like to start with and enter the following parameters:
• Camera name - any name you prefer
• Camera username - it should be the Onvif user
• Camera password - the Onvif user password
• HTTP and RTSP ports forwarded on your router.
Here you will find articles providing more information on how to create an Onvif user and make a port forwarding on your router.
2. Wait until you see the video in the Preview window - now you can click “Done” to return to the previous step if you would like to add more cameras or you can close the Camera Finder app.
If you see any kind of error, please click “Done” and try the process once again.
3. Sign in to your web client - you will see your IP camera in the list:
