-
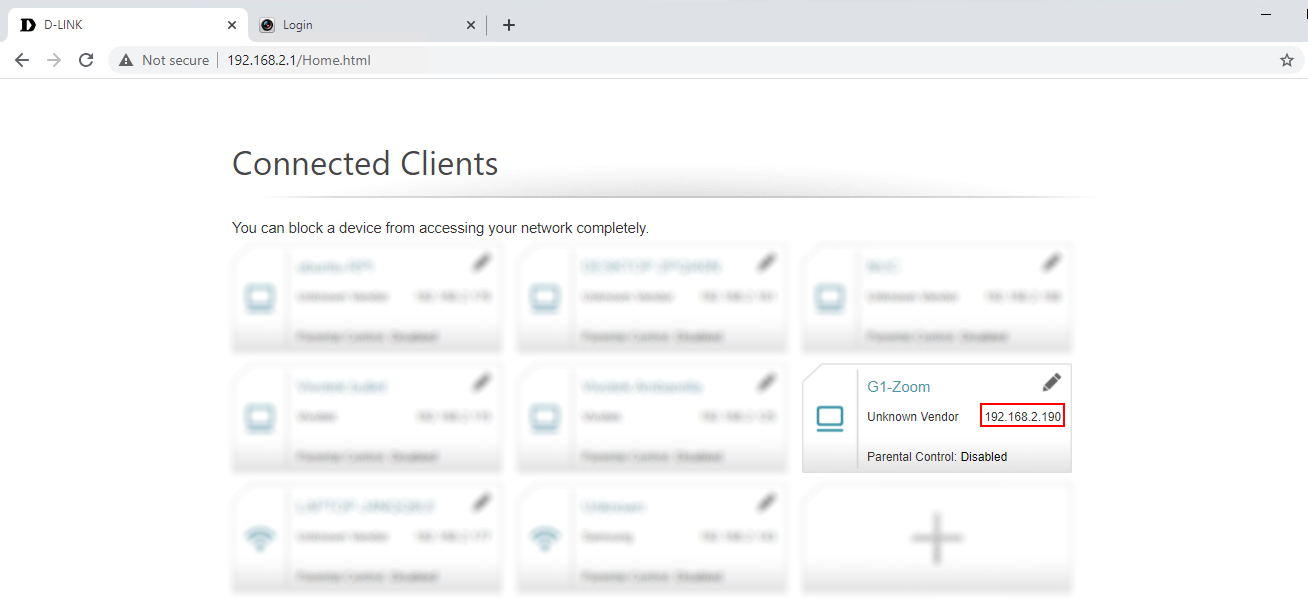
When you have connected a new camera to your router, you need to open its web interface - just type in the local IP address of your new camera in a web browser - you can find this local IP address (usually in format 192.168.x.x) in your router among other connected devices.
-
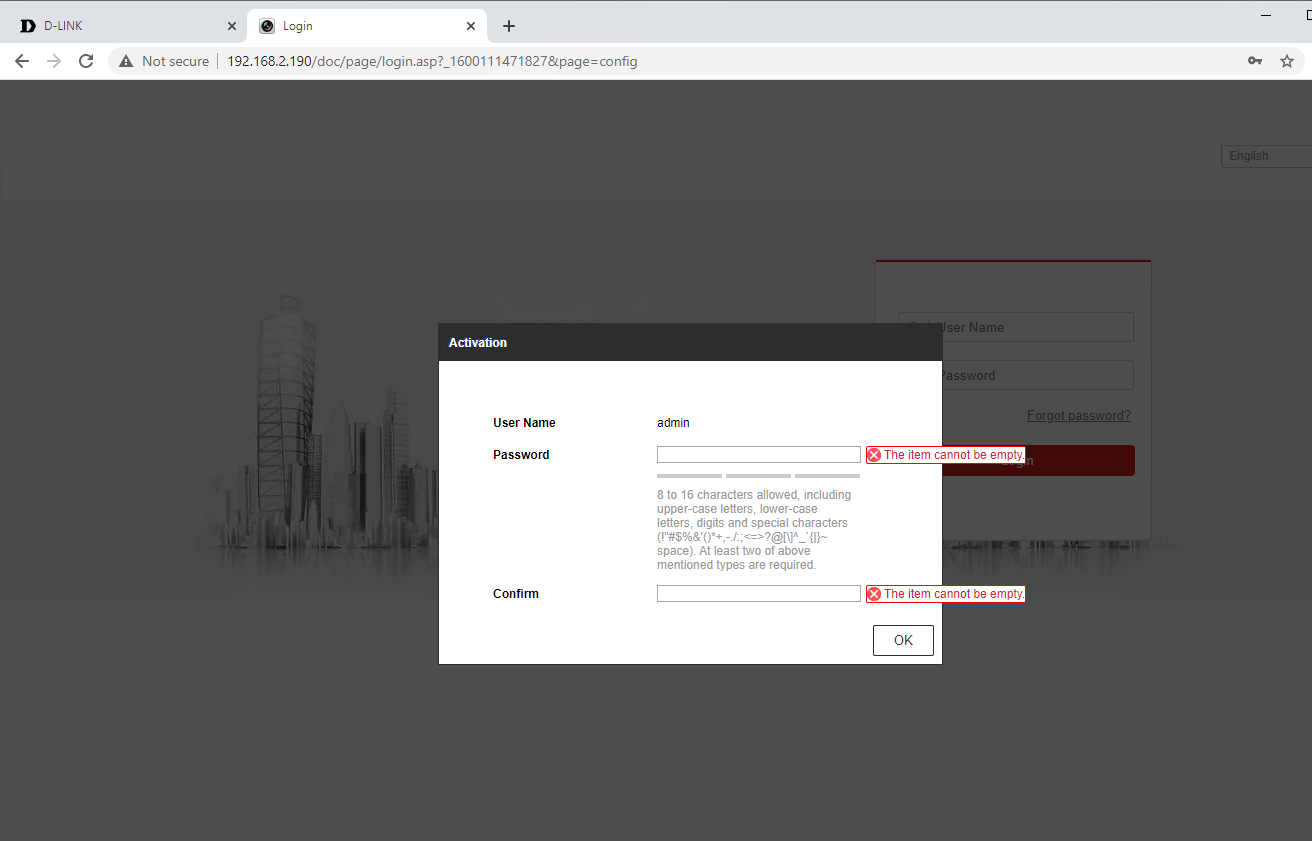
When you have just opened the camera’s web interface, you need to activate it first by setting up a password:
-
Now you need to set up port forwarding on your router - you can find the step-by-step guide for your router on this website. You need to create forwarding rules for HTTP (80) and RTSP (554) ports.
-
Then you should navigate to Advanced settings > Configuration protocol. You will need to enable ONVIF:
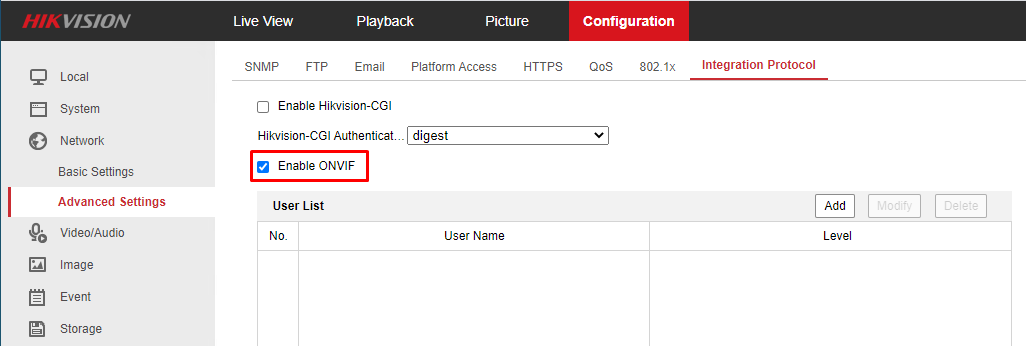
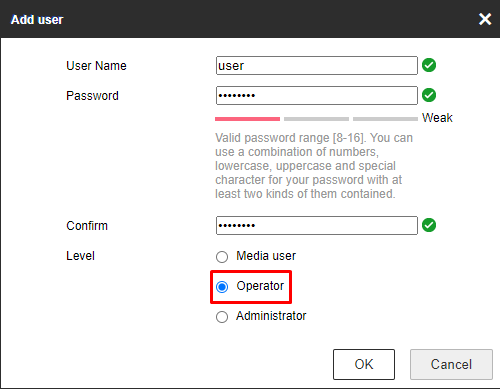
and create an ONVIF user by clicking “Add”:
-
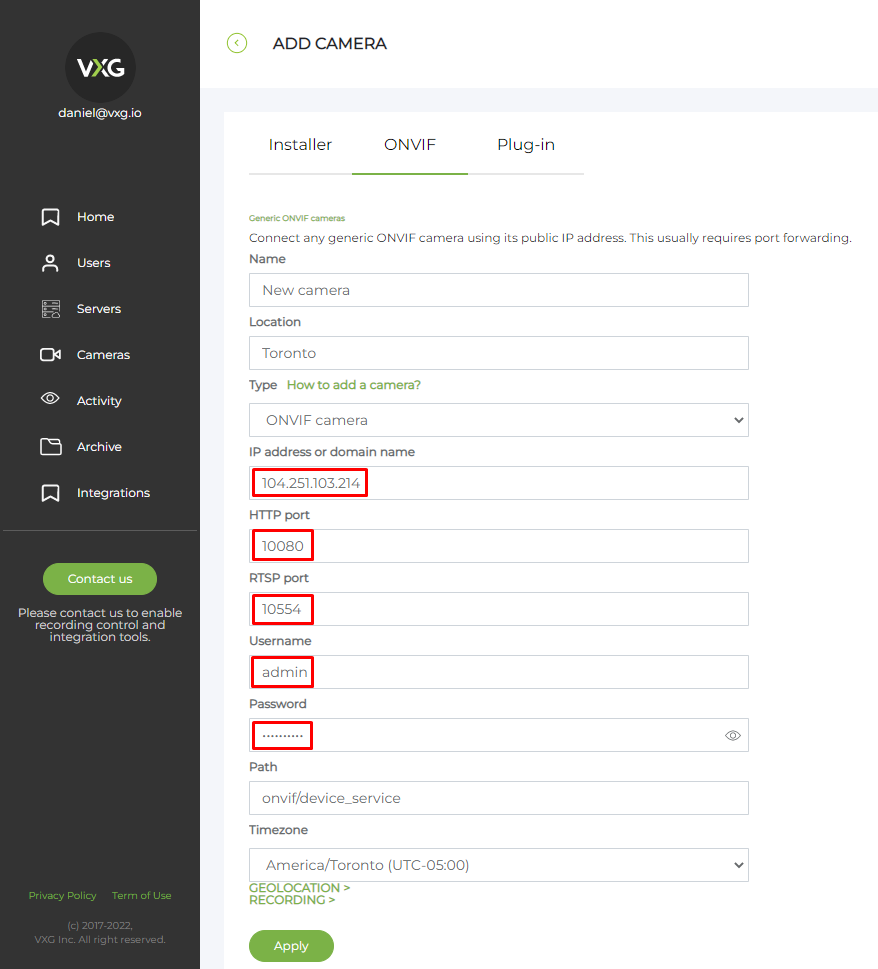
Then go to your web client UI and add a new camera: Cameras > Add camera > ONVIF. Set the stream parameters - your public IP address, HTTP & RTSP ports that you have forwarded in step 3, ONVIF username and password from step 4: