This article covers steps on how to use the V3 API to added both OpenWRT and Docker Uplink Gateways, along with cameras, to the VMS platform.
Adding an OpenWRT Gateway
After installing the Uplink Gateway software on the OpenWRT device, the device will be ready to connect to the cloud.
-
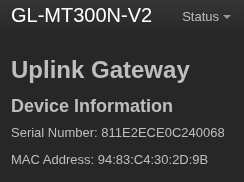
Record the gateway’s serial number and MAC address. Both can be found in either the gateway UI or on the device itself.
-
Make the
POST api/v3/gateways/API call using the gateway’s information.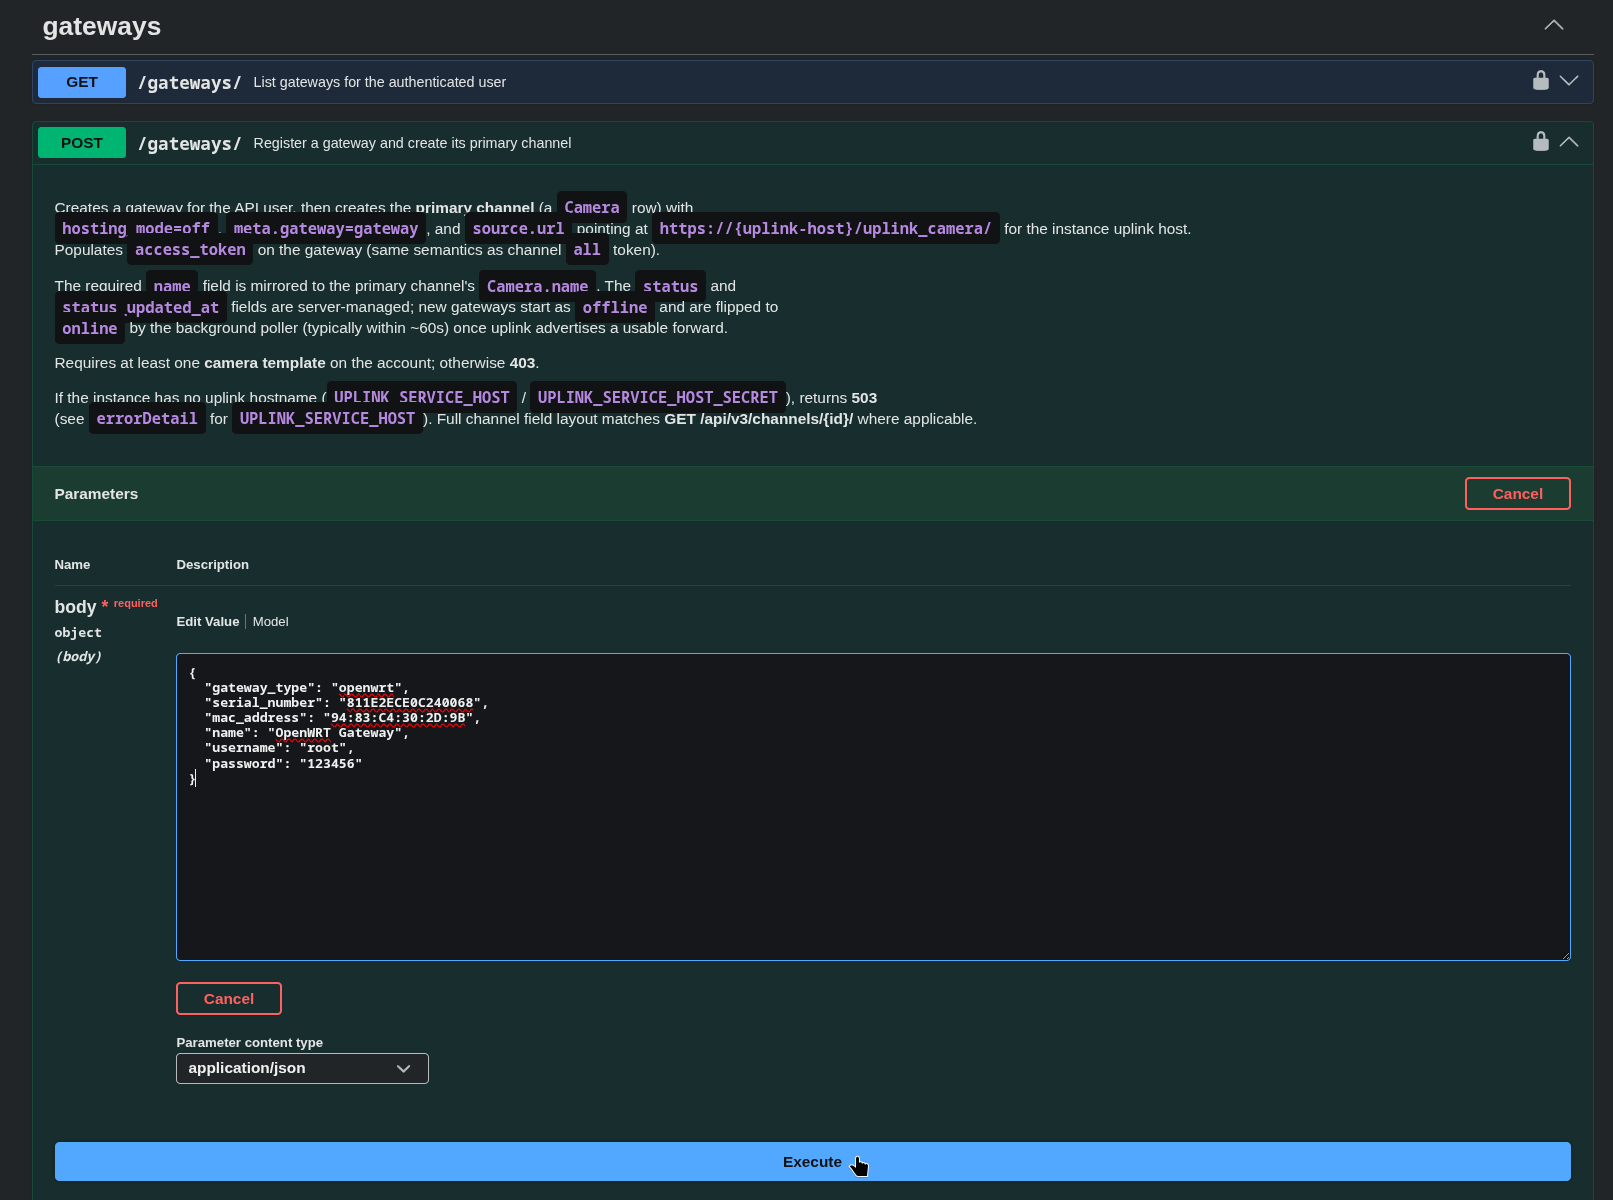
Example request body:
{
  "gateway_type": "openwrt",
  "serial_number": "SERIAL",
  "mac_address": "MAC",
  "name": "OpenWRT Gateway",
  "username": "root",
  "password": "PASSWORD"
}
OpenWRT devices usually use
rootas the username by default.
Make sure to use"gateway_type": "openwrt"in the request body. -
Check that the gateway has connected.
a. Check the gateway logs for the following messages:Thu May 21 13:48:01 2026 user.notice gateway-main: Starting main process with command: VXG_API_PASSWORD=94:83:C4:30:2D:9B /usr/bin/cameraagent --serial 811e2ece0c240068 -f openwrt-main-http:http:localhost:80 -f openwrt-main-ssh:tcp:localhost:22 Thu May 21 13:48:01 2026 user.notice gateway-router: [2026/05/21 13:48:01:0421] U: Starting Uplink Client Thu May 21 13:48:01 2026 user.notice gateway-router: Forward [openwrt-main-http] proto=http priority=bulk Thu May 21 13:48:01 2026 user.notice gateway-router: [2026/05/21 13:48:01:2928] U: Device MAC: 94:83:C4:30:2D:9B Thu May 21 13:48:01 2026 user.notice gateway-router: [2026/05/21 13:48:01:2936] U: Device serial: 811E2ECE0C240068 Thu May 21 13:48:01 2026 user.notice gateway-router: [2026/05/21 13:48:01:2947] U: Requesting auth token from camera.vxg.io:443 Thu May 21 13:48:02 2026 user.notice gateway-router: [2026/05/21 13:48:02:2033] U: Got HTTP 200 response from auth token service Thu May 21 13:48:02 2026 user.notice gateway-router: [2026/05/21 13:48:02:2047] U: Successfully received auth token Thu May 21 13:48:02 2026 user.notice gateway-router: [2026/05/21 13:48:02:2068] U: Requesting websocket endpoint from dev-api.proxy.cloud-vms.com:443 Thu May 21 13:48:02 2026 user.notice gateway-router: [2026/05/21 13:48:02:5815] U: Got HTTP 200 response from proxy api websocket endpoint Thu May 21 13:48:02 2026 user.notice gateway-router: [2026/05/21 13:48:02:5828] U: Successfully received ws endpoint Thu May 21 13:48:02 2026 user.notice gateway-router: [2026/05/21 13:48:02:5846] U: Trying to connect to ea85c892fdedcdd73500.proxy.cloud-vms.com:443/device-ws Thu May 21 13:48:02 2026 user.notice gateway-router: [2026/05/21 13:48:02:9970] U: Got HTTP 101 response from websocket endpoint Thu May 21 13:48:02 2026 user.notice gateway-router: [2026/05/21 13:48:02:9979] U: websocket_callback: establishedb. Use the API call
GET api/v3/gateways/{GATEWAY-ID}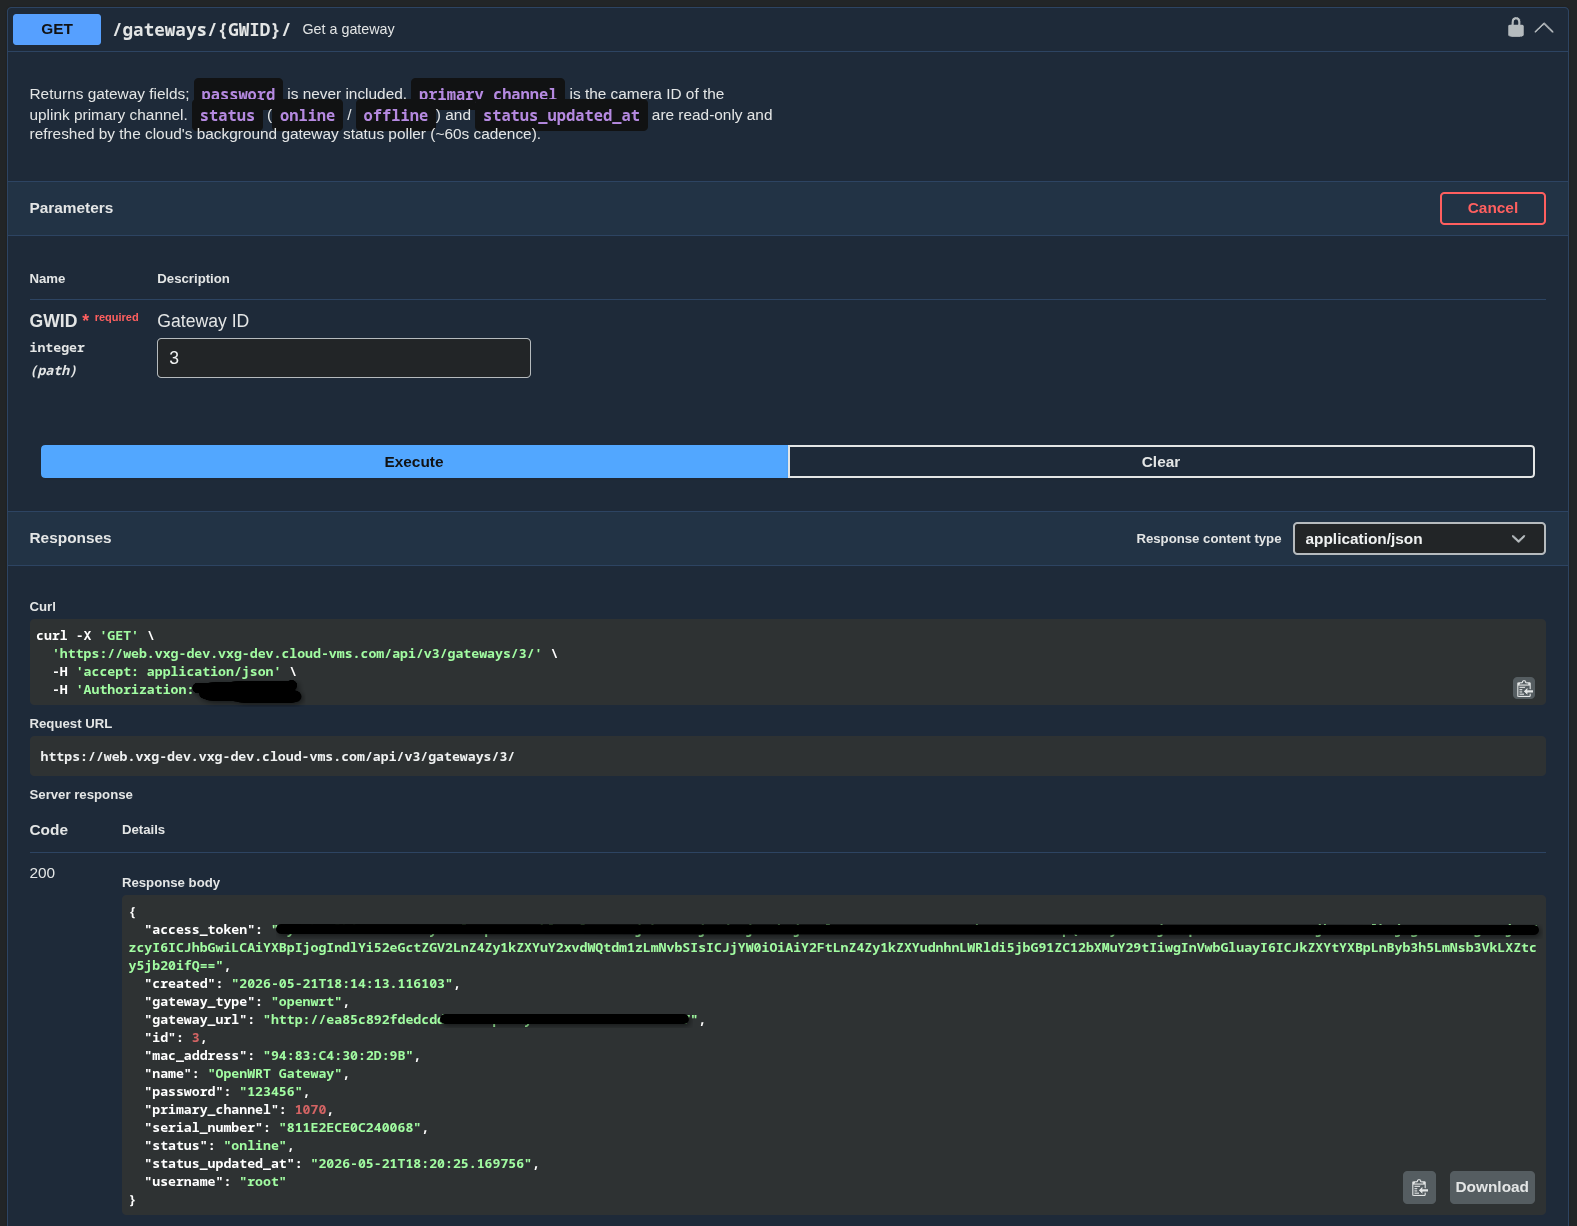
The following fields should be populated:
"gateway_url": "http://ea85c892f..."
"status": "online"
Adding a Docker Gateway
After installing the Uplink Gateway docker containers on the device, the device will be ready to connect to the cloud.
-
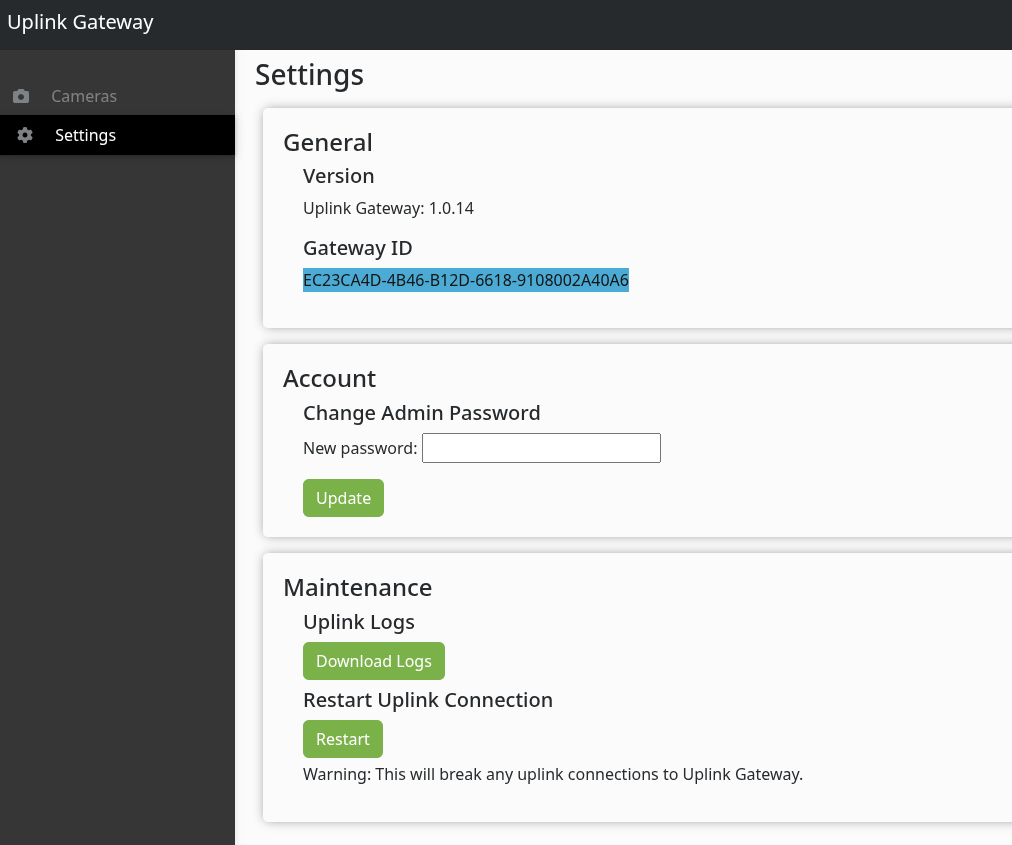
Navigate to the Gateway UI’s settings page and copy the Gateway ID.
-
Make the
POST api/v3/gateways/API call using the gateway’s information.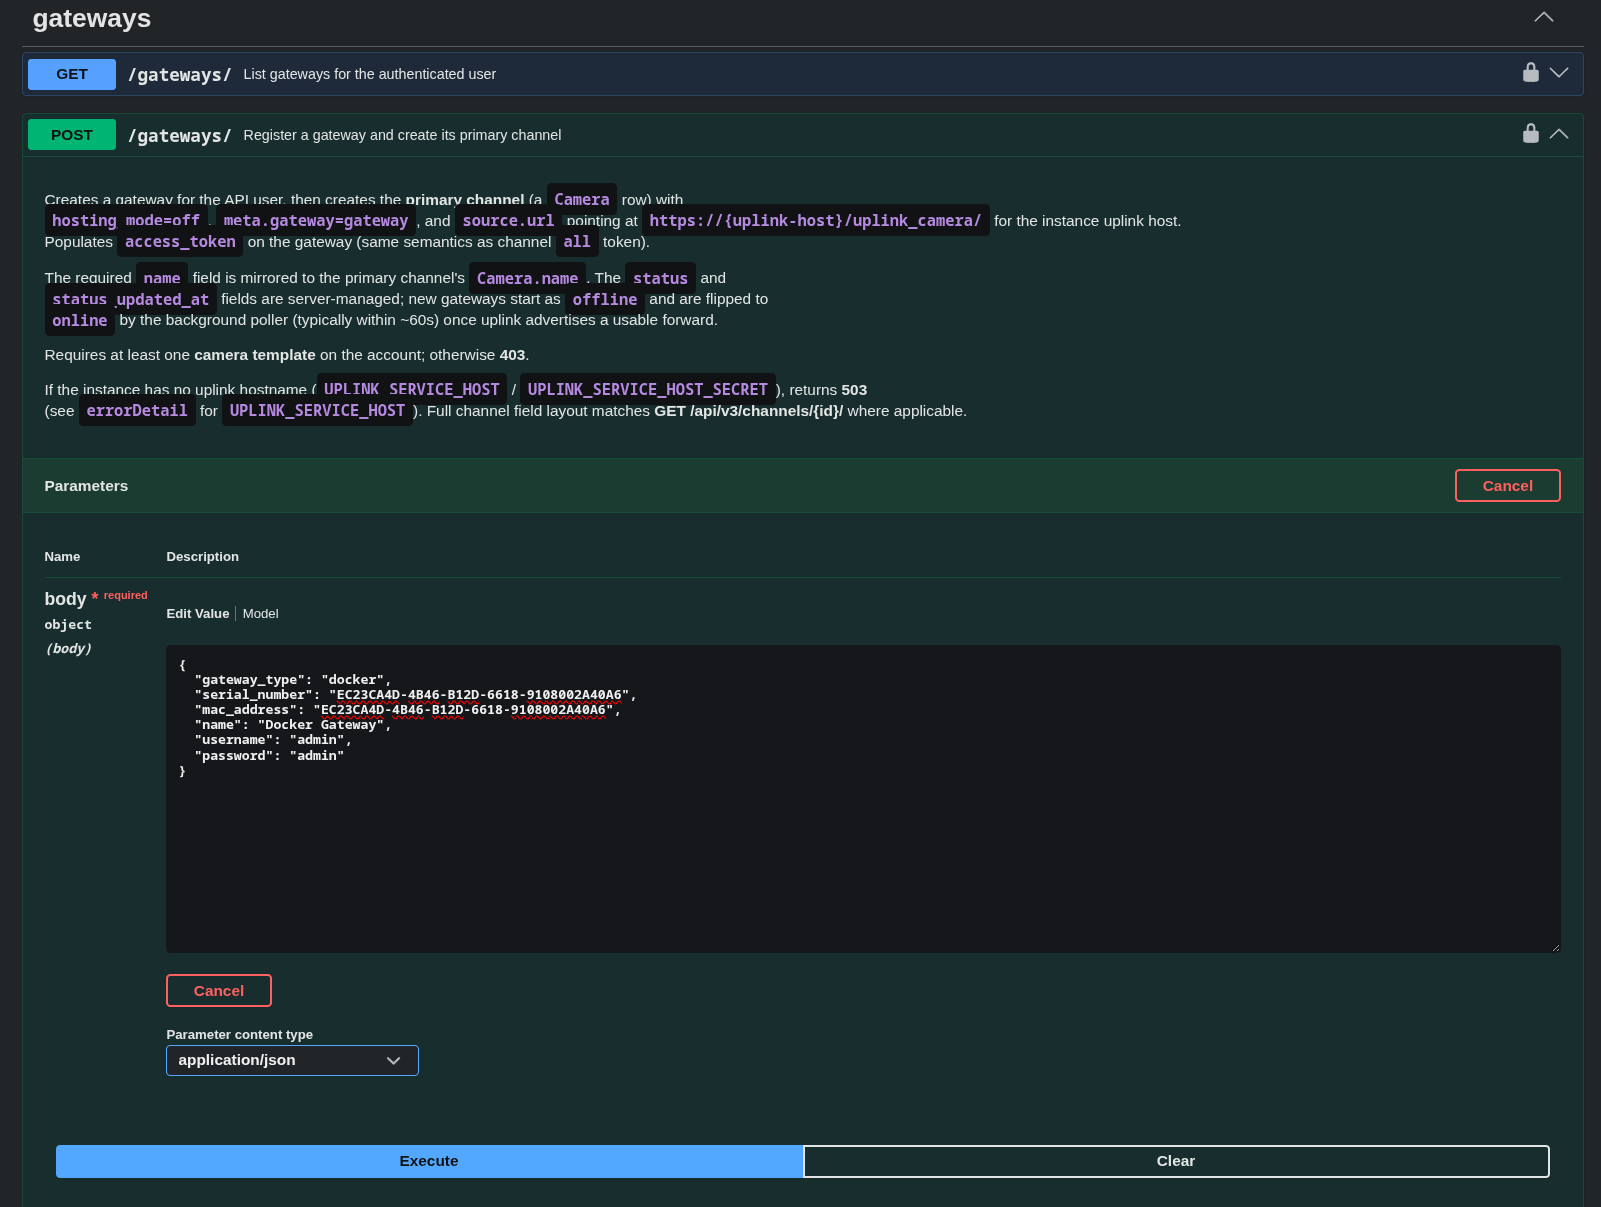
Example request body:
{
  "gateway_type": "docker",
  "serial_number": "GATEWAY-ID",
  "mac_address": "GATEWAY-ID",
  "name": "Docker Gateway",
  "username": "admin",
  "password": "admin"
}
Use the Gateway ID as both the
serial_numberandmac_address.
Docker devices usually useadmin/adminas the username/password by default.
Make sure to use"gateway_type": "docker"in the request body. -
Check that the Gateway has connected.
a. Check the gateway logs. The following messages should exist for a successful connection:[2026/05/21 15:37:15:2681] U: Starting Uplink Client Forward [camera-gateway-http] proto=http priority=bulk [21/May/2026 15:37:15] "GET / HTTP/1.0" 200 4558 [2026/05/21 15:37:15:2908] U: Device MAC: EC23CA4D-4B46-B12D-6618-9108002A40A6 [2026/05/21 15:37:15:2909] U: Device serial: EC23CA4D-4B46-B12D-6618-9108002A40A6 [2026/05/21 15:37:15:2909] U: Requesting auth token from camera.vxg.io:443 [2026/05/21 15:37:15:6003] U: Got HTTP 200 response from auth token service [2026/05/21 15:37:15:6004] U: Successfully received auth token [2026/05/21 15:37:15:6006] U: Requesting websocket endpoint from dev-api.proxy.cloud-vms.com:443 [2026/05/21 15:37:15:6416] U: Got HTTP 200 response from proxy api websocket endpoint [2026/05/21 15:37:15:6417] U: Successfully received ws endpoint [2026/05/21 15:37:15:6418] U: Trying to connect to ea85c892fdedcdd73500.proxy.cloud-vms.com:443/device-ws [2026/05/21 15:37:15:6561] U: Got HTTP 101 response from websocket endpoint [2026/05/21 15:37:15:6562] U: websocket_callback: establishedb. Use the API call
GET api/v3/gateways/{GATEWAY-ID}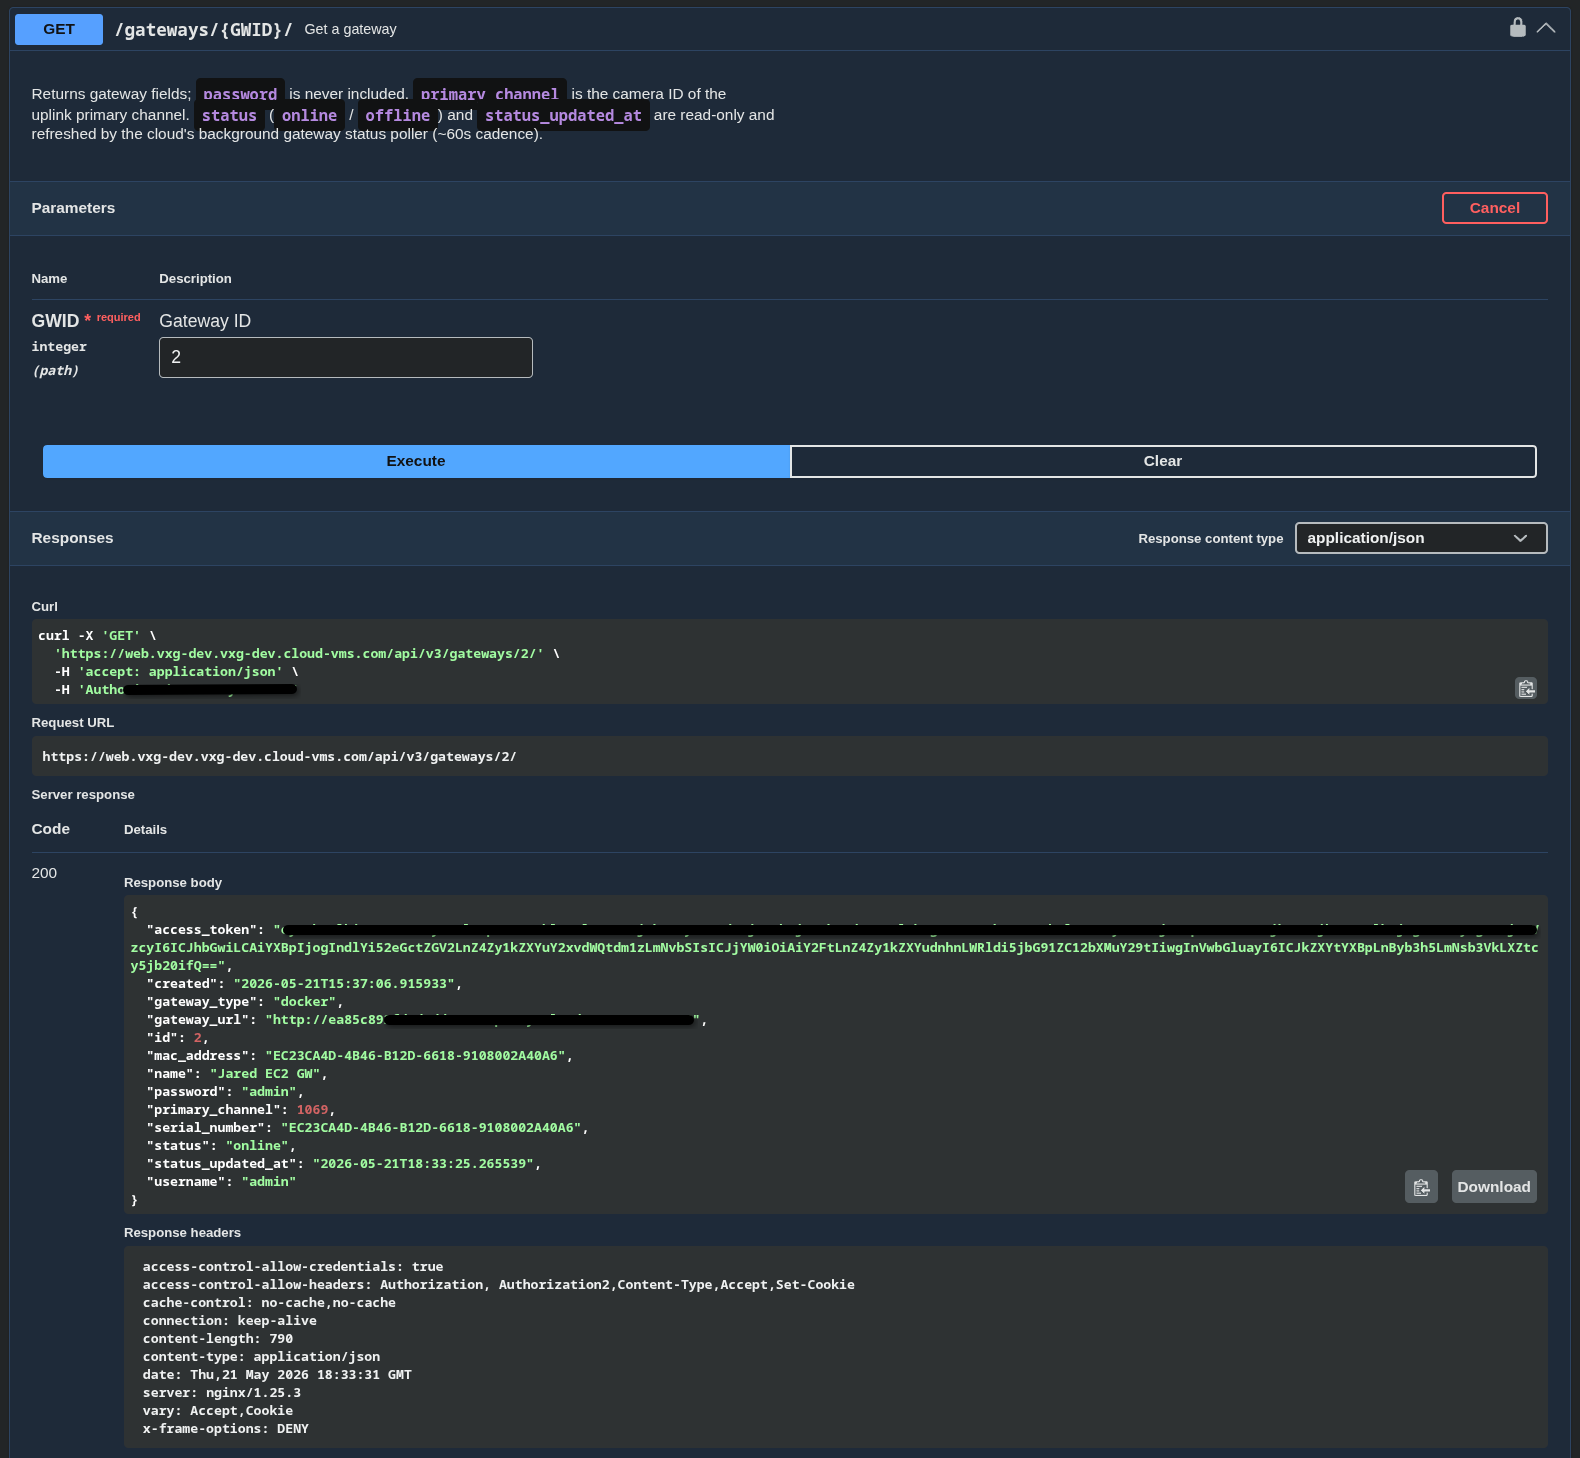
The following fields should be populated:
"gateway_url": "http://ea85c892f..."
"status": "online"
Adding a Camera to a Gateway
After creating a gateway using the API you can add cameras to the gateway. Ensure the camera you are adding is accessible in the same local network as the gateway.
-
Record the following information about the camera:
local ip,username,password,http/onvif port, andrtsp port
Record the ID in the VMS for the gateway you want to add the camera to.
For example:Camera: 192.168.2.206, root, admin123, 80, 554 Gateway ID: 2 (from Adding an OpenWRT Gateway example) -
Make the
POST api/v3/gateways/{GATEWAY-ID}/channels/API call using the Camera’s information.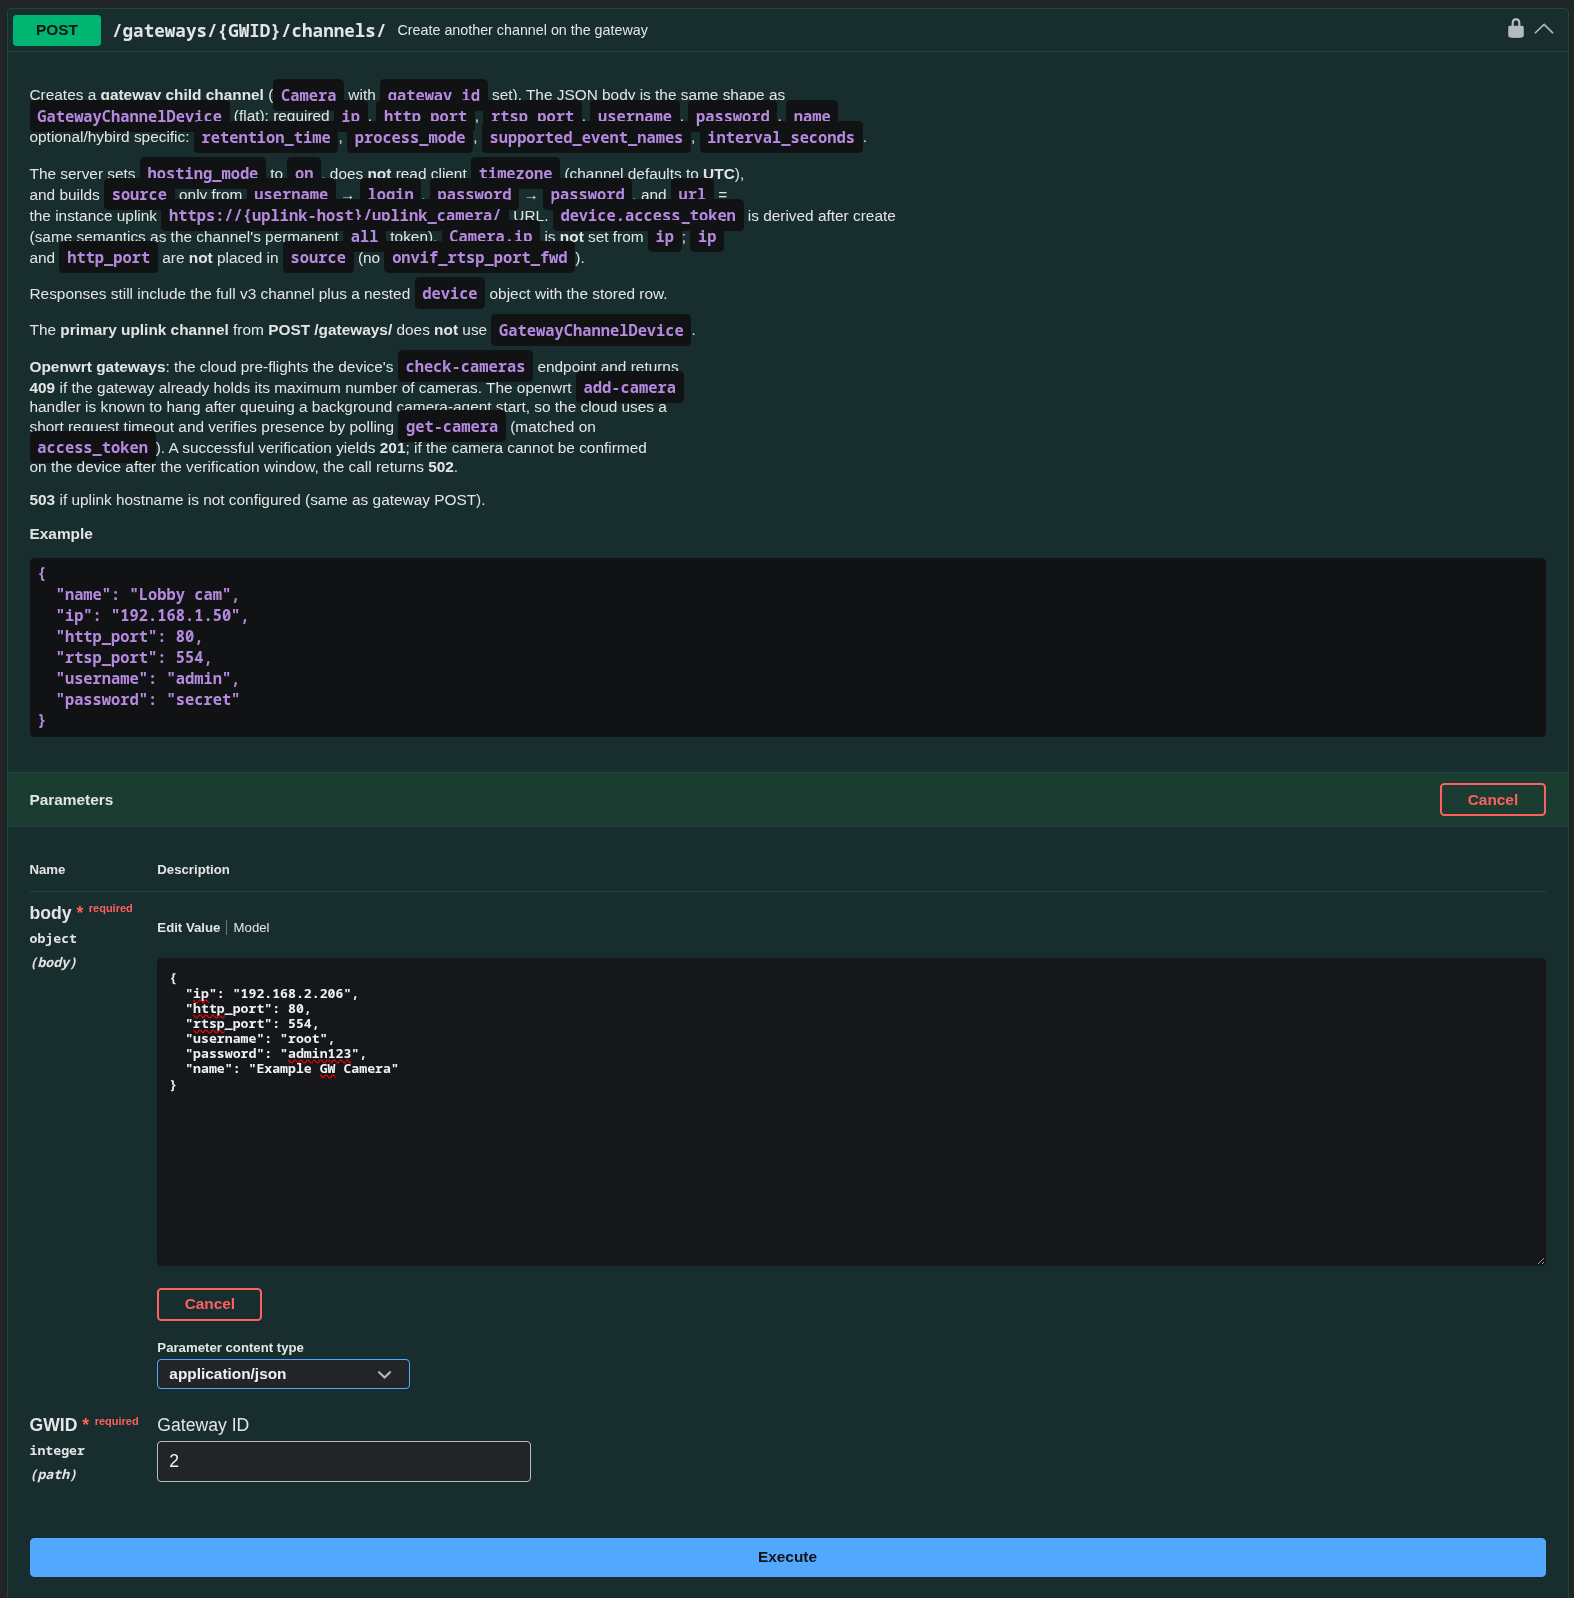
Example request body:
{
  "ip": "192.168.2.206",
  "http_port": 80,
  "rtsp_port": 554,
  "username": "root",
  "password": "admin123",
  "name": "Example GW Camera"
}
API Response will return a Channel ID that was created for this camera.
-
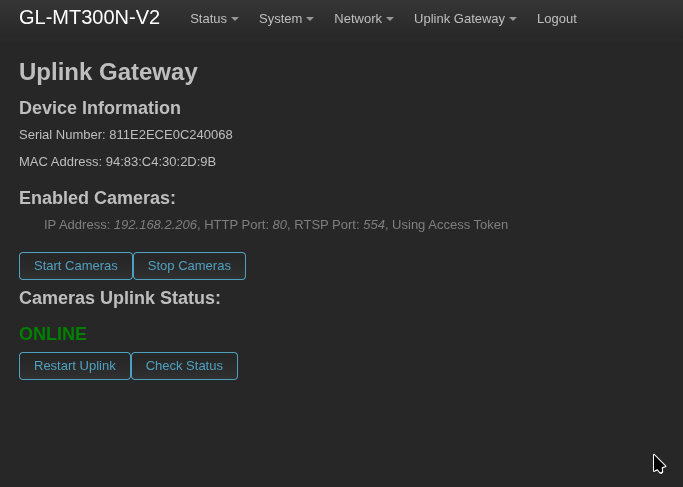
Check that the camera was added.
a. Quick check in the Gateway’s UI to see if new data was added.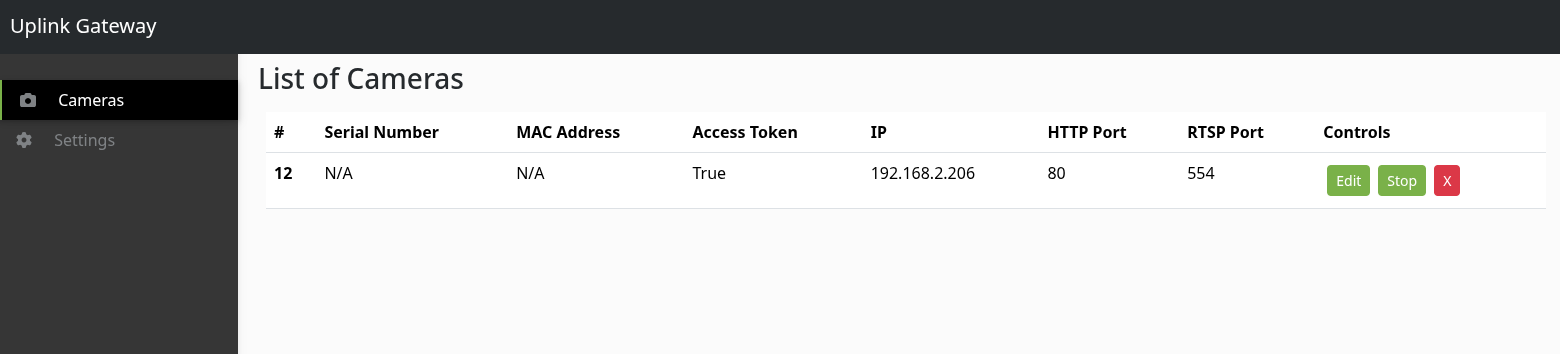
b. Use API call
GET /api/v3/channels/{channel-id}/and check camera info and test the stream of the associated channel id.
Deleting a Camera on a Gateway
-
Fetch the Gateway ID and the Channel ID on the VMS for the camera that is to be deleted.
-
Make the API call
DELETE /api/v3/gateways/{gateway-id}/channels/{channel-id}/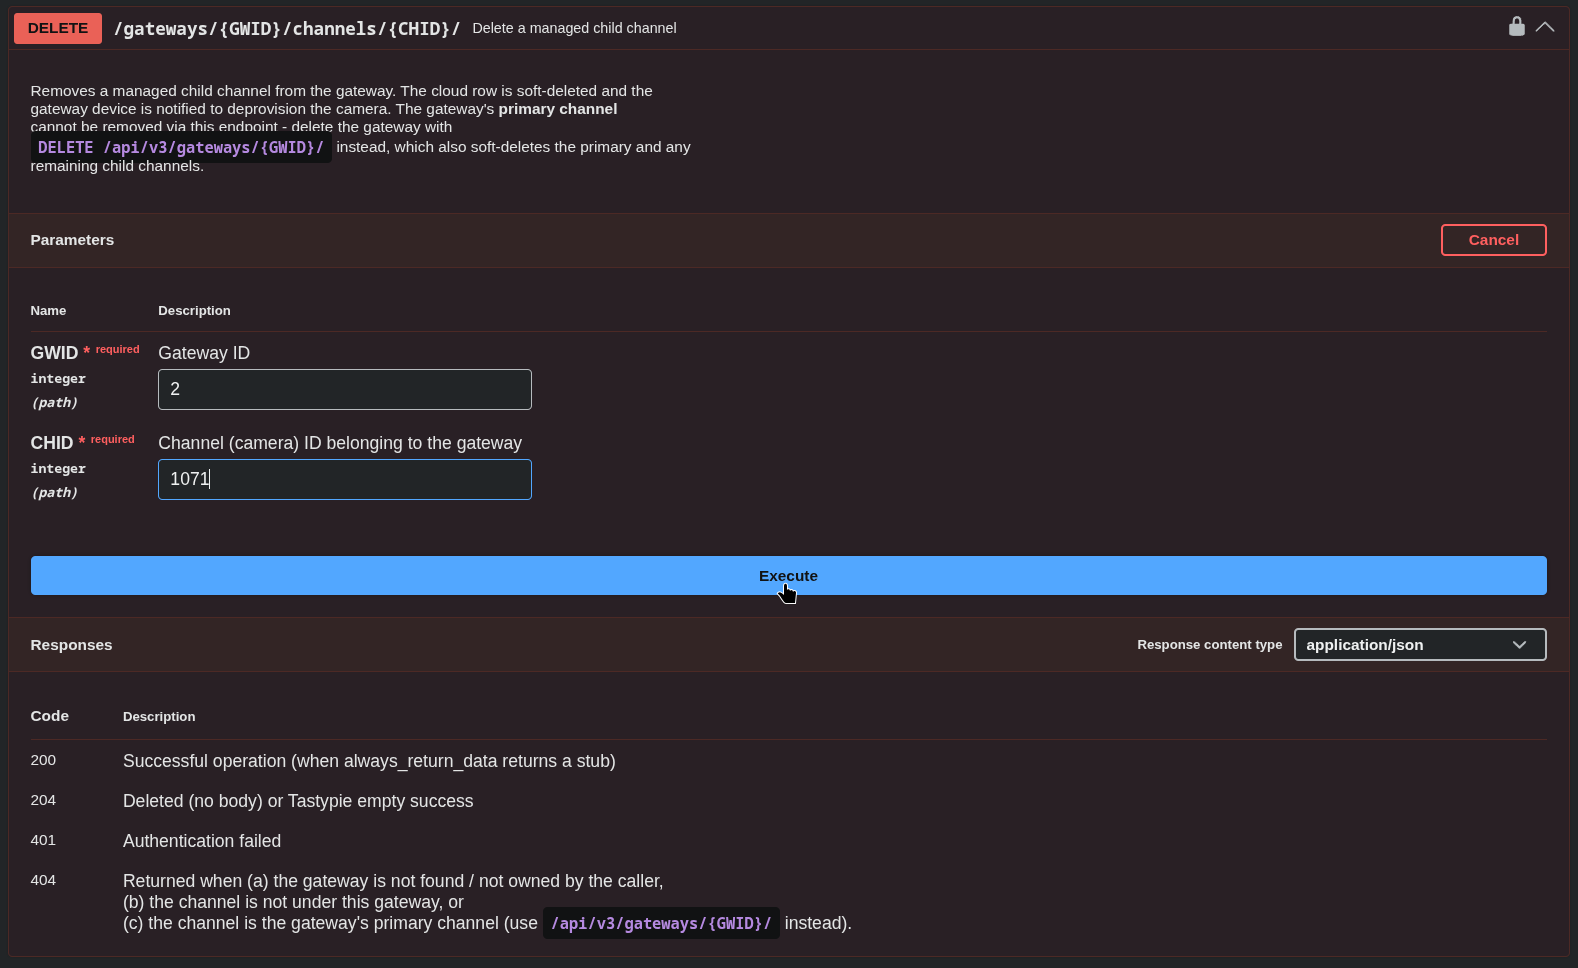
-
Confirm in the Gateway’s UI that the camera was removed.
Deleting a Gateway
-
Fetch the Gateway ID on the VMS for the device that is to be deleted.
-
Make the API call
DELETE /api/v3/gateways/{gateway-id}/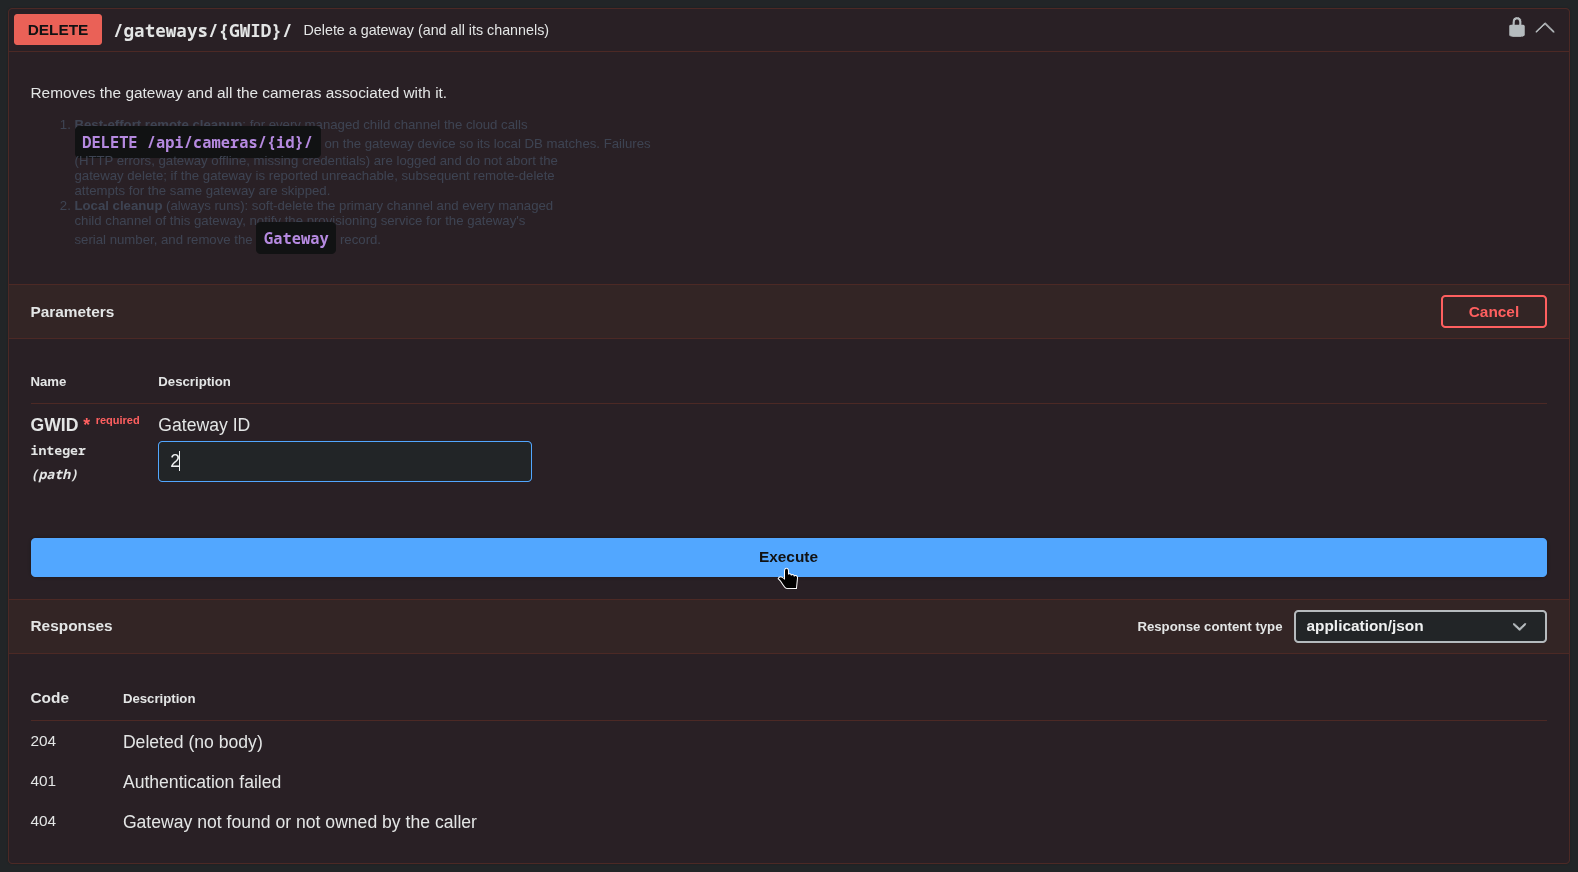
-
The gateway should be removed from the VMS and all cameras should be removed from the gateway.