Camera pre-setup
Check for camera firmware updates and upgrade to the latest version.
-
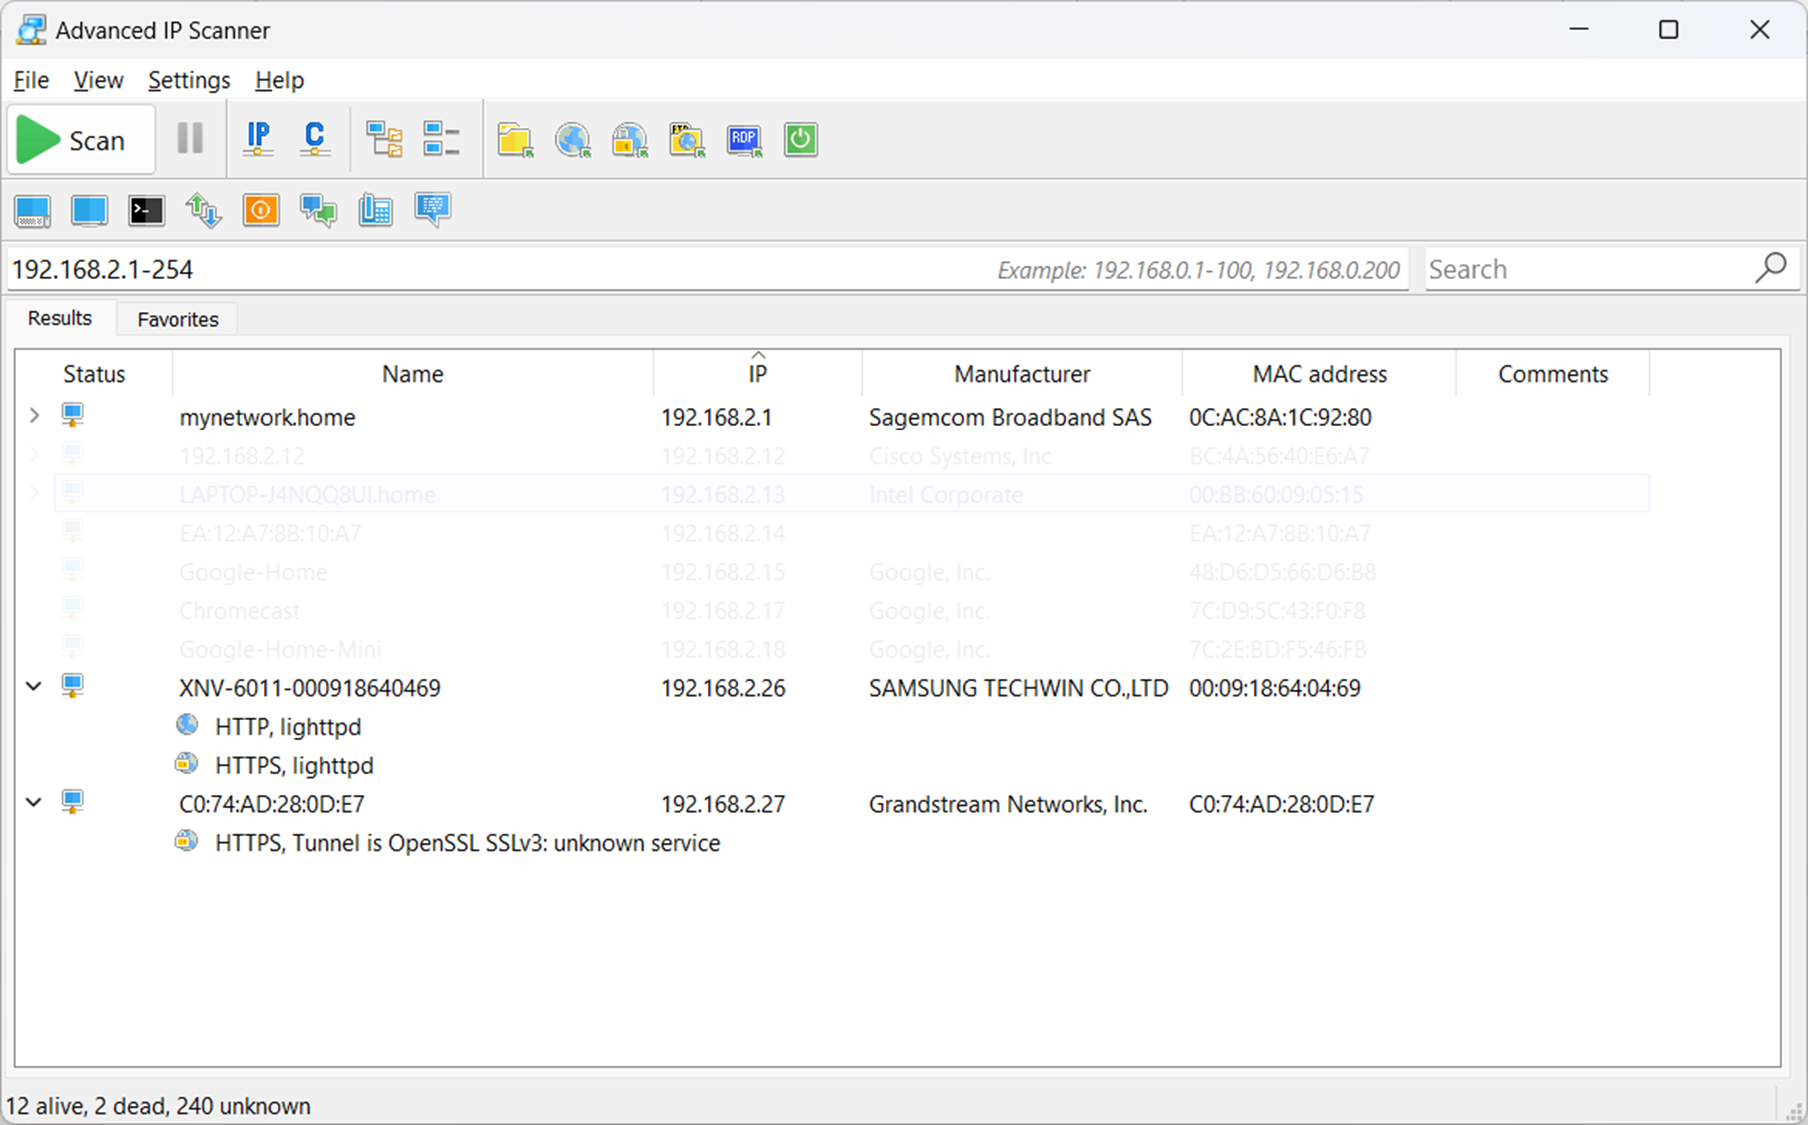
Find your camera’s local IP address. You can use your router’s Web UI or a network scanner to find the camera’s IP address. For example https://www.advanced-ip-scanner.com/ is a free tool that will scan your network and show all connected devices:
-
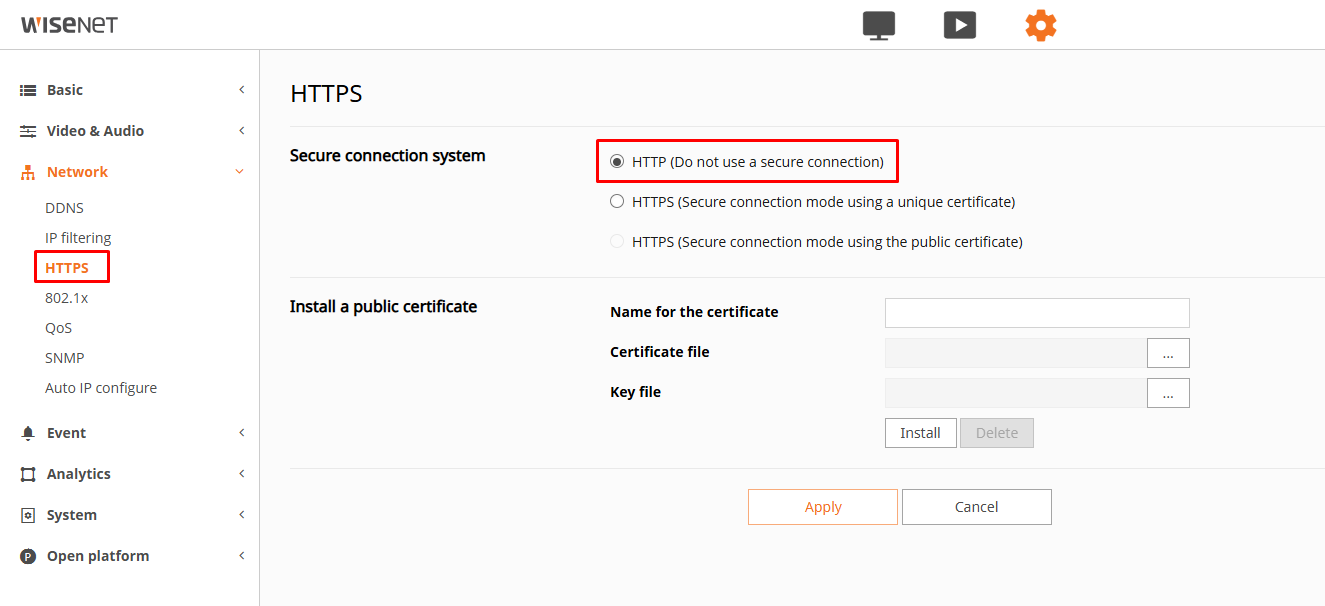
Log in to the camera Web UI and go to Setup → Network → HTTPS, select HTTP and click Apply. Please note that this is for local connection only; connection with the VMS will go through a secure Uplink channel.
-
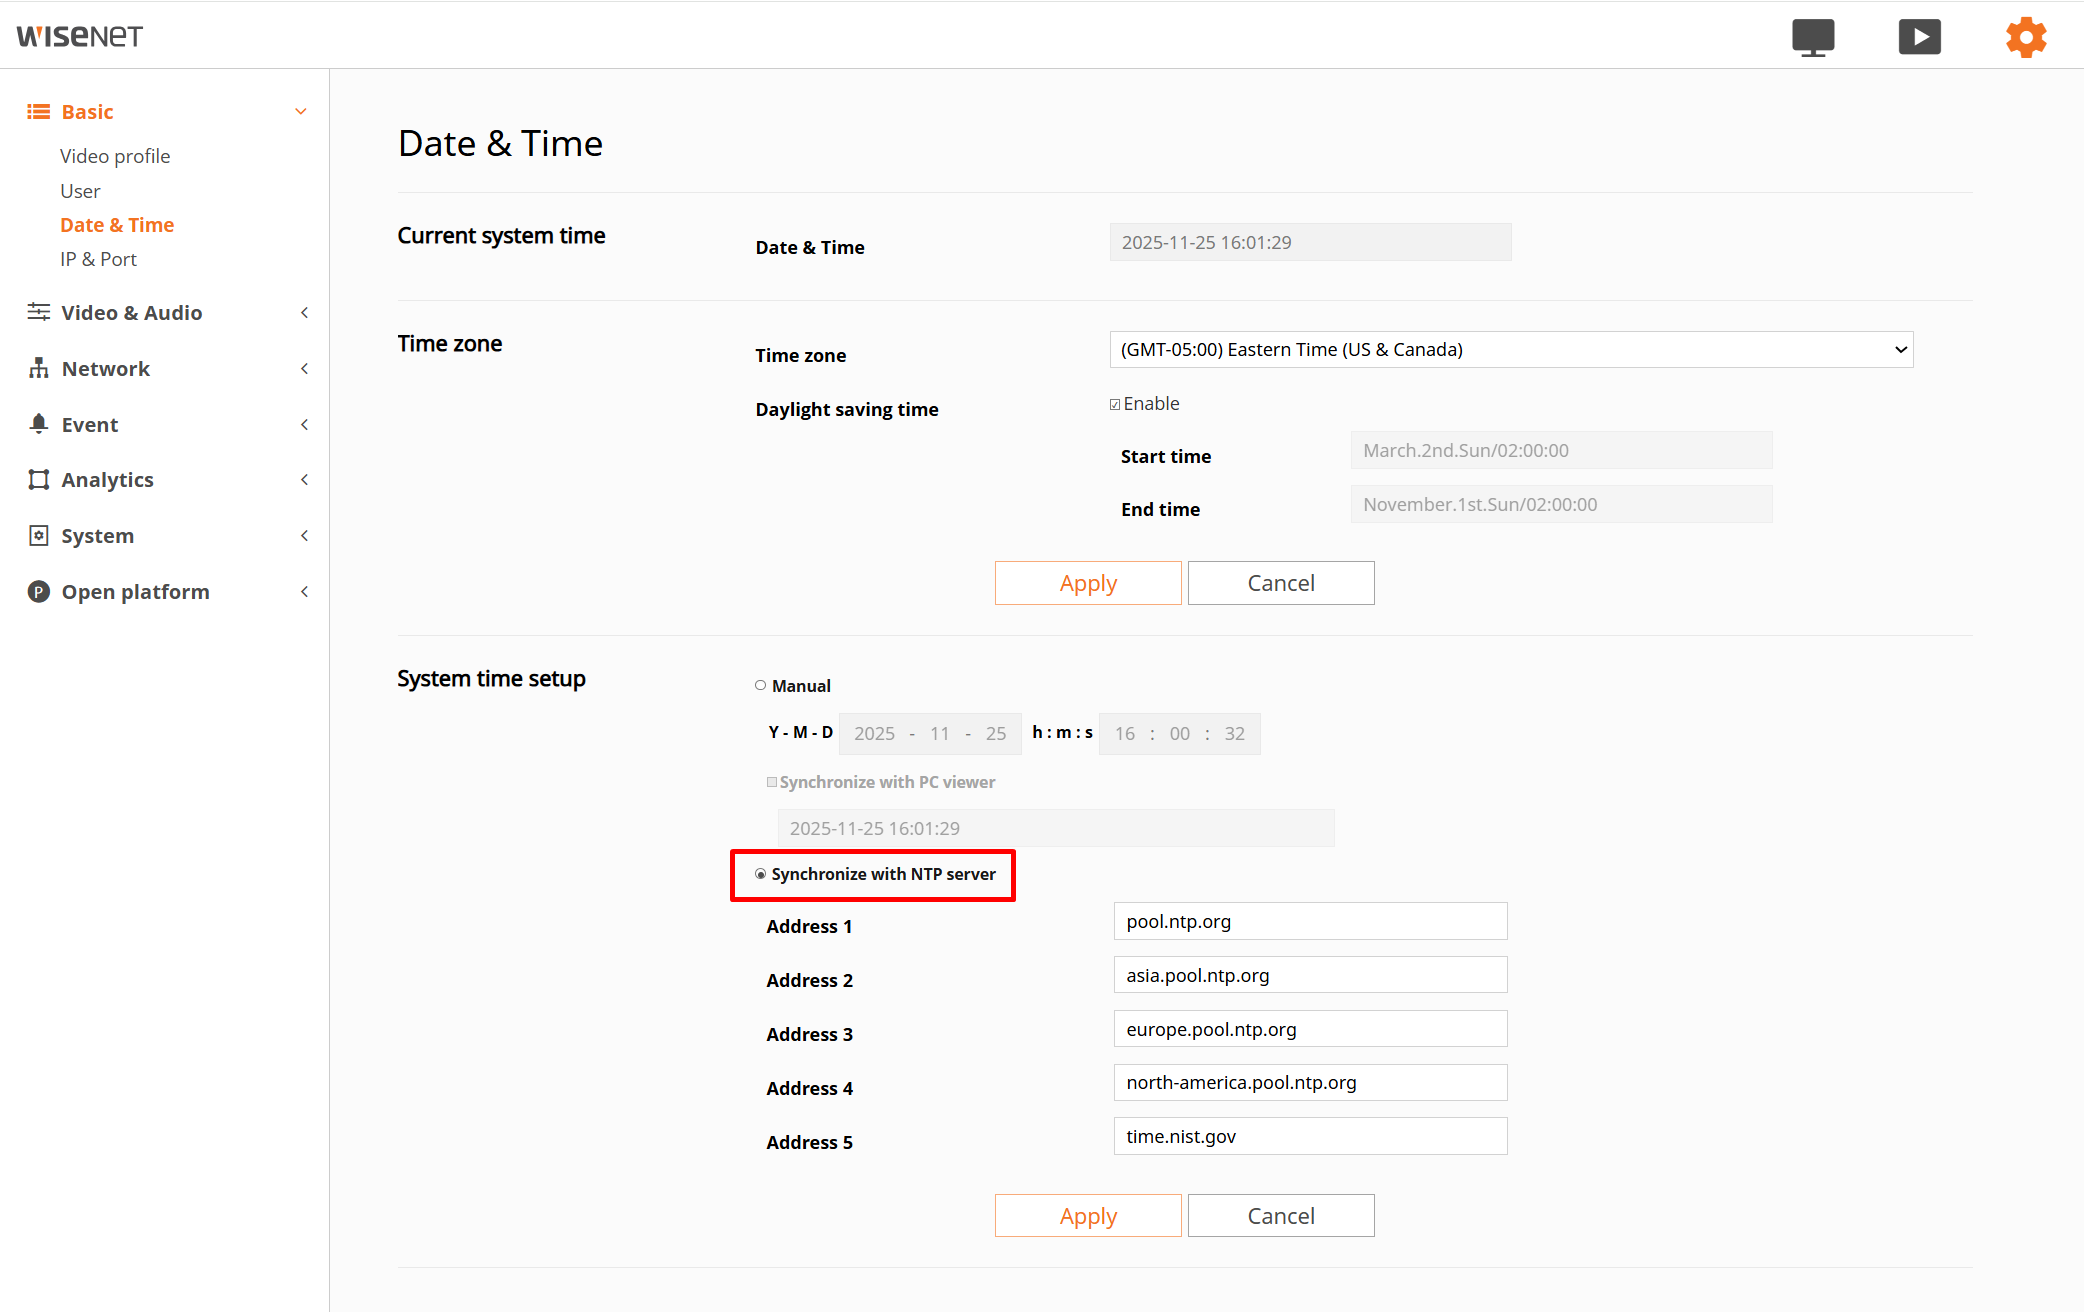
Navigate to Setup → Basic → Date & Time → System time setup and select Synchronize with NTP server.
Uplink app installation
-
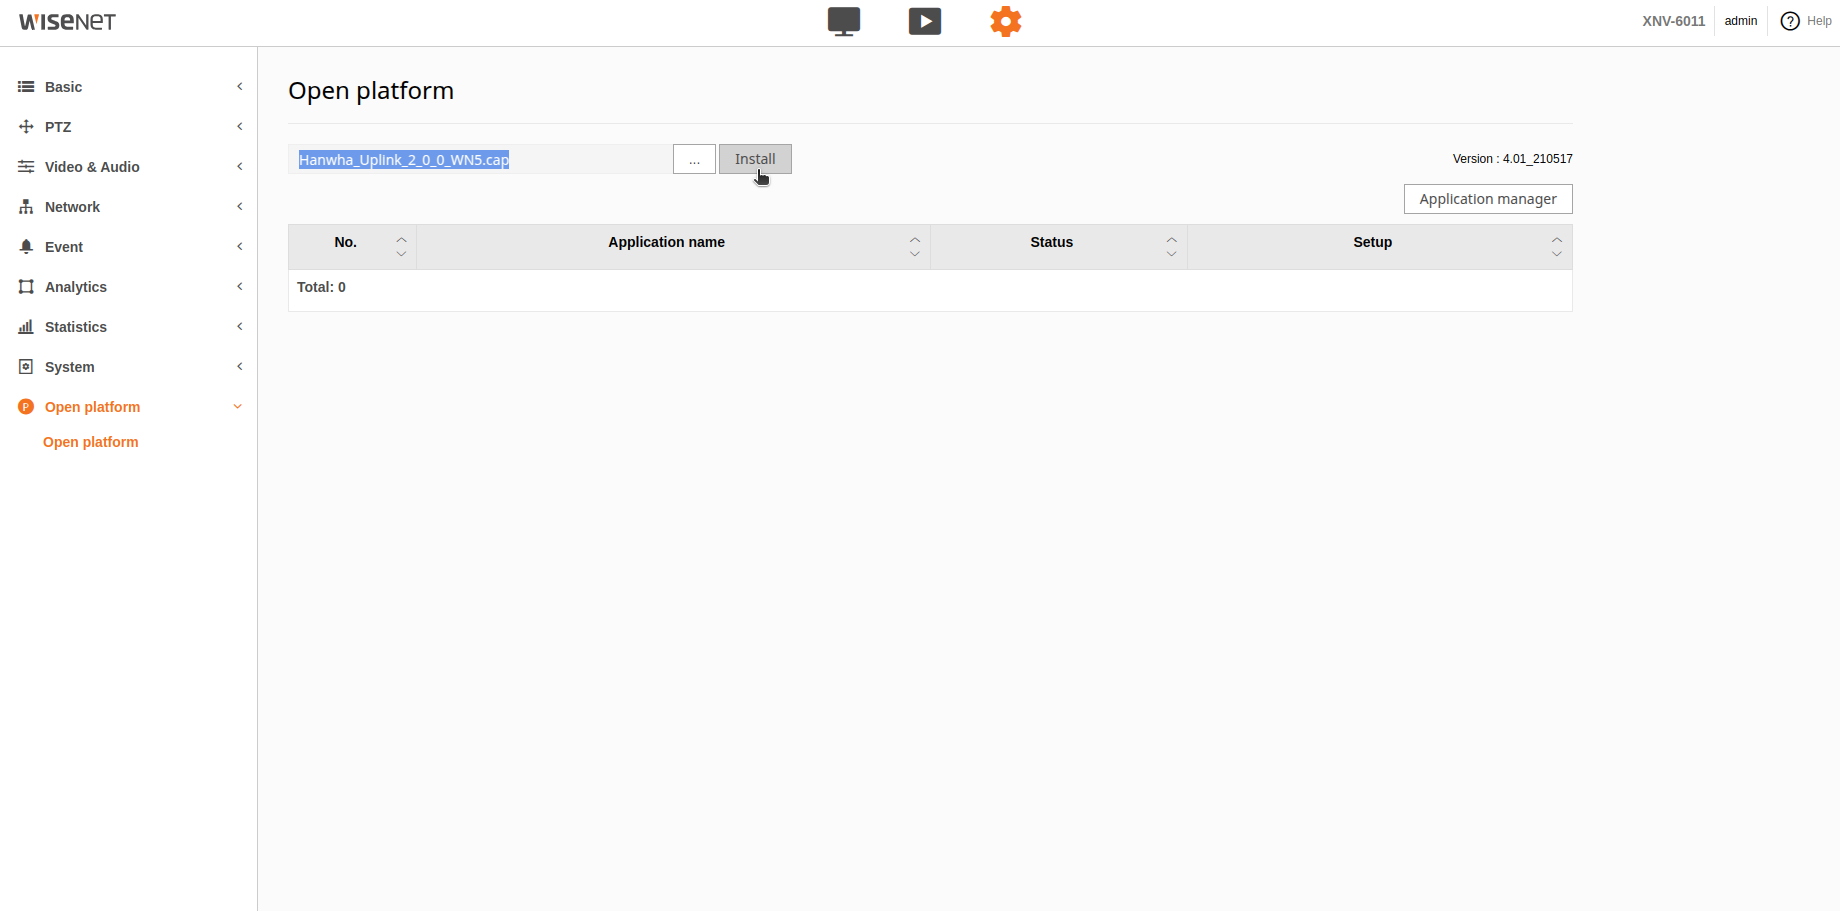
Go to Settings → Open Platform, upload a plug-in package (The .cap file located in the compressed archive) for the corresponding camera platform and click “Install” (see the list of models and platforms below). The latest app version can be downloaded here - https://downloads.cloud-vms.com/
-
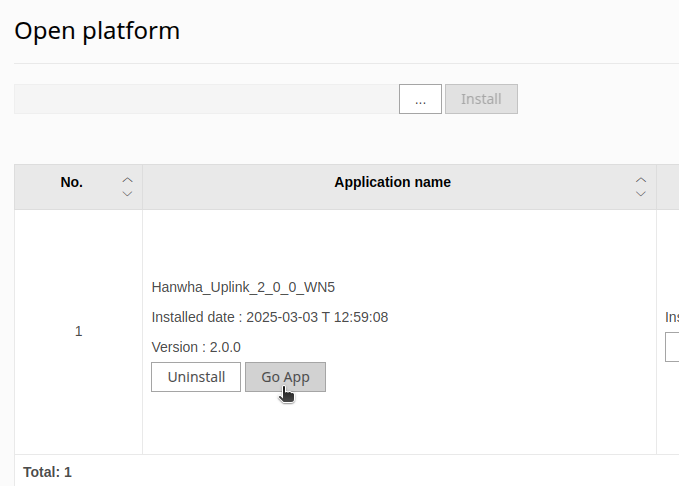
Click on “Go App” to access the application’s web page.
-
Review the device information in the left panel and ensure the values match the camera, and click Start Application in the top left corner. The information in the main section of the page should update after starting the application.
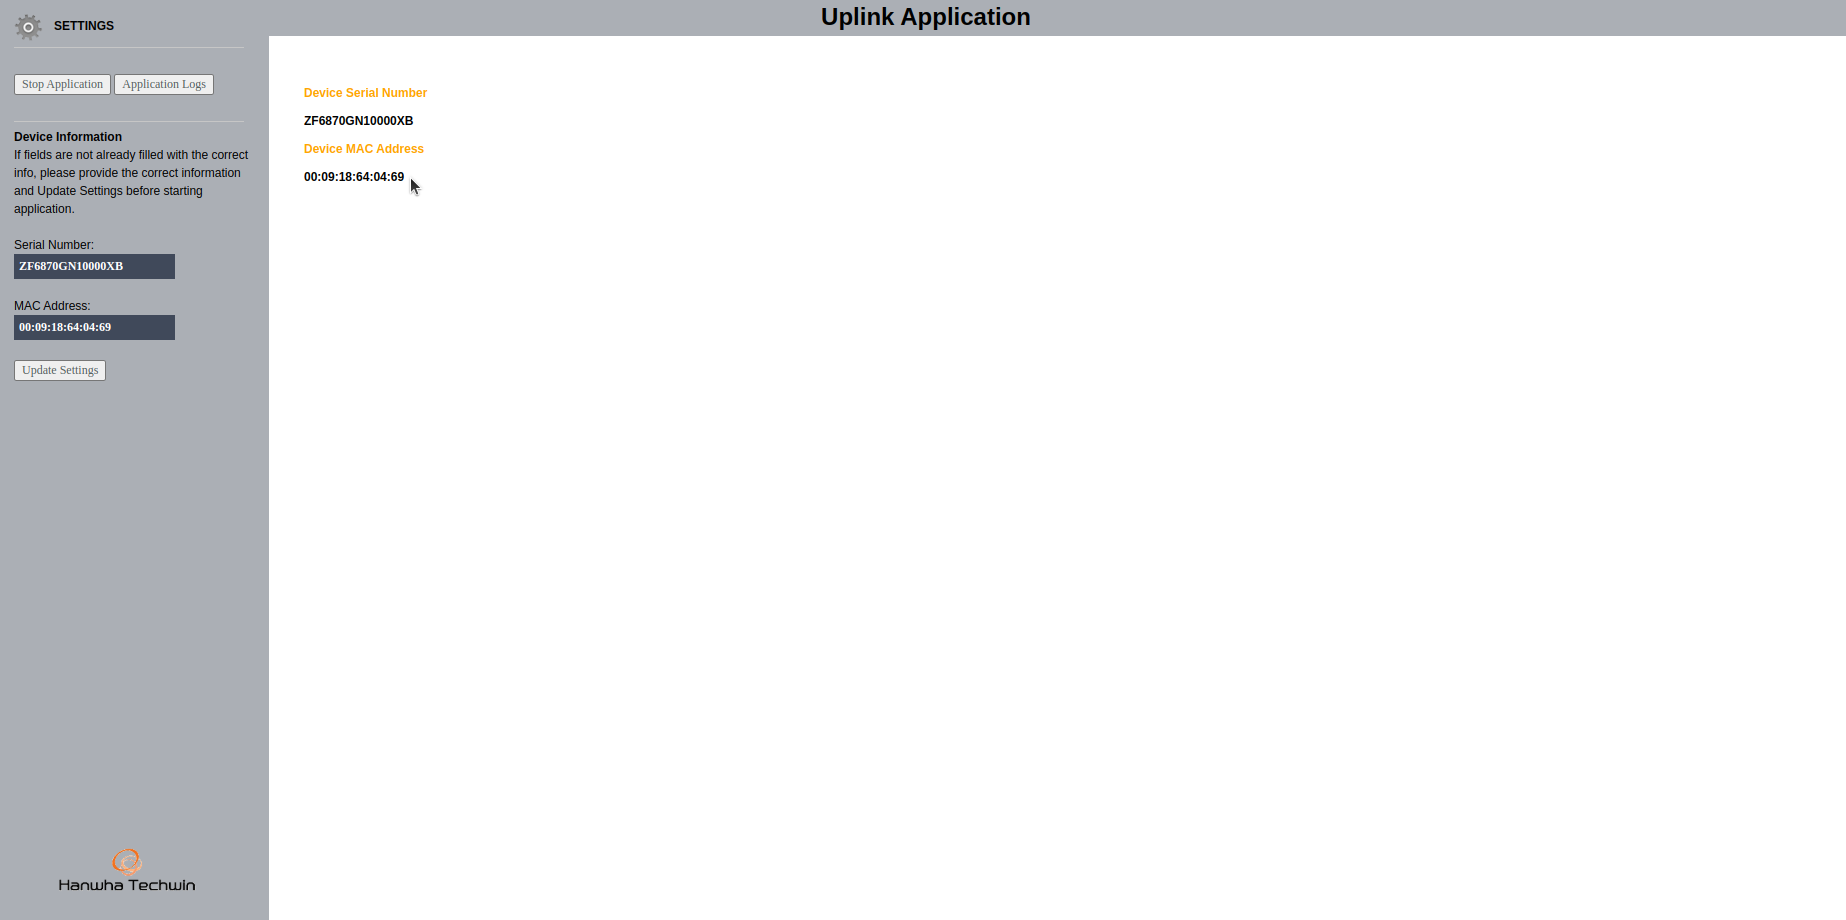
Take note of the Serial Number and MAC Address values as they are required to add your camera to the VMS.
-
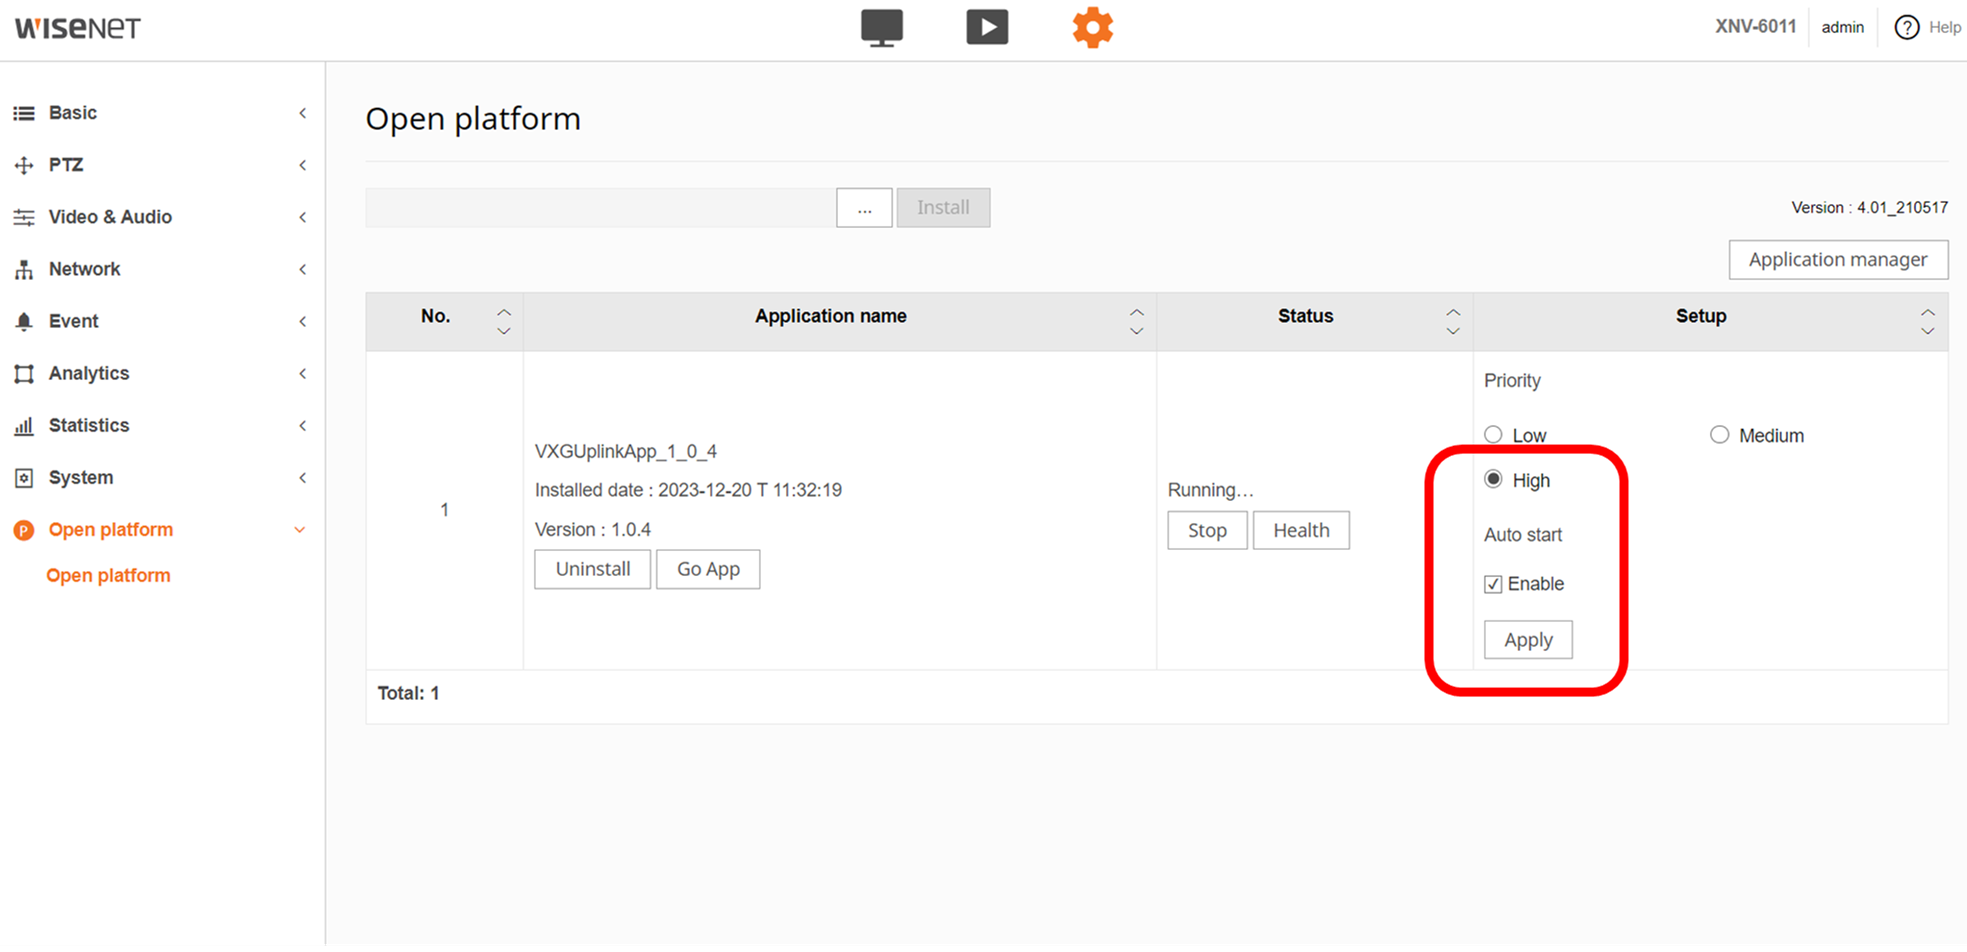
Go back to the Open Platform page, change the priority to High and enable Auto start, then click Apply.
Adding camera to VMS
You’ll need the following 4 pieces of information:
-
Camera serial number
-
Camera MAC address
-
Camera username
-
Camera password
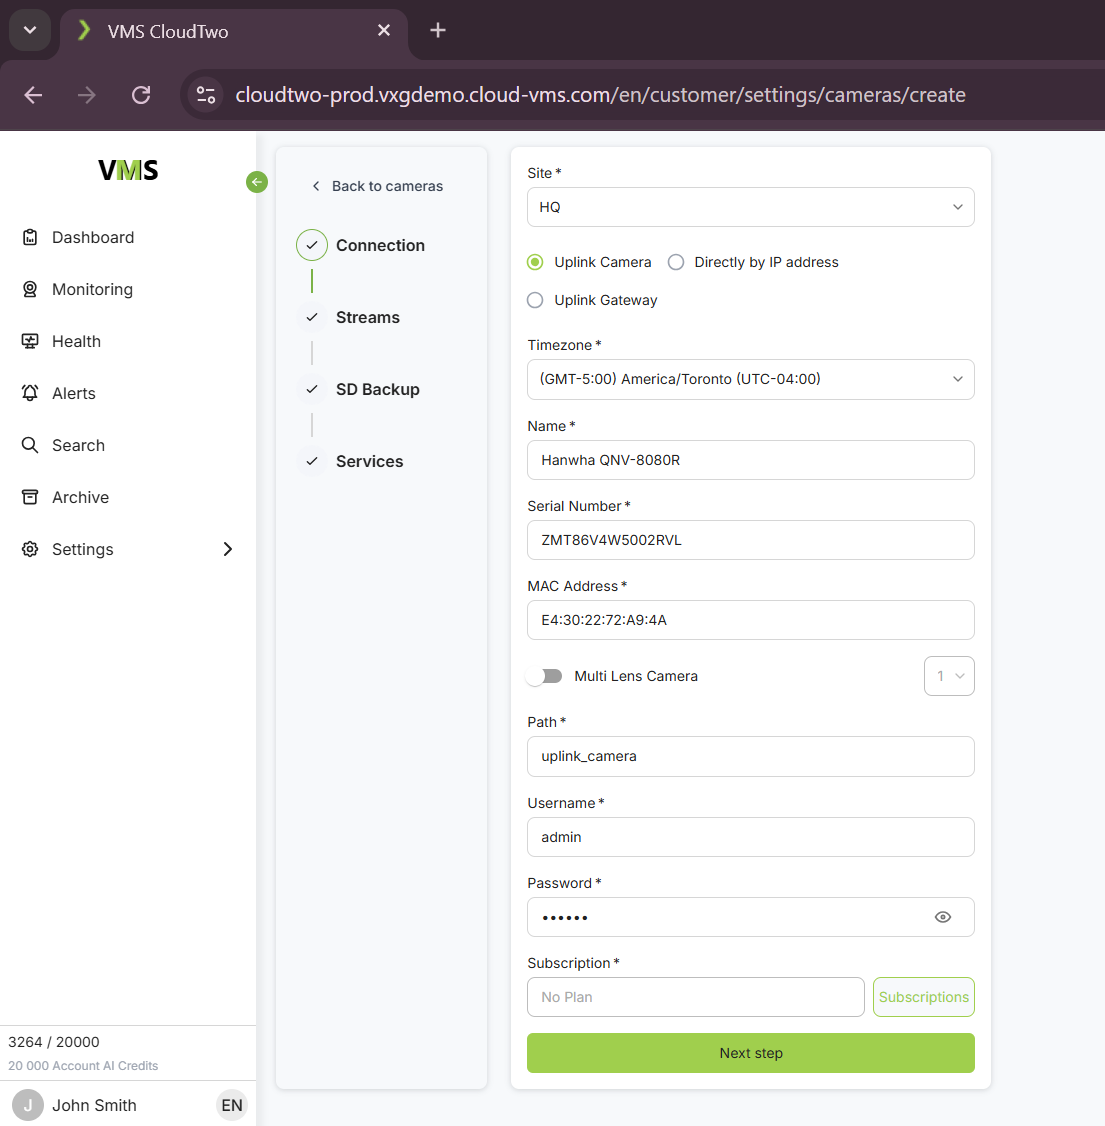
If you haven’t saved the Serial and MAC on the previous steps, they can be found on the Application Settings page (Open platform → Go App) and the Device Info page <http://<IP Address>/stw-cgi/system.cgi?msubmenu=deviceinfo&action=view
Please note that all letters in the Serial and MAC address must be capitalized
Log in to the Cloud VMS interface and go to Settings → Cameras and click on Add Camera and fill all the fields:
Supported models
|
X AI / X Series Platform: WN7 Firmware version
|
Q AI Series Platform: MT8137 Firmware version
|
P Series AI Platform: CV2X Firmware version
|
T Series AI Platform: MT8137 Firmware version
|
|
|
|||
|
|
|||
|
|
|||
|
|
|||
|
|
|||
|
|
|||
|
|
|||
|
|
|||
|
|
|
||
|
|
|
||
|
|
|
||
|
|
|
||
|
|
|
||
|
|
|
||
|
|
|
||
|
|
|
||
|
|
|
|
|
|
|
|
|
|
|
|
|
|
|
|
|
|
|
|
|
|
|
|
|
|
|
|
|
|
|
|
|
|
|
|
|
|
|
|
|
|
|
|
|
|
|
|
|
|
|
|
|
|
|
|
|
|
|
|
|
|
|
|
|
|
|
|
|
|
|
|
|
|
|
|
|
|
|
|
|
|
|
|
|
|
|
|
|
|
|
|
|
|
|
|
|
|
|
|
|
|
|
|
|
|
|
|
|
|
|
|
|
|
|
|
|
|
|
|
|
|
|
|
|
|
|
|
|
|
|
|
|
|
|
|
|
|
|
|
|
|
|
|
|
|
|
|
|
|
|
|
|
|
|
|
|
|
|
|
|
|
|
|
|
|
|
|
|
|
|
|
|
|
|
|
|
|
|
|
|
|
|
|
|
|
|
|
|
|
|
|
|
|
|
|
|
|
|
|
|
|
|
|
Troubleshooting
If you have issues with installing or running the application on the camera, please check the table below:
|
Errors |
Possible causes and resolutions |
|
|---|---|---|
|
1 |
APP UPLOAD FAIL |
the package file name is wrong, it should not be changed after downloading |
|
2 |
INVALID APPLICATION PACKAGE |
the package file is for the wrong Hanwha platform, try with a file for a different platform (WN7, CV2X, etc.) |
|
3 |
“You have exceeded the maximum number of login attempts” |
The username and password are wrong. Try to connect in a minute and change them on the “Go App” page |
|
4 |
The application is not running |
Some camera firmware versions have issues with running applications and display a “Not running” status when the app is started. For example, QNO-6082R1 is not running apps with firmware versions 1.41.05 and 1.41.16. The firmware should be downgraded to 1.41.01 |
If the app is running, but the camera is not coming online, please check the following:
-
Make sure that you have completed the camera pre-setup steps: HTTP connection and Date & Time.
-
Make sure you have capitalized all letters in the Serial number and MAC address
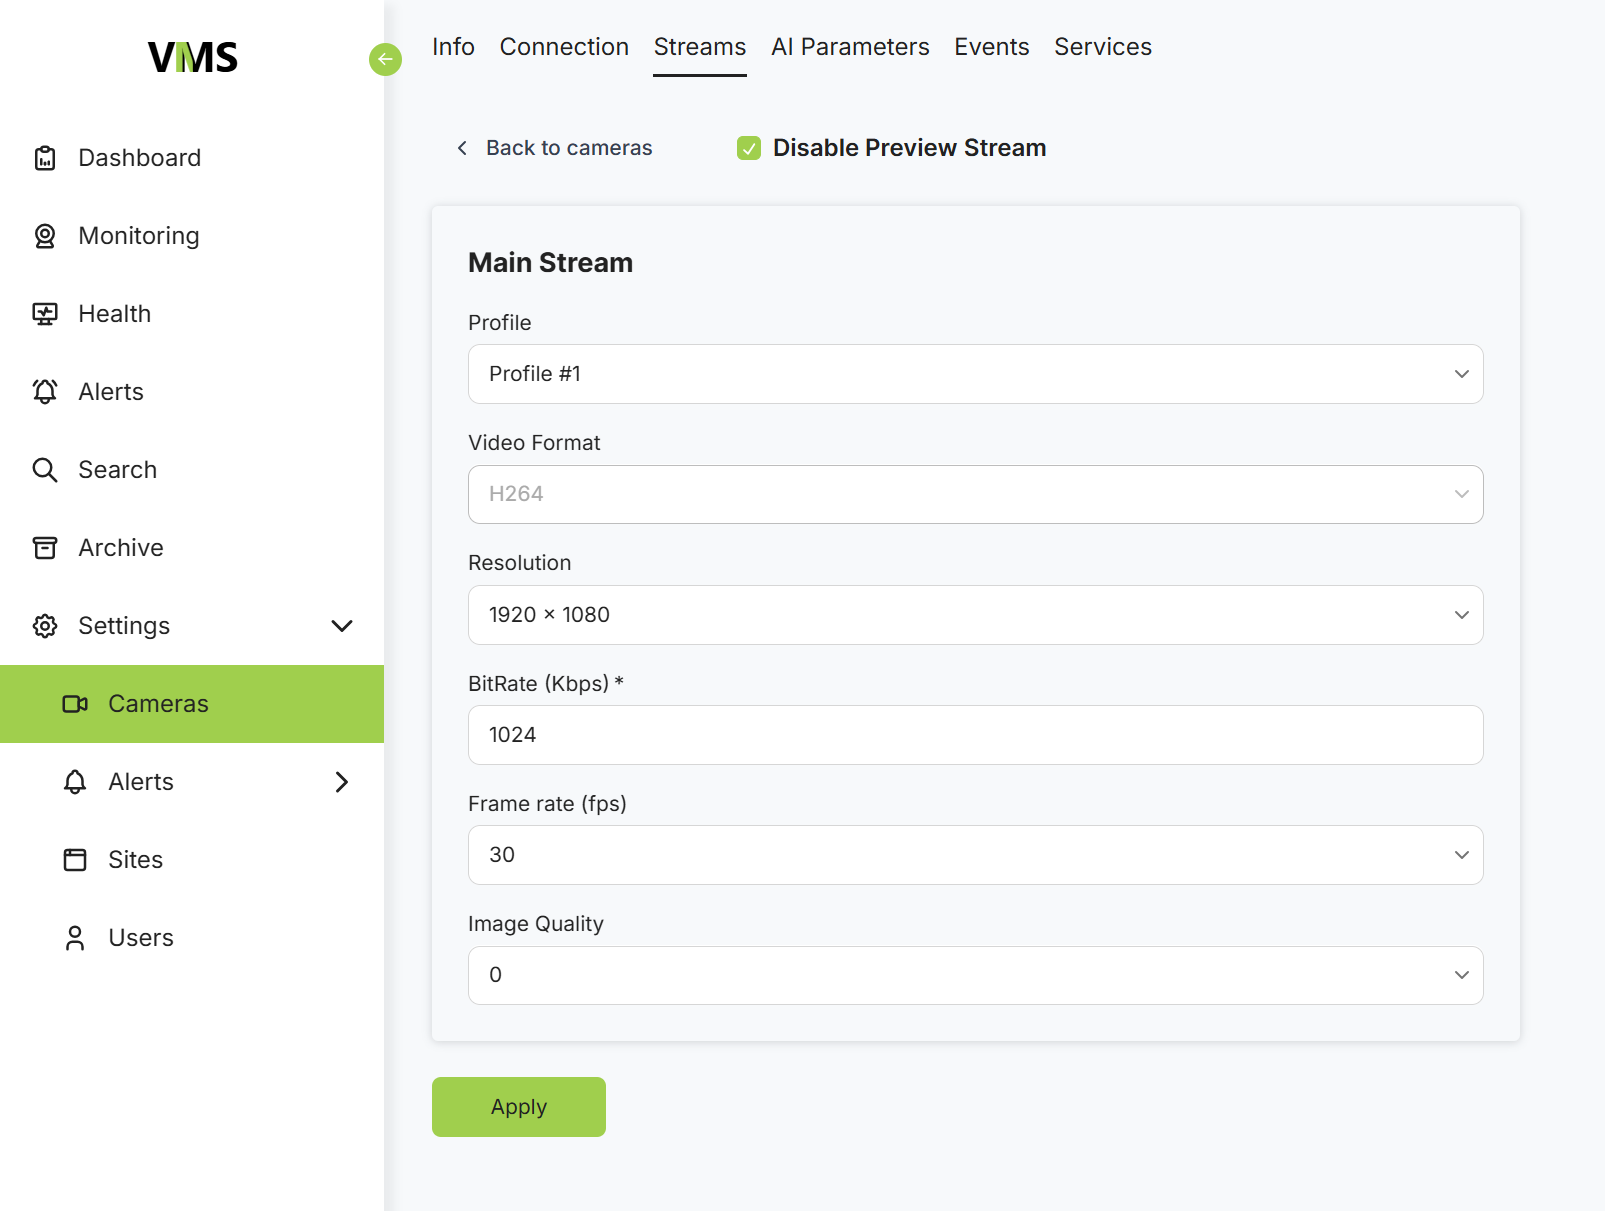
If the camera became online, but you don’t see live video, it may be caused by incorrect configuration or selection of the streaming profile. Hanwha cameras have MJPEG as the first profile by default and depending on the camera’s initial configuration, it can be picked up for live streaming or recording on the cloud. In the Cloud VMS interface, go to Settings → Cameras → 3-dot button → Streams and try changing the profile (to the one with H.264 or H.265 encoding). Also please check that the bitrate is not too high. The exact streaming settings depend on your camera and use case, but the recommended neutral settings are: 1920x1080 resolution, 1024 Kbps bitrate, and 30 fps
Uplink App Logs
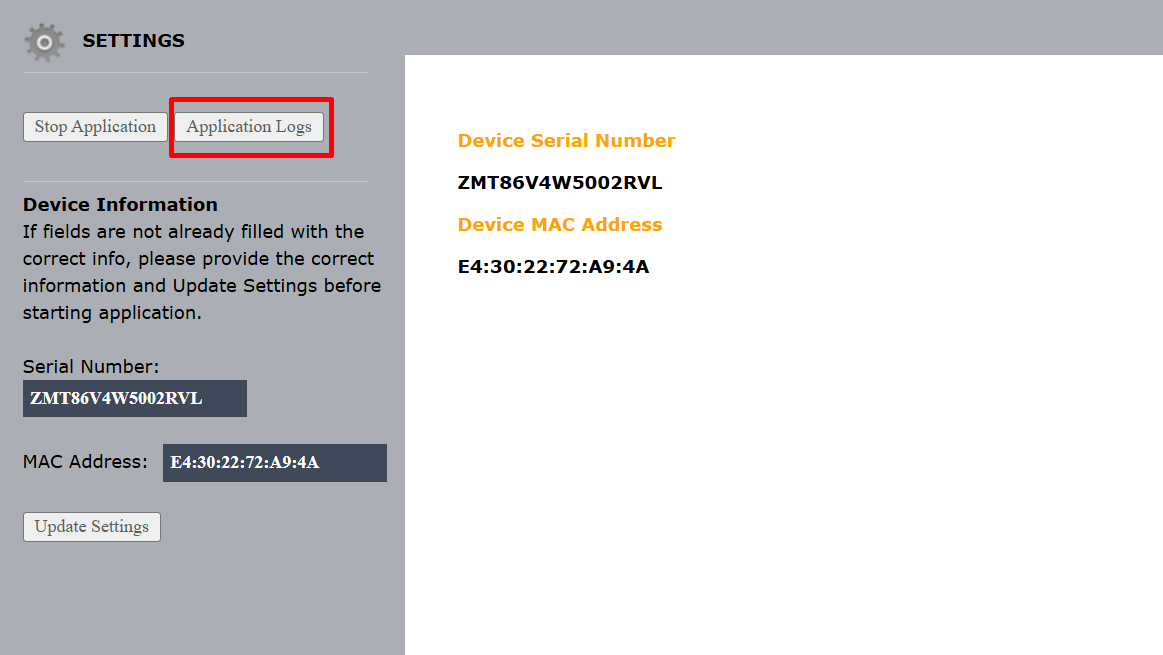
If you are still experiencing issues, please download the camera logs (Open platform → Go App → Application logs) and send them to technical support.